
Painting With Oils - Part Four
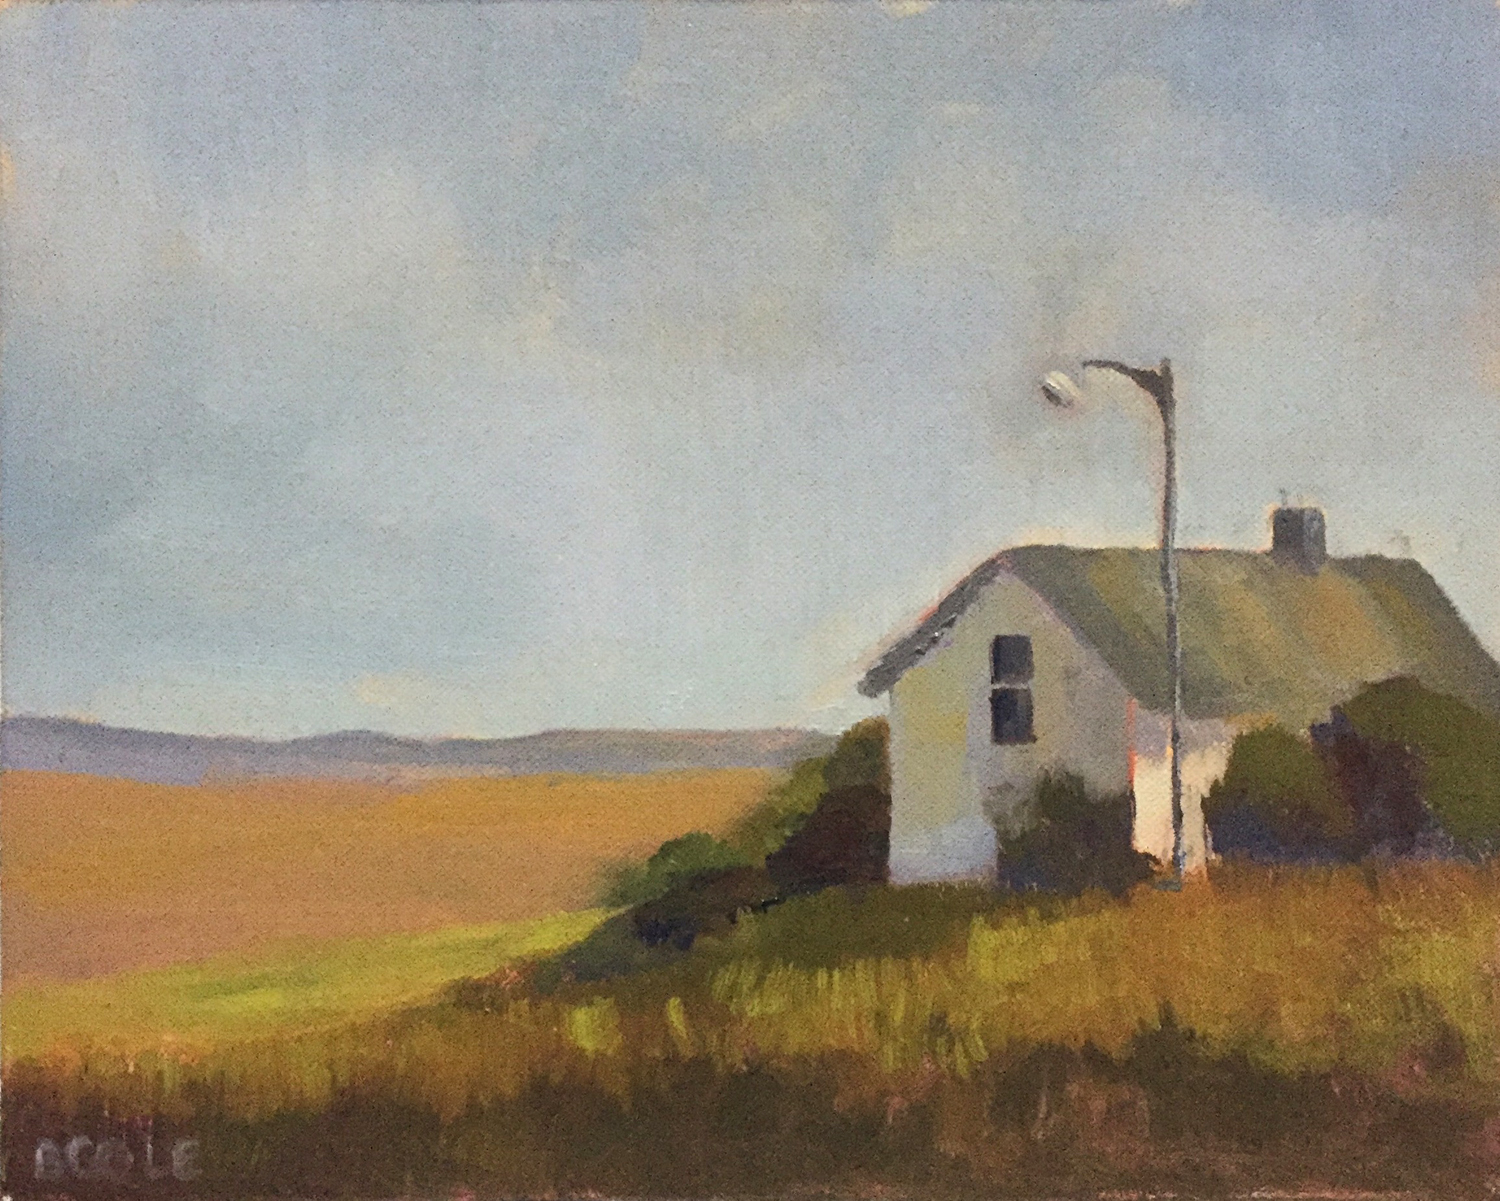
Yardlight | © Beth Cole | 8 x 10 | Oil on Canvas Panel
This is the fourth in a series about painting with oils, sharing what I have learned so far. You can read the first, second, and third posts here.
Applying Paint
In this post I want to write about the best part of painting – applying the paint! I usually don’t start with a white canvas, instead, I mix a background color (usually in the pinkish family) and dip my brush in mineral spirits to get it nice and thin. Then I brush this all over the canvas. Sometimes I mix a warm and cooler color and apply one for land and one for sky, it just depends. Drips happen sometimes, and I really like that, but I usually take a tissue and wipe everything fairly dry so my actual paint doesn’t mix with the mineral spirity paint.
Next, I mix a darker version of the background wash and sketch in the outline of the composition. Sometimes, I fill in the sketch a little as pictured below.

Thin wash and sketch
After I’m satisfied with the sketch, I wipe the puddle of paint off so the palette is clean for mixing paint.
Mixing and Graying Down Your Paint
Now to mix paint. I look at my reference photo and start mixing the colors I see and want to use.
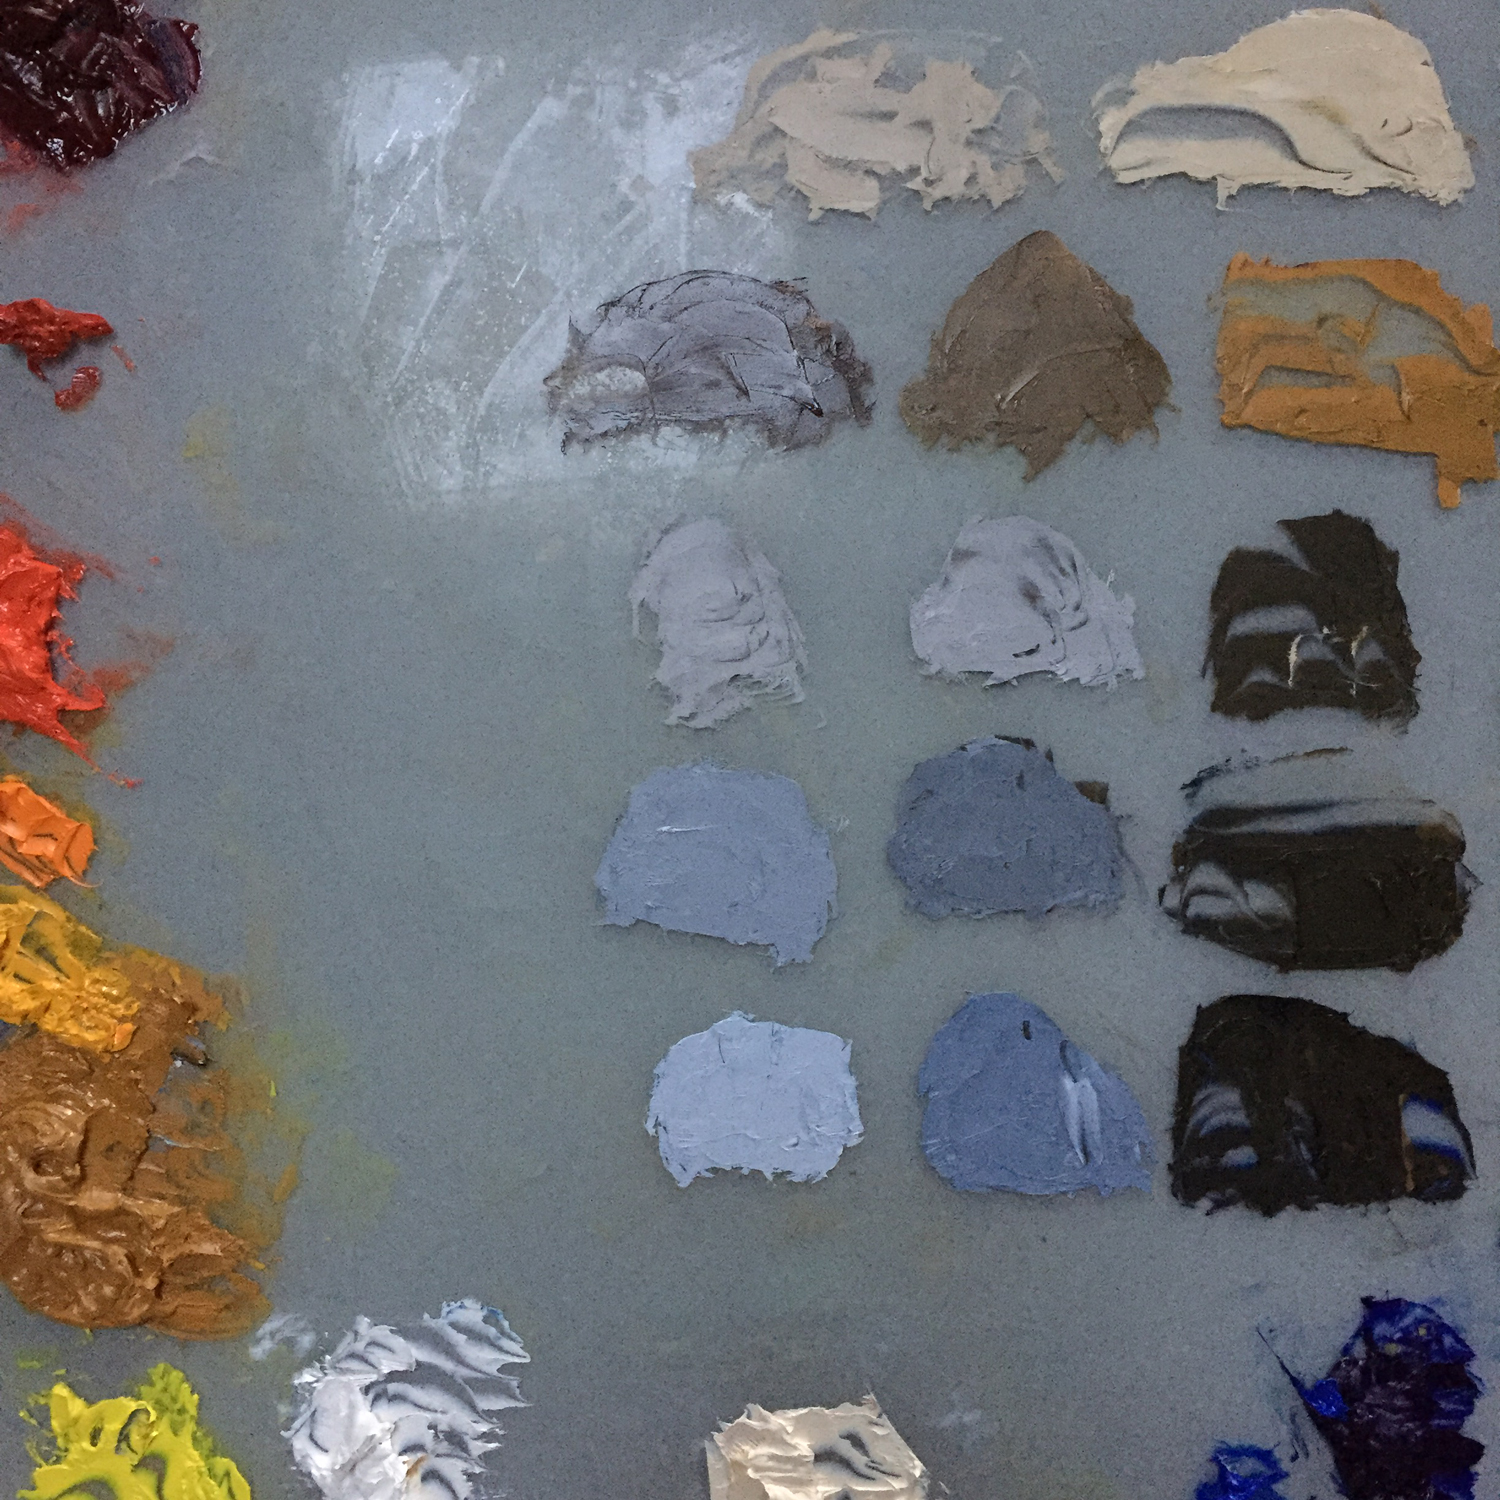
Mixed paint
Most mixtures are too “hot” right out of the tube, so I will usually gray down the color so it appears more natural and realistic. There are a couple of ways to do this.
- You can mix a complement into your color. For example if you are mixing a green and it looks too green, you can mix a little red into it, or if you are mixing a yellow and it’s too bright, mix a little purple in with it. I always keep a color wheel within sight to help me with this. I like the Quiller Color Wheel because it names the paint colors.
--OR--
- The other way I have been graying down colors is a method I learned from Don Finkeldei in his DVD, Painting Large From a Field Study (excellent), and that is to mix three values of a neutral gray that can be added to any paint mixture on your palette. To make the neutral gray, mix ultramarine blue and orange for your dark, then add white to make a middle value gray and a light gray. I have to say, I have been really liking this method and have been using it with most of my recent paintings.
Now, it’s time to paint. The first layers should go on smoothly and easily by dipping the edge of your brush in walnut oil or the medium of your choice and then dipping into the pile of paint. The paint should be thin enough to spread very easily and a little bit will go a long way. Before I learned this, I applied way too much paint because I didn’t understand how to make the paint thin in the first layers. It makes such a difference to use thin paint!
Sometimes I start with the sky and work my way down, remembering that all the values are relative. I usually want the biggest contrast to be at the horizon line, so when I get there with my lightest sky color, I can place my dark next to it and see if it is working and make adjustments from there. Then, I just keep working my way through the painting keeping in mind the colors that are next to each other and testing the values as I go.
The other way I have started many pieces is by painting all the darks first, then working my way to the middle values, then the lightest. This is fine, too. Whatever works for you.
I usually let my first pass of the painting dry a little over night, then I come in the next day with a palette knife and thicker paint on my brush to add texture and more interest. I rarely finish a painting in one day, usually it takes two or three.
Next up, cleaning your brushes and storing paint. Thanks for following along and please let me know if you ever have questions. Happy painting to you!
--Beth