
Featured Artist at Artsy Shark
Have you guys heard of Carolyn Edlund's art business service, Artsy Shark?
She offers many opportunities and services for artists, including a juried feature opportunity.
Featured Artist at ArtsyShark.com
Have you guys heard of Carolyn Edlund's art business service, Artsy Shark?
She offers many opportunities and services for artists, including a juried feature opportunity.
I was selected for inclusion and featured on the blog May 29, 2017. Here is a link to the story. I hope you enjoy it! If you visit her site, do check out all the opportunities she offers while you are there.
Thanks for looking, enjoy the day!
--Beth
Art After Fifty - Part Three
This is the third post in a series, Art After Fifty. You can read the first and second posts here.
Dealing With Frustrations
Shortly after I began painting, my niece gave me a book -- The Artist’s Way by Julia Cameron. This book encourages journaling in what are called “daily pages.” Being the rule follower that I am, I promptly bought some moleskin notebooks and set pen to page.

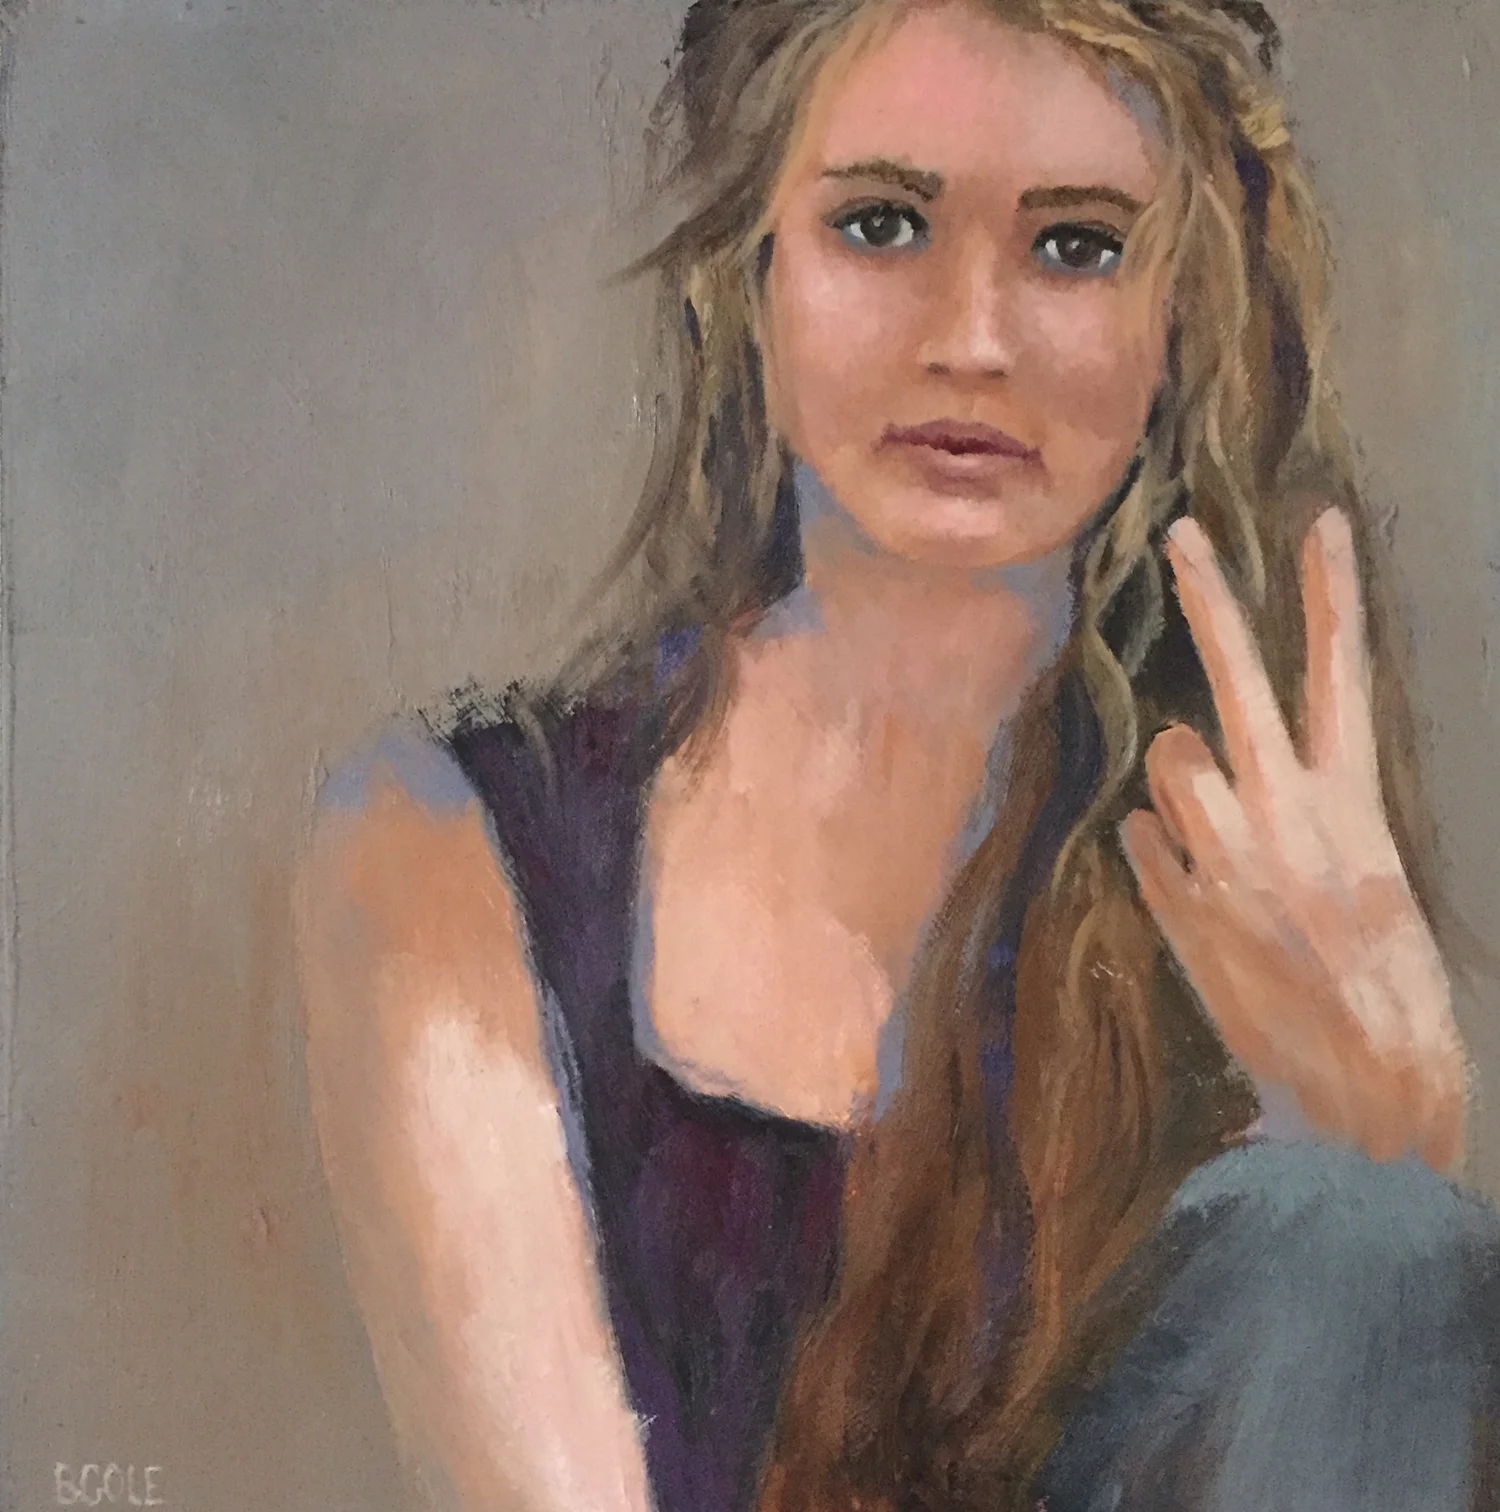
Martha | © Beth Cole | Oil on Wood | 12 x 12 | SOLD
This is the third post in a series, Art After Fifty. You can read the first and second posts here.
Dealing With Frustrations
Shortly after I began painting, my niece gave me a book -- The Artist’s Way by Julia Cameron. This book encourages journaling in what are called “daily pages.” Being the rule follower that I am, I promptly bought some moleskin notebooks and set pen to page.
I found my daily pages journals the other day and saw firsthand how much I was struggling. My biggest question was “what shall I paint?” ….. the question that never goes away. I still have this question and some of those struggles , but painting has gotten easier or maybe I’m just easier on myself. I don’t know for sure.
I remember my husband reading a quote to me in those early days. I can’t find it now, but it said something about making really bad art, and that you will need to make quite a bit of bad art before you are able to paint anything worth keeping. He told me that is true of me and, man, I had to get a stiff upper lip to receive that. The quote is true but it still hurt my feelings knowing that most of what I was creating was bad. And it was. But still.
So it’s frustrating, eh?
I don’t have all the answers, but here are some ways I have worked through frustrations.
- Keep picking up the paintbrush. I sound like a broken record, but nothing beats practice when it comes to improvement.
- Join an art group. My art club has been a great outlet and encouragement to me. There’s something about gathering with like minded persons to put wind in your sails.
- Take as many classes as time and budget will allow. Classes are so accessible these days, there is always something to learn from someone else. Find an area you want to improve and look specifically for a class on that topic. It can really help.
- Read. I like to look for book recommendations from artists I admire knowing there is an art lineage to be followed. I like to read older books by master artists because the principles are tried and true and apply, no matter how long ago the book was written, i.e. Carlson's Guide to Landscape Painting.
- Find a friend or mentor who can give an honest critique. This past year I have been working with a wonderful art mentor and it has been a really good decision. Not only does she keep me accountable, but she is a voice of reason helping me to problem-solve and get unstuck in my painting.
- Be that friend/mentor to someone else. Be willing to help others as they come to you, giving as you have received.
- Listen to artist interviews. I have a four hour drive each way to visit my littles so I have lots of time in the car. I have lately been listening to podcasts, one of my favorites is The Savvy Painter. Hearing the questions and stories helps me feel I’m not alone in my painting world. And you aren’t either!
- Pray. I can’t help but know my Creator has my good and His glory in mind when I step up to the canvas. Praying helps me let go of fears and unrealistic expectations and keeps everything in perspective.
For all I know, I’m still in the early years of painting, and still making bad art but I have to believe that it is connecting in some way because many people have taken it home to live with them. That waterfall of grace always gives me a lift.
So what about you? How do you cope with frustration? I’m all ears.
--Beth
Soli Deo Gloria
Show Announcement - Carnegie Arts Center
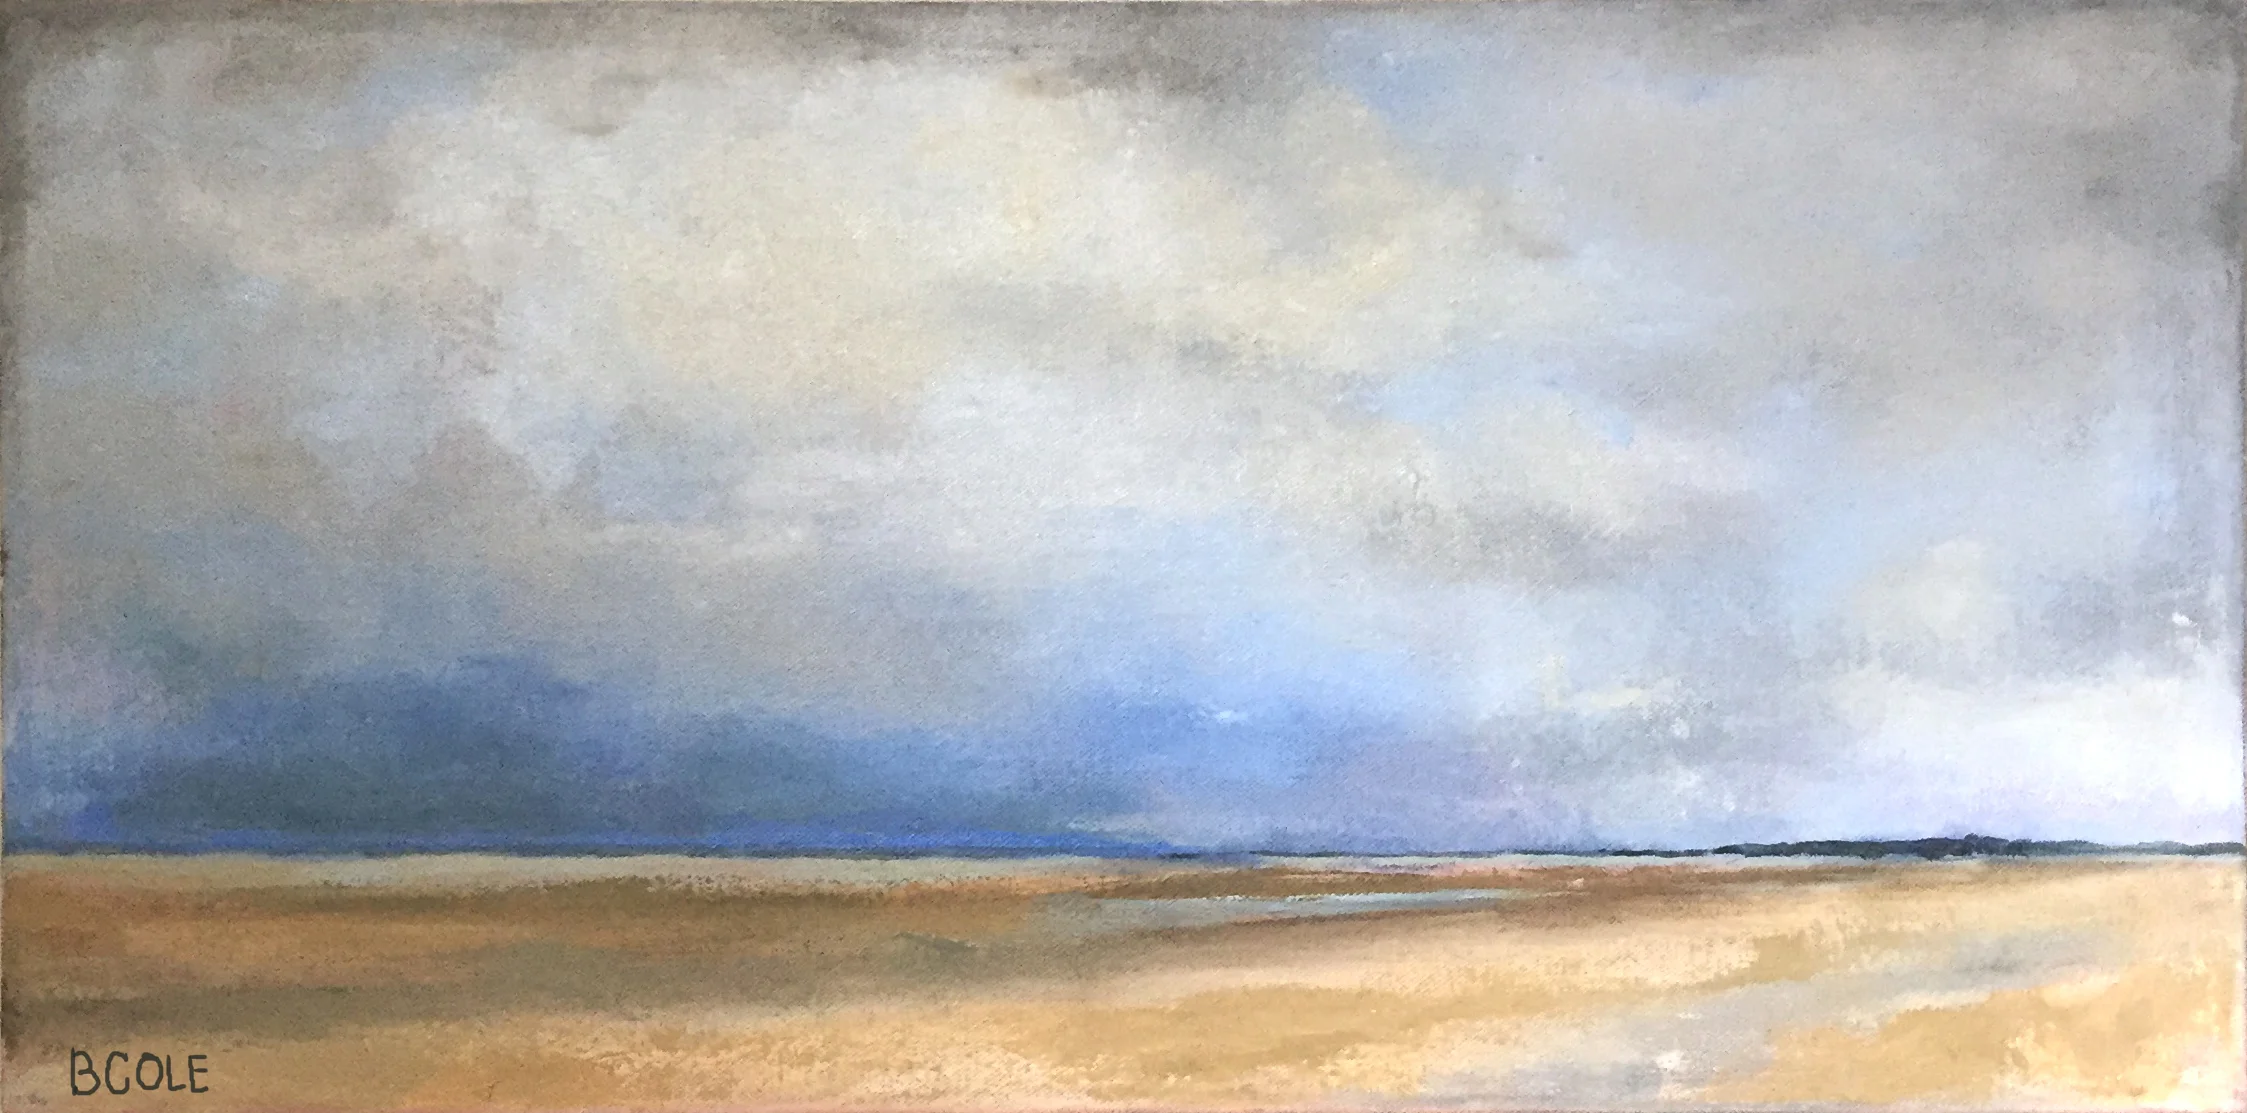
Gary and I invite you to our art and photography show opening next week (May 16th, 2017) at the Carnegie Arts Center in Alliance, Nebraska.
The reception will be June 24th from 1:30 - 3:30 and you're invited!

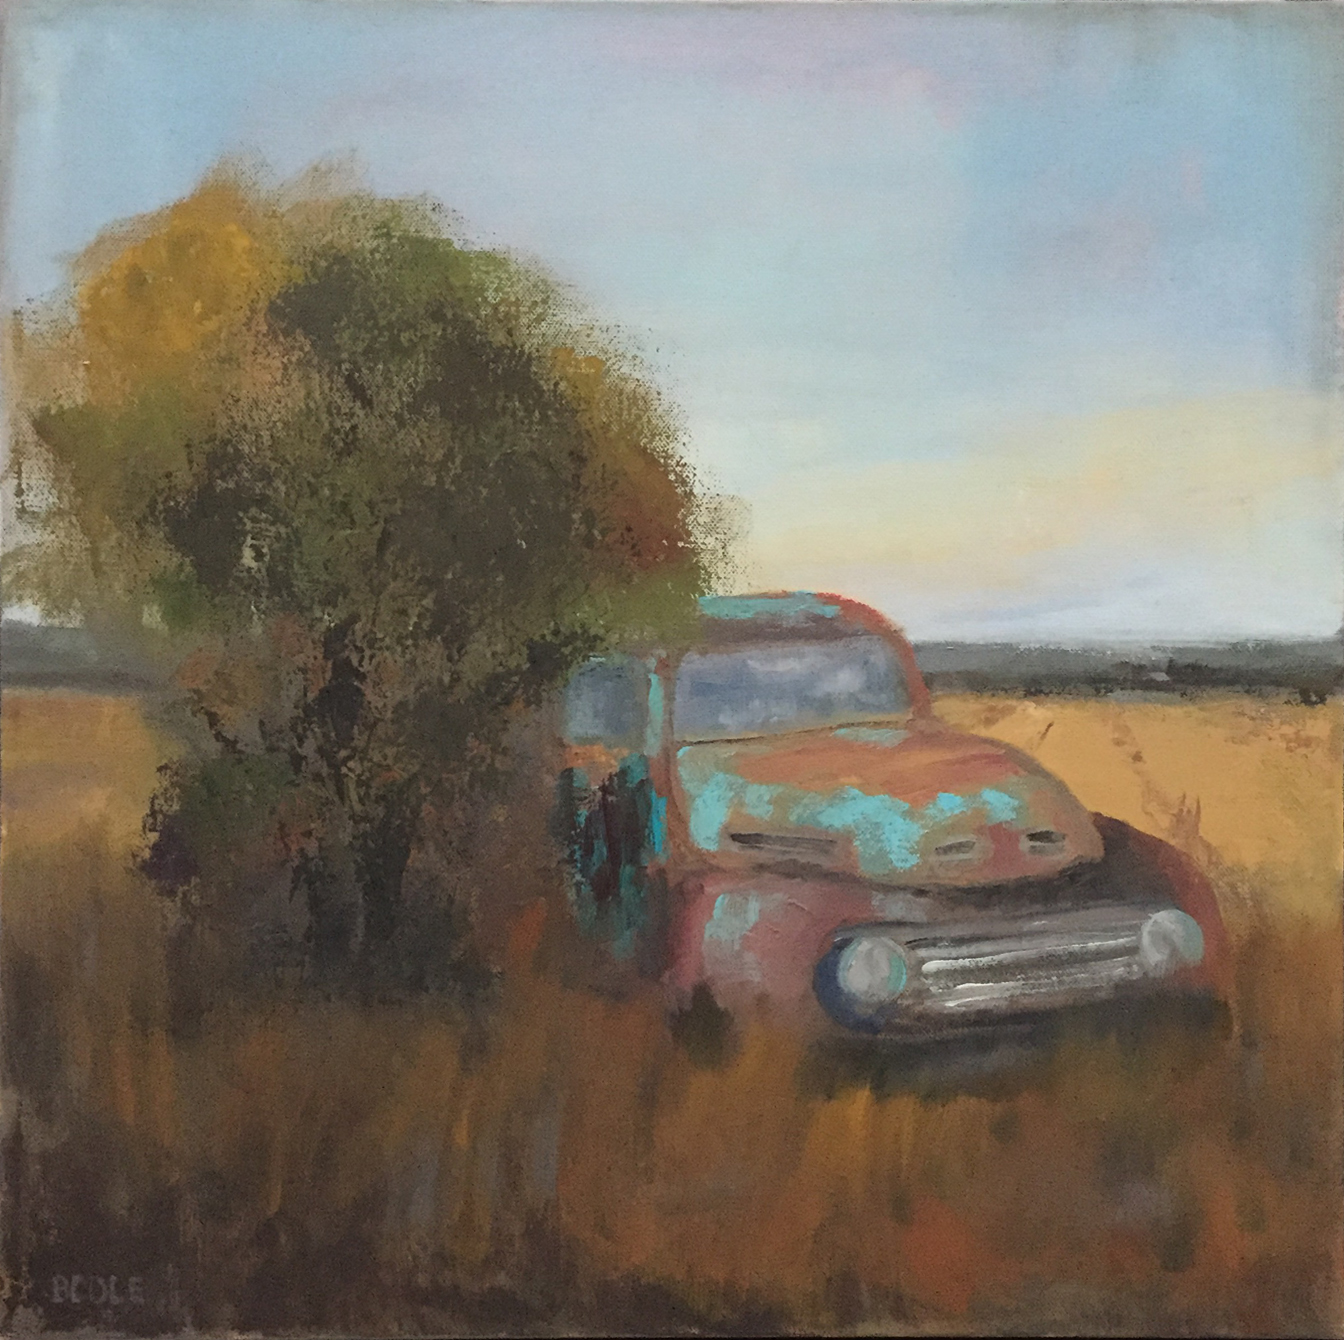
Parked for Good, ©Beth Cole, Oil on Canvas, 18 x 18
Gary and I invite you to our art and photography show opening next week (May 16th, 2017) at the Carnegie Arts Center in Alliance, Nebraska.
The reception will be June 24th from 1:30 - 3:30 and you're invited!
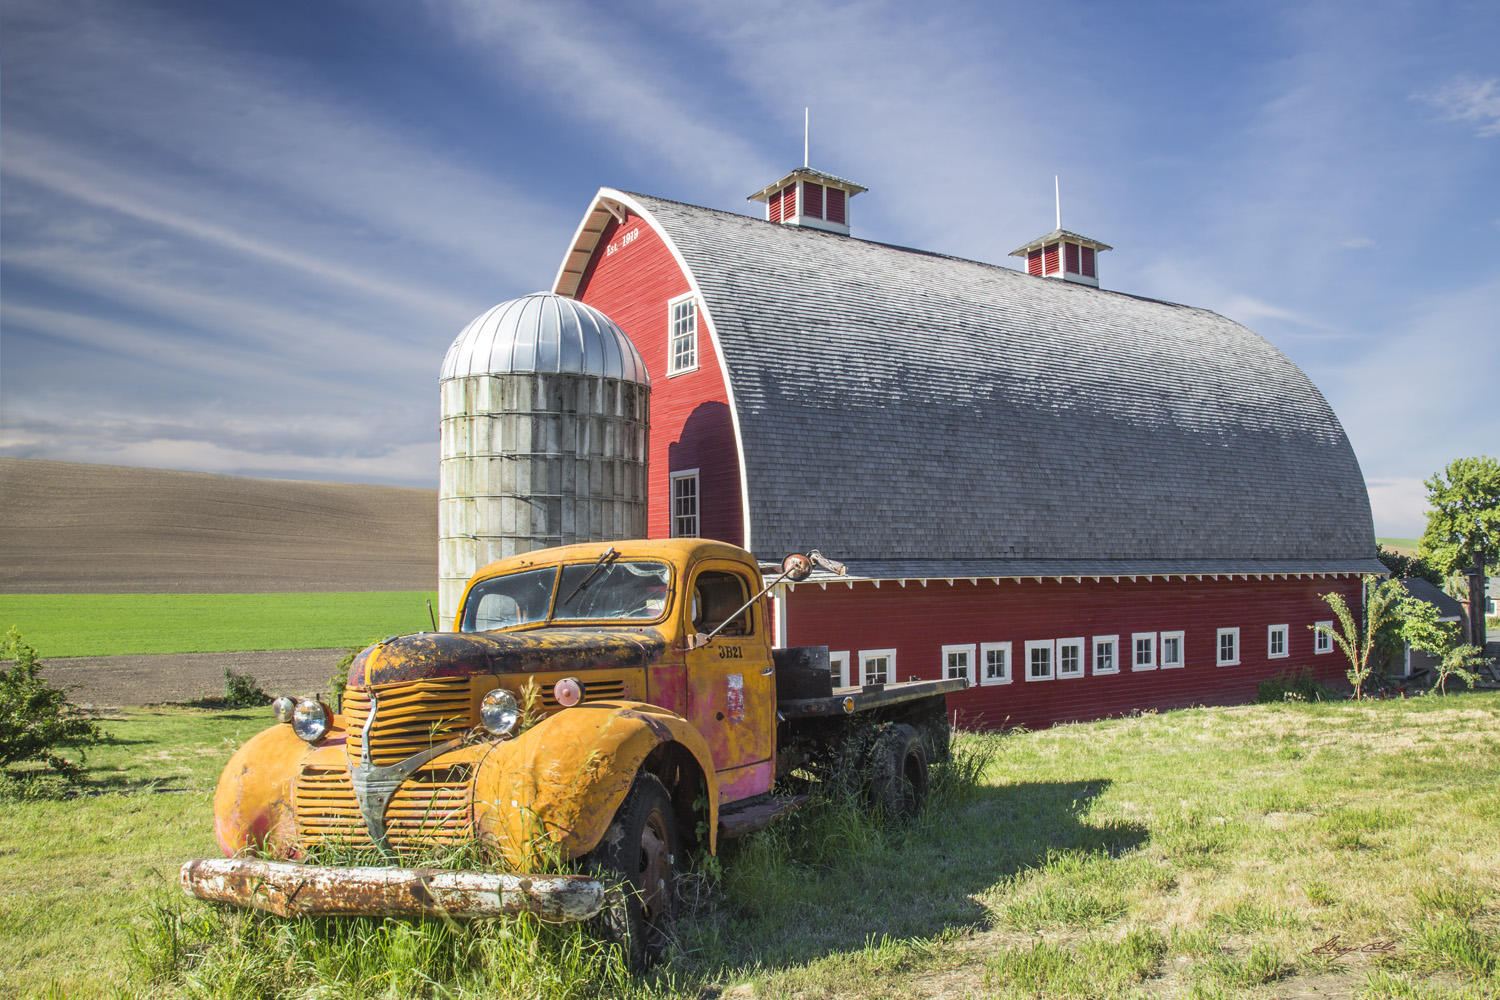
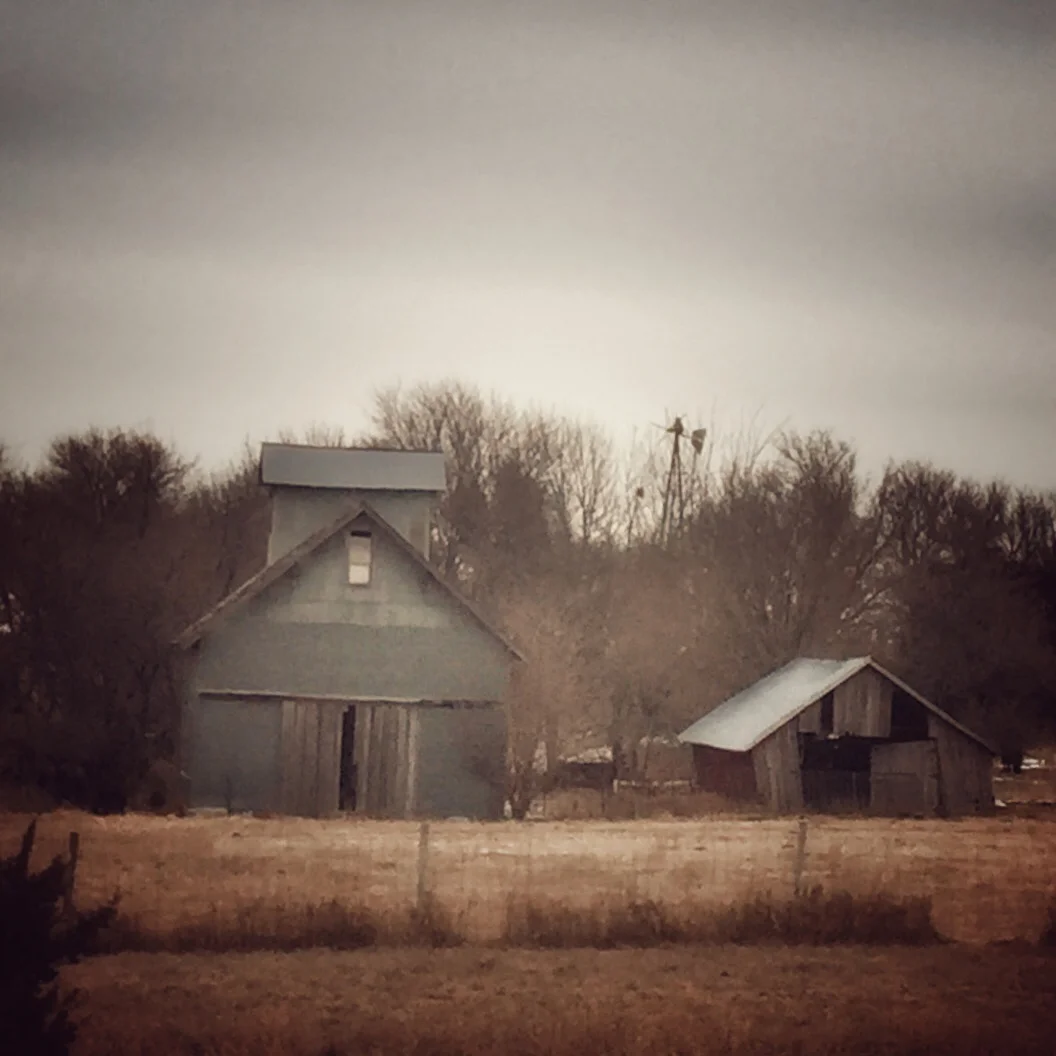
Palouse Barn and Truck, ©Gary Cole, Photography

What Piano Taught Me About Painting
I am a music nerd. To the core. Piano lessons were the highlight of my seven year old life, and yes, I am often reminded by my piano-lesson-taking-sisters that I did hog the piano.
The piano has been my friend, my disciplinarian, my therapist and my voice for many years. No matter how much time passes, I can still sit down with her and we have a beautiful exchange as all best friends do.

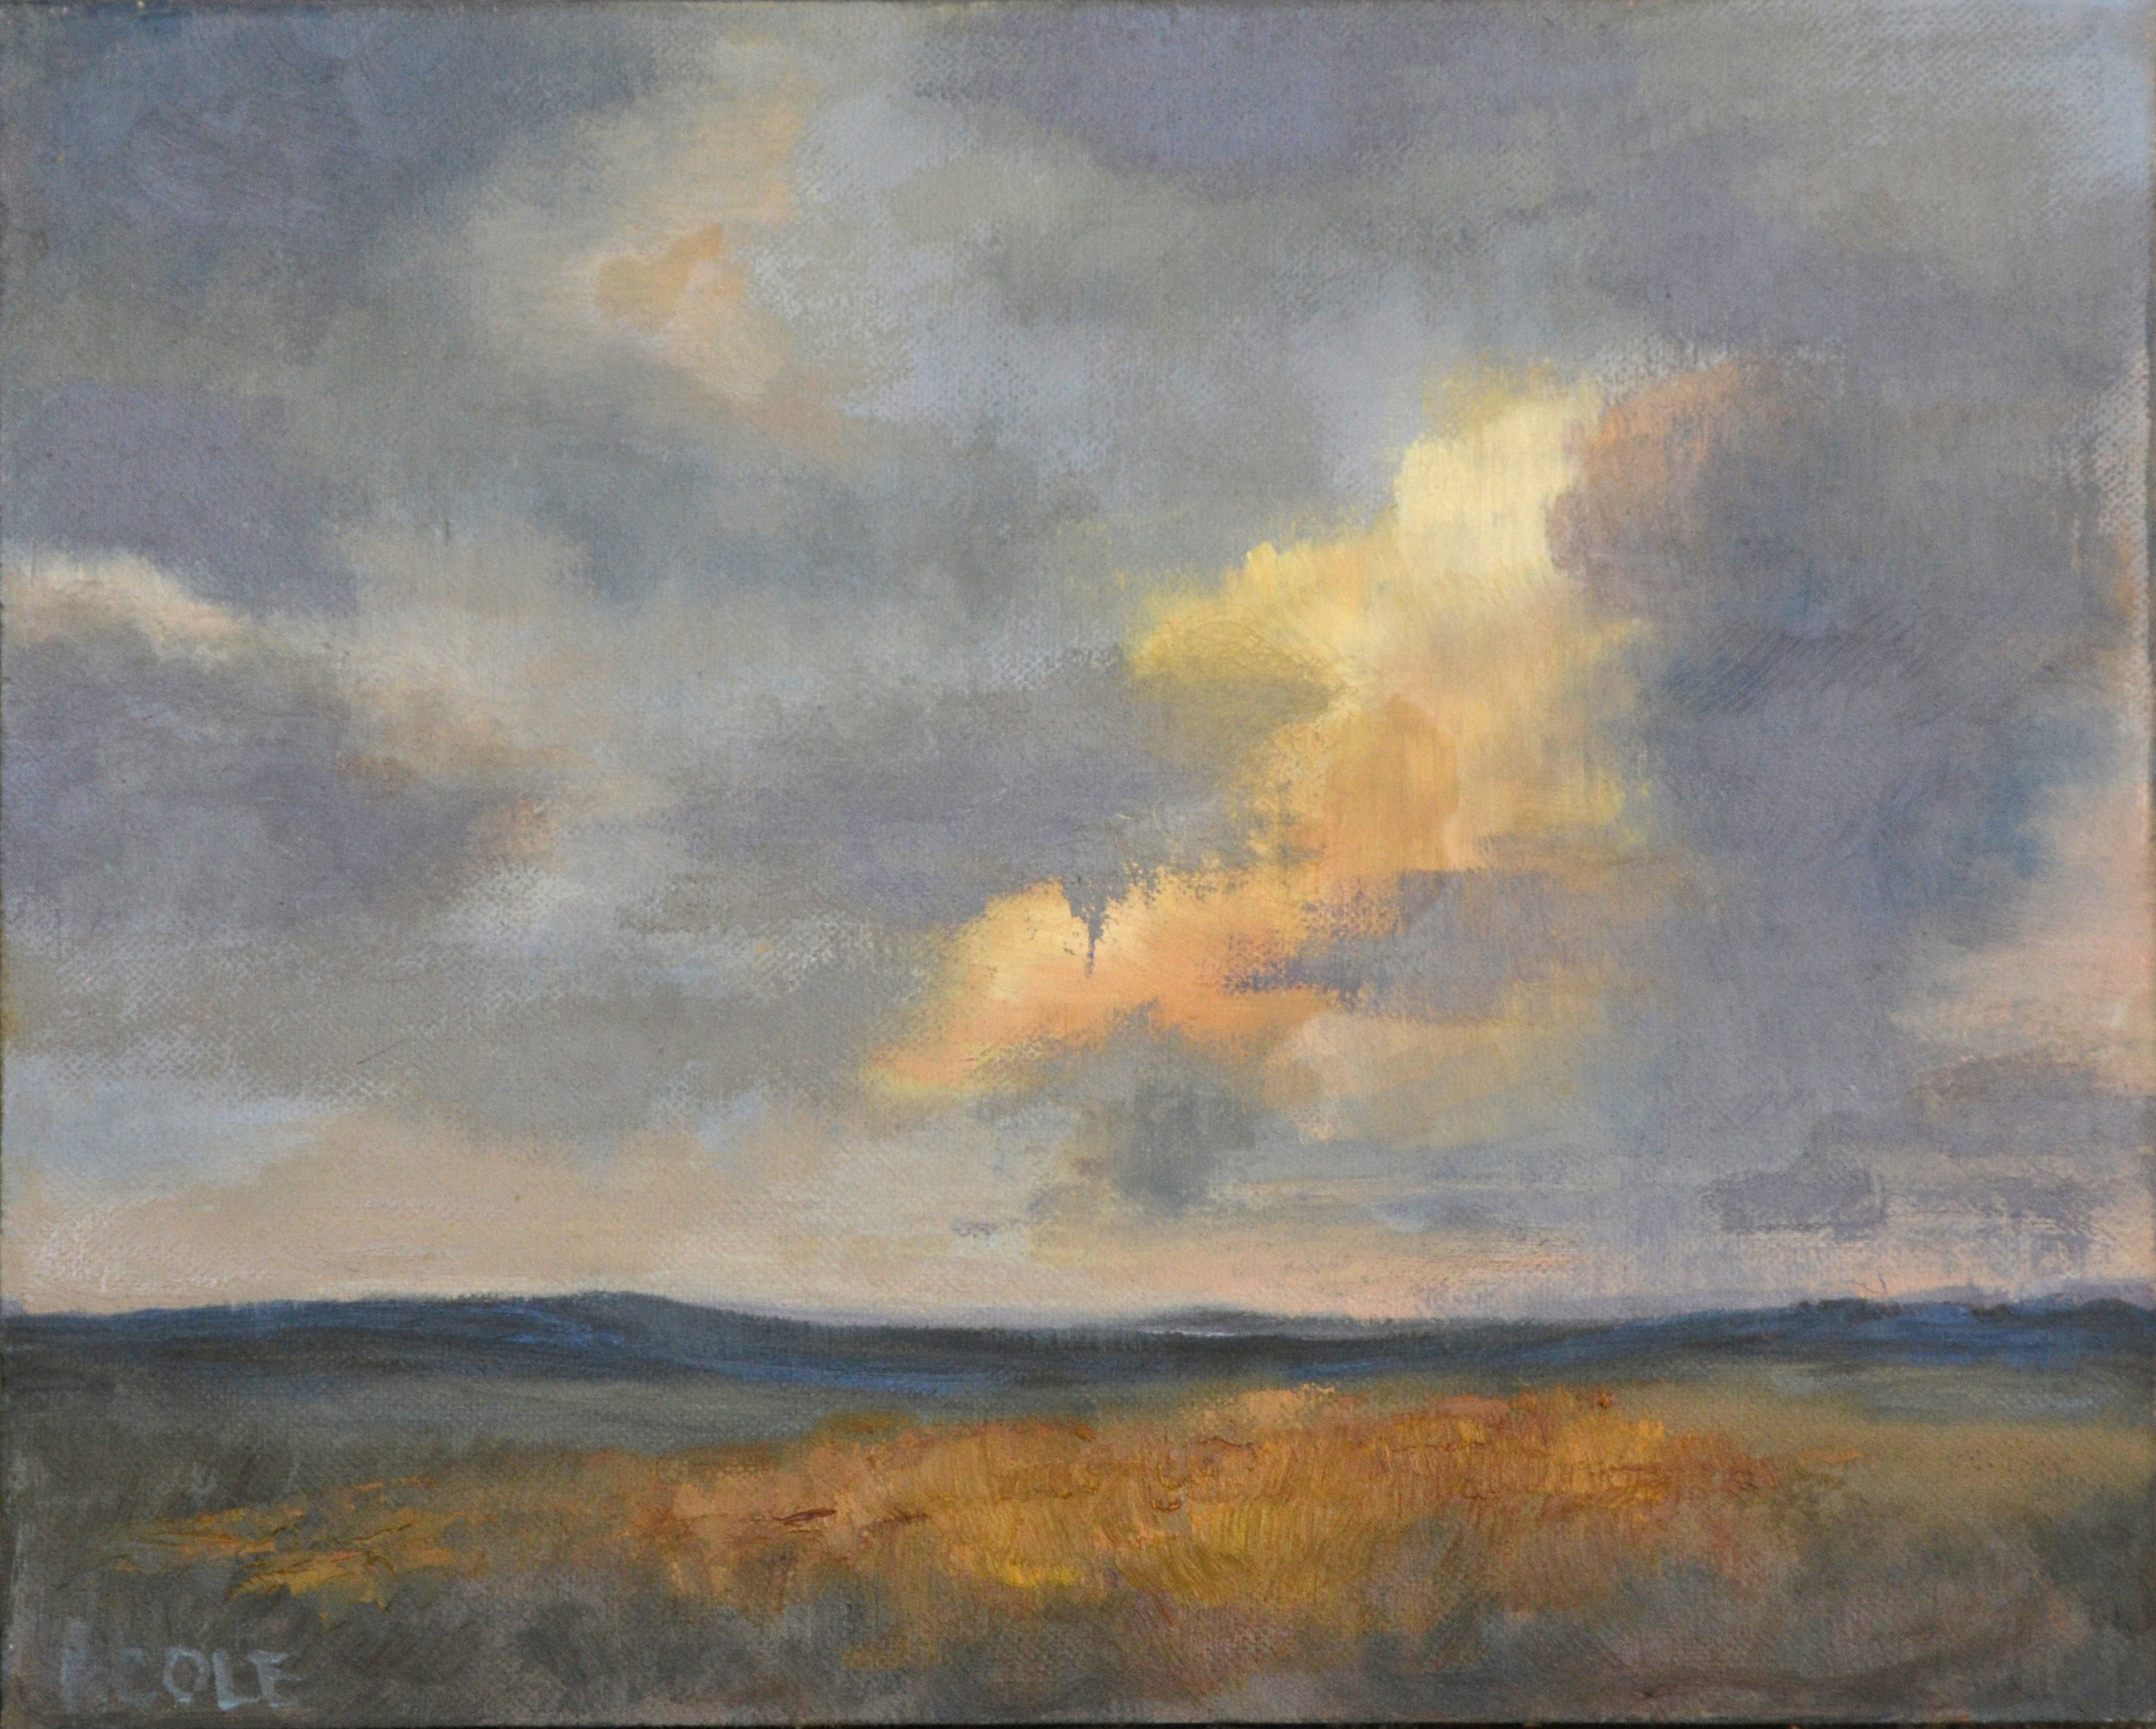
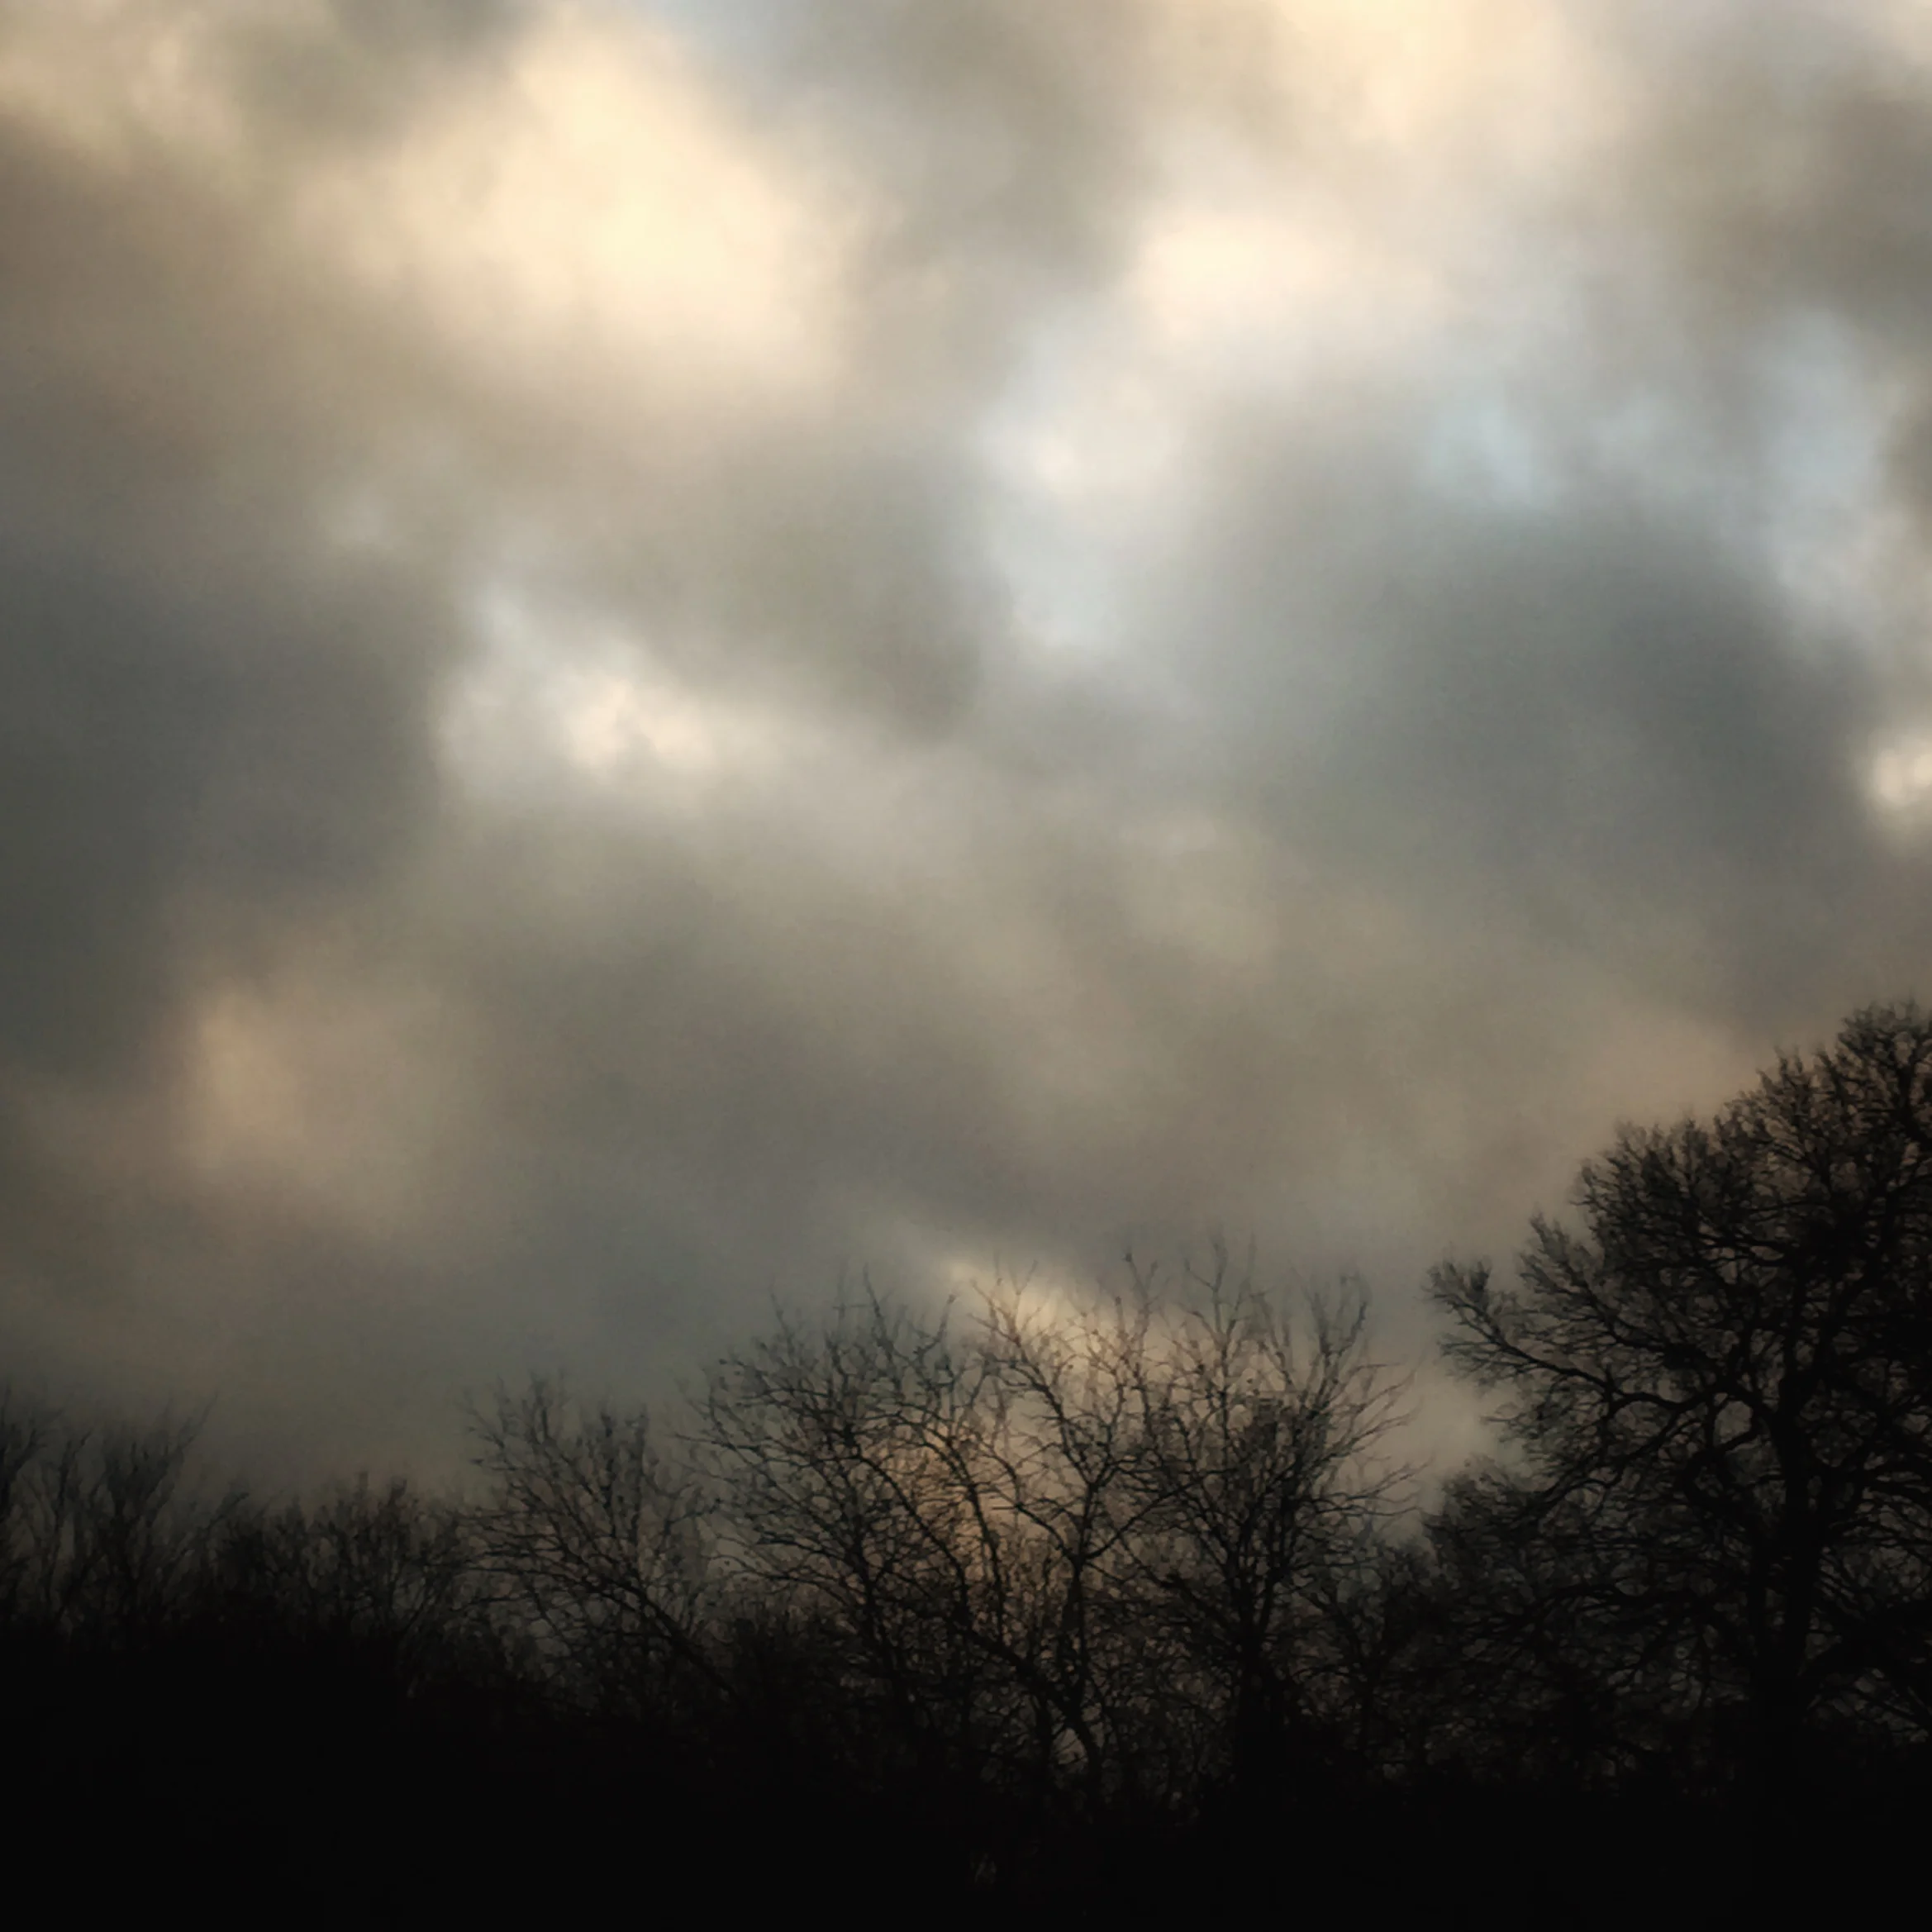
Cloud Study, ©Beth Cole, 8 x 10, Oil on Panel
I am a music nerd. To the core. Piano lessons were the highlight of my seven year old life, and yes, I am often reminded by my piano-lesson-taking-sisters that I did hog the piano.
The piano has been my friend, my disciplinarian, my therapist and my voice for many years. No matter how much time passes, I can still sit down with her and we have a beautiful exchange as all best friends do.
She taught me about the similarities between music and art.....
- composition (drawing)
- melody (focal point)
- harmony (values/colors)
- syncopation (variety)
- rhythm (repeating patterns)
When I play a piece, there is an element of technical execution but there is also the interpretation of what is written on the page. The touch, how loudly or softly I play, the speed, etc….all contribute to the voice of the music, how it sounds, how it flows, how it connects, how it speaks. That’s what music does, you know. It speaks a universal language.
Same goes for painting. There is a technical aspect to every painting in the rendering and composition….what goes where and the perspective of the drawing. And there is the interpretation, the emotion of the piece, the story, the symbolic, the unsaid.
It is only recently that I realized how much my musical background influences my art. Every time I step up to the canvas I am hoping to bring out the melody with a the focal point, to support the melody with interesting harmony in color and value, to make the whole piece sing with syncopation and rhythm.

Light Beyond ©Beth Cole, Oil on Canvas, 18 x 18
Take "Light Beyond," for example. I wanted the light beyond the trees to be the focal point, it is the melody of the piece. I tried to create rhythm and syncopation, do you see any? The palette is simple using only shades of the blue and yellow family. Hopefully this gives the piece a sense of harmony and peace.
So, are you a musician and a painter as well? Do you know of others? Would love to hear your thoughts.
Take good care, my friend.
--Beth

Art After Fifty - Part Two
This is the second post in my series, Art After Fifty. You can read the first post here.
Finding Classes
It’s fun to learn and it’s fun to gather with other people to make art. It’s even more fun when you find a group of people that are so like minded they feel like a tribe. I think that’s a little of what we find in both online and in person art workshops.
Contentment © Beth Cole, Oil on Canvas, 11 x 14
This is the second post in my series, Art After Fifty. You can read the first post here.
Finding Classes
It’s fun to learn and it’s fun to gather with other people to make art. It’s even more fun when you find a group of people that are so like minded they feel like a tribe. I think that’s a little of what we find in both online and in person art workshops.
But where to start? There are so many options, whew, it can be overwhelming.
We live in a very rural area, I know I’m not the only one, so many of you understand the lack of art programming, support and availability. So when I began looking for art classes my first stop was Google. I looked for classes that taught to my aesthetic, using colors and materials I wanted to try. And I also looked for people who were anchored in similar principles from our Creator.
And I found such a place in Jeanne Oliver’s Creative Network. Her classes are varied, affordable, and she has Facebook groups for each of them so you can connect with other artists in the class. It is such fun, and it was a wonderful way to begin my art explorations.
After immersing myself in several of her classes, I learned of other teachers and programs that would give me more basics of art that I really needed. One such experience was Barry John Raybould’s Virtual Art Academy. I studied in this group for about six months and learned a great deal about what I consider tried and true art basics that have really grounded my art process.
I also invested in a few DVD’s, one of the best was Quang Ho’s Nuts and Bolts, I highly recommend this.
About a year after I started painting I began looking for in person workshops I could attend and the first one I chose was the Autumn Art Workshop in Nebraska, only about 40 miles from where I live. My instructor was pastel artist, Marla Baggatta. It was a fantastic experience and I was totally LOST! I hadn’t any experience in pastel, my brand new box of pastels was barely cracked open. I knew what values were, but I didn’t know how to correlate colors with value and I was inexperienced with color mixing, especially with pastels where the colors are mixed on the surface as you paint. It was all such good fun and overwhelming at the same time. I am so thankful for that experience because it whetted my appetite for more practice and more learning.
So having experienced both in person and online classes I think there is a need for both of them. If I had an unlimited travel budget, I would choose in person every time. I think nothing beats an actual face-to-face experience, especially with art. But there is a lot to be gained from the convenience of online classes as well.
What you gain with online classes
- Camaraderie with other like minded individuals
- Feedback on your art
- Instruction on demand, you can work on your art whenever you have time
- You can watch the video over and over if you want to really practice or see the details
What you miss
- Chatter in the room
- Walking over to someone’s easel and really seeing what’s happening there
- A touch on your shoulder or a reassuring hug
- Eye contact
- Laughs and great conversation during breaks
Here are a couple other classes and teachers I have experienced and recommend:
- Deborah Paris, The Landscape Atelier
- Kim Casebeer, Online Mentoring
On my bucket list:
When it's all said and done, I have learned that one of the best teachers is experience. You can only gain that by spending time at the easel, chalking up mistakes and getting to the keepers.
So, what art classes and teachers would you recommend?
Next up, recognizing your art aesthetic and dealing with frustration.
Thanks for following along, do take care my friend.
--Beth
Soli Deo Gloria
Painting With the Masters - Edward Seago - Boats on the Orwell
I love Edward Seago's work. He was an English artist who painted in both oils and watercolor. The muted palette he uses is so intriguing to me. Artist Todd Williams first introduced us to his work in the workshop he taught for our art club last fall.

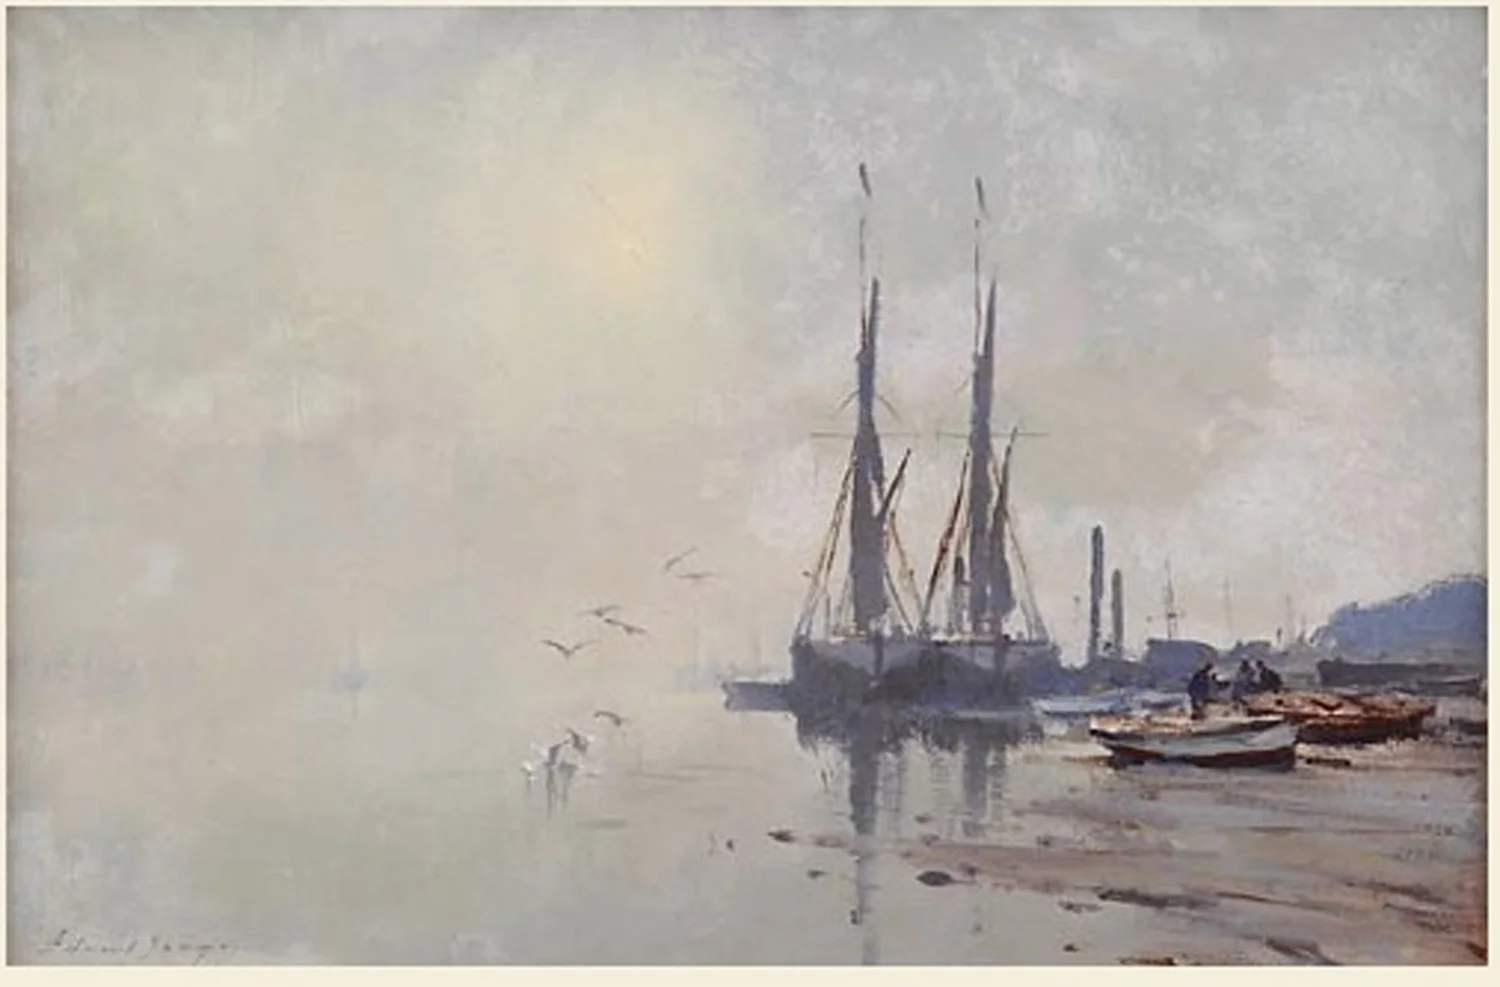
Boats on the Orwell by Edward Seago
I love Edward Seago's work. He was an English artist who painted in both oils and watercolor. The muted palette he uses is so intriguing to me. Artist Todd Williams first introduced us to his work in the workshop he taught for our art club last fall.
So, I learned a great deal from practicing this piece. Those grays! Do you see the cool and warm mixed together to give interest and atmosphere? That was the challenge for me and I loved experimenting with my color pools.
I started with a neutral gray mixed with ultramarine blue and cad orange. I then mixed warm and cools with titanium white, and warm white along with more red (cad red light) or blue (ultramarine or cobalt) or yellow (transparent yellow) to get the variations of gray for the painting. The lower right corner gave me the most trouble. Gah. I just wasn't sure how to mix that color, there is some red and yellow in it.
So here is where I ended up. I am most happy with how those little birds came to life, I have never tried painting such delicate little marks and it was quite fun.

Boats on the Orwell, ©Beth Cole after Edward Seago
What master's do you admire? Thanks for reading my friend.
--Beth
Soli Deo Gloria
Painting With Oils - Part Five
This is the fifth and final post in my sharing series about painting with oil. You can read the first, second, third and fourth posts here.
Cleaning Your Brushes
Brushes are our tools. We need to take care of them so they will last and help us well with the work of our hands.

Untitled, ©Beth Cole - Oil on Canvas - 12 x 24
This is the fifth and final post in my sharing series about painting with oil. You can read the first, second, third and fourth posts here.
Cleaning Your Brushes
Brushes are our tools. We need to take care of them so they will last and help us well with the work of our hands.
I have made so many brush care mistakes, ruining brushes for ignorance of what to do or how to care for them. I am probably still making mistakes, but this is what I do now to care for my brushes.
I use tissues to clean the brush in between color changes, sometimes I use a different brush for lights and darks. At the end of my painting day, I wipe as much paint as possible out of the brush with a tissue, then I swish it in odorless mineral spirits (I use Gamsol) to remove more paint.
Sometimes I will call it good there, knowing I will return in the morning to paint again. But when I want to thoroughly clean the brush I will head to the sink and use the Masters Brush Cleaner soap which I really like. I try to make sure the paint is removed near the ferrule of the brush so it can remain supple.
Some have recommended Murphy’s Oil Soap to clean brushes and that would probably work well, too.
After the brushes are clean, I lay them flat on a side table to dry. I used to place them upright in my brush holder, but I read that it is better to let them dry flat so the water doesn’t drain into the ferrule. I don’t know that this makes any difference but it’s what I’m doing for now.
Storing Your Paint
To help my paint last longer, I take the entire glass palette and store in my freezer. This works like a charm. The next day, I take out the palette and let it warm up a few minutes and the paint is as good as new.
I have heard you can also submerge your entire palette in water and then just pour off the water the next day and you’re good to go. I have not tried this.
I hope you have enjoyed this little oil painting journey we’ve been on. Thanks for traveling with me. I am now working on another series about painting after 50, here is the first post. I want to encourage other late bloomers, I don't think I'm the only one who got a late start!
Thanks again for following along, my friend. Good day to you!
--Beth
Soli Deo Gloria
Carnegie Arts Center Show - Alliance, Nebraska
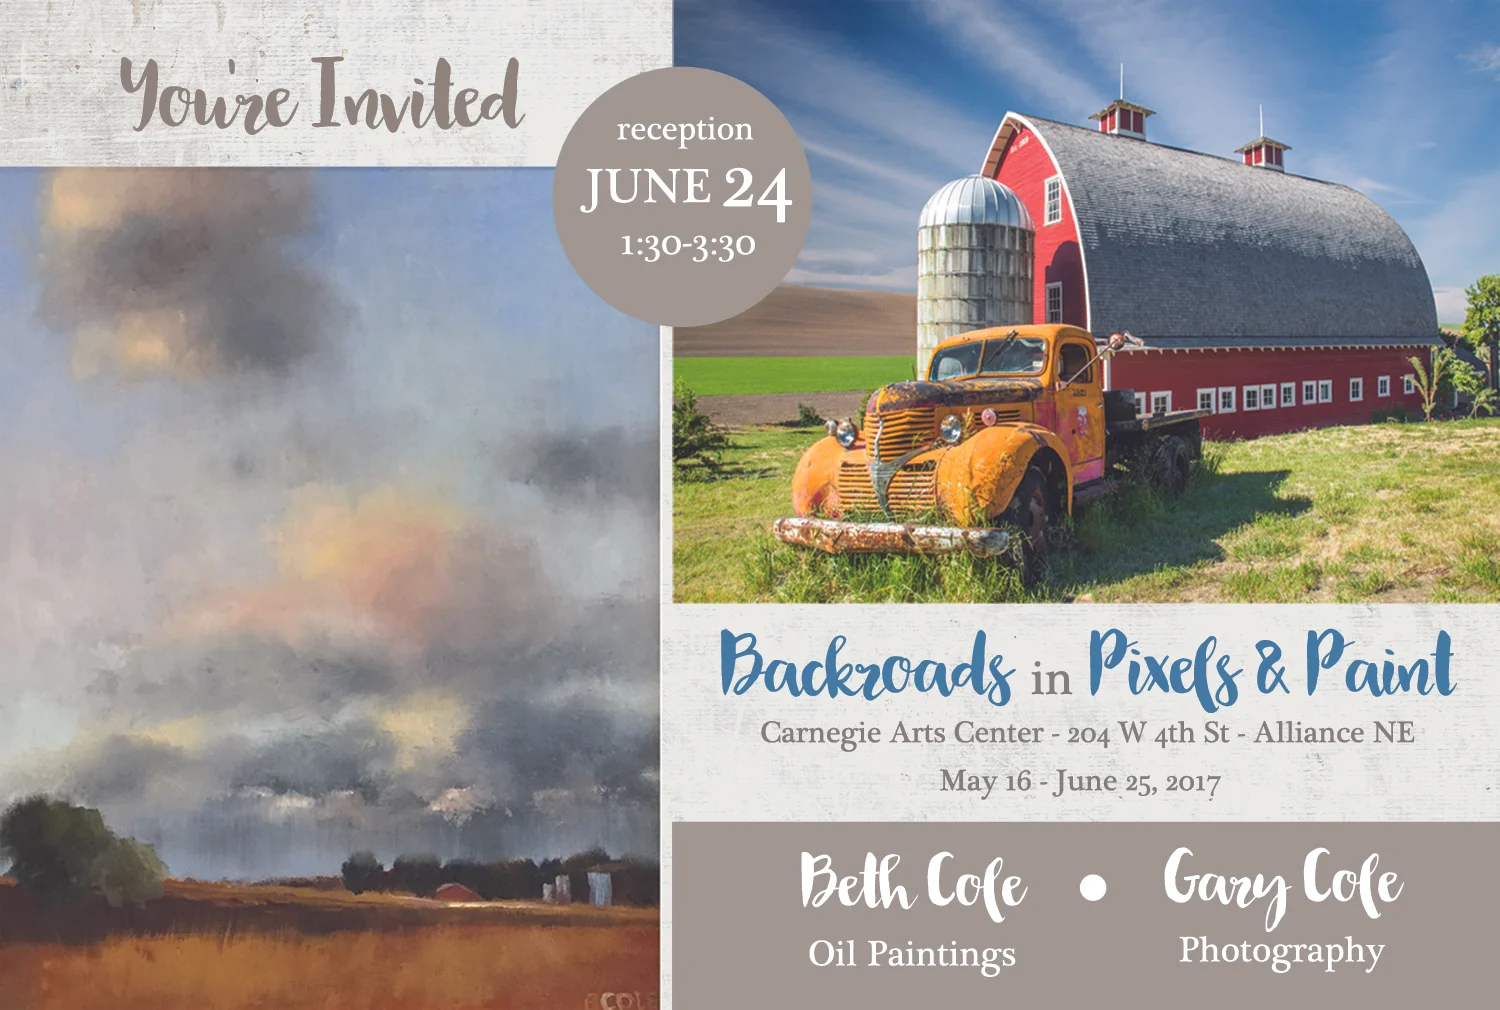
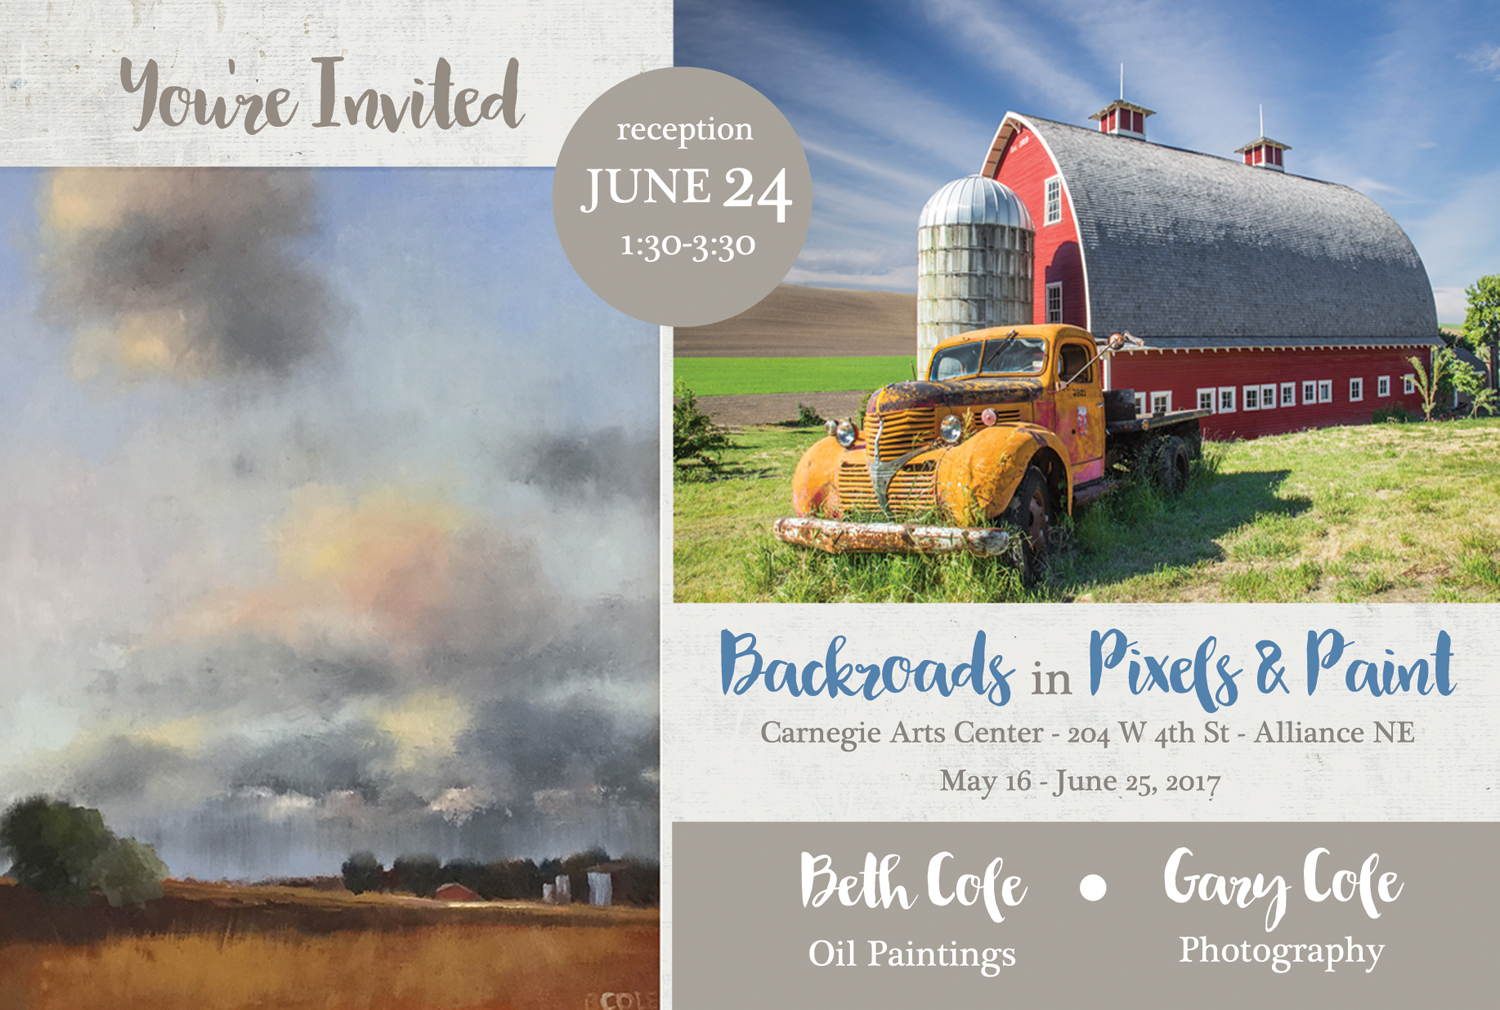
Gary and I will be doing a joint exhibition at the Carnegie Arts Center in Alliance from May 16-June 25, 2017. You're invited to a reception on Saturday, June 24, from 1:30 - 3:30.
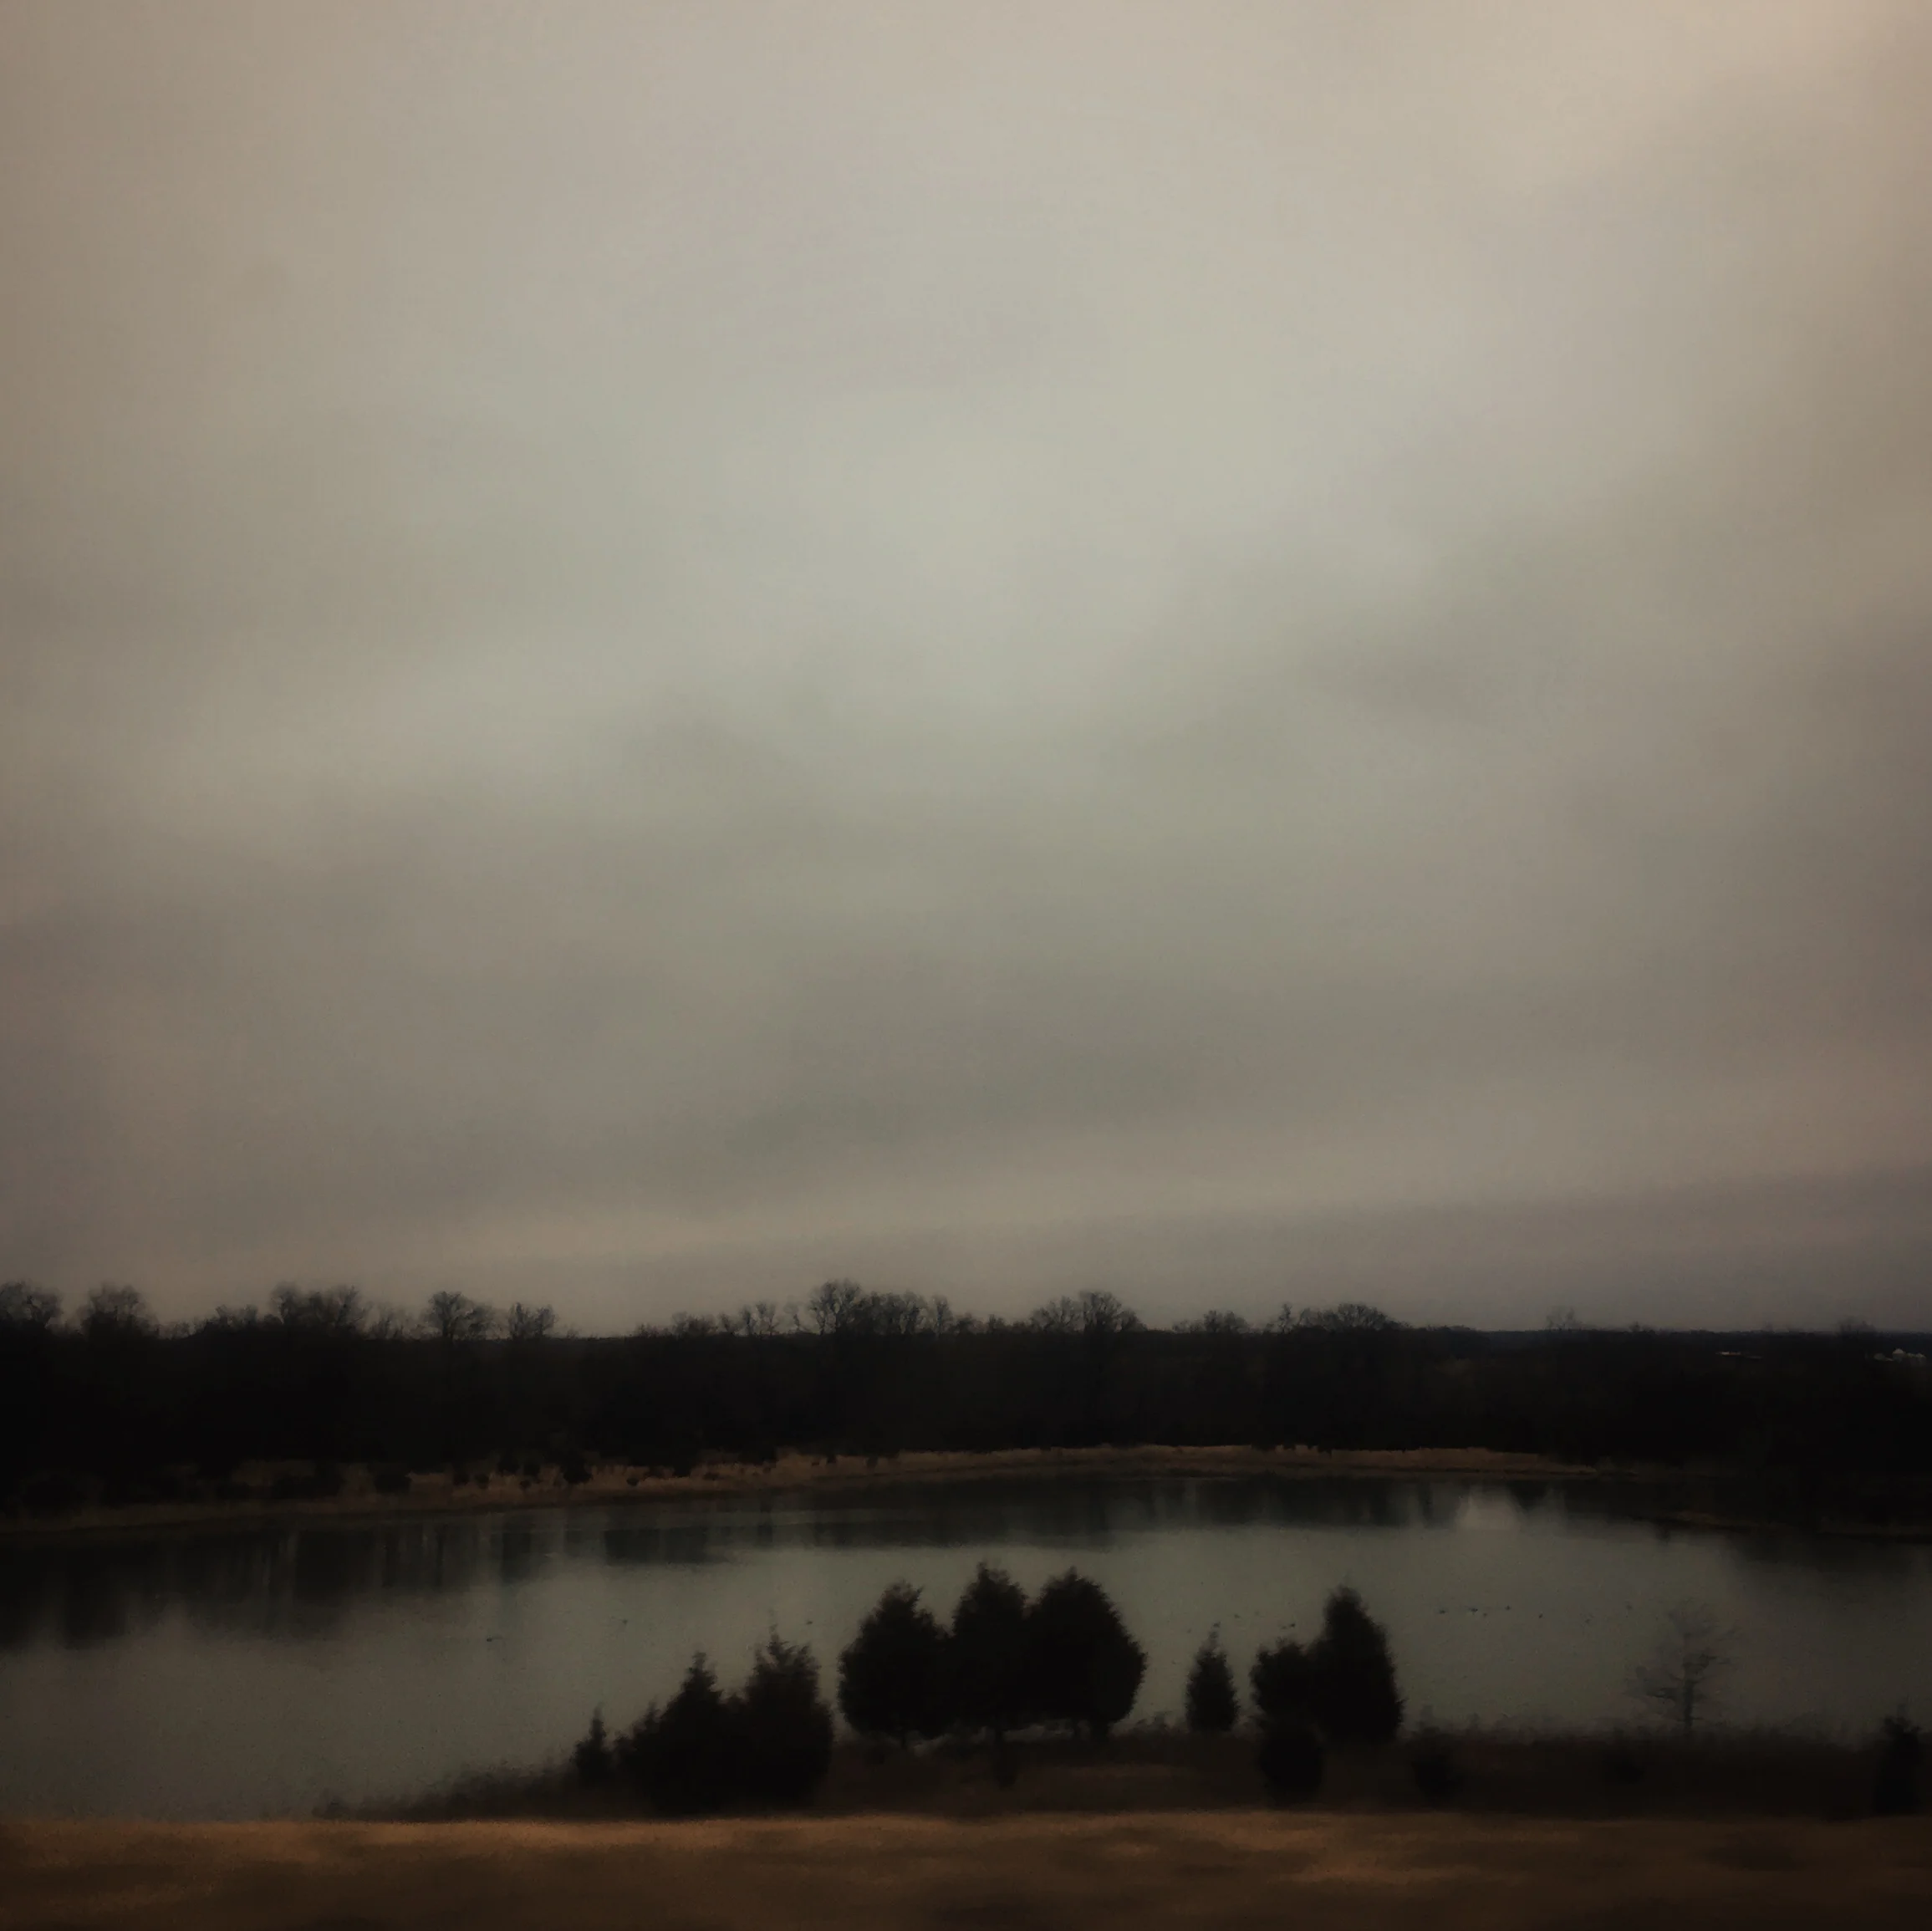
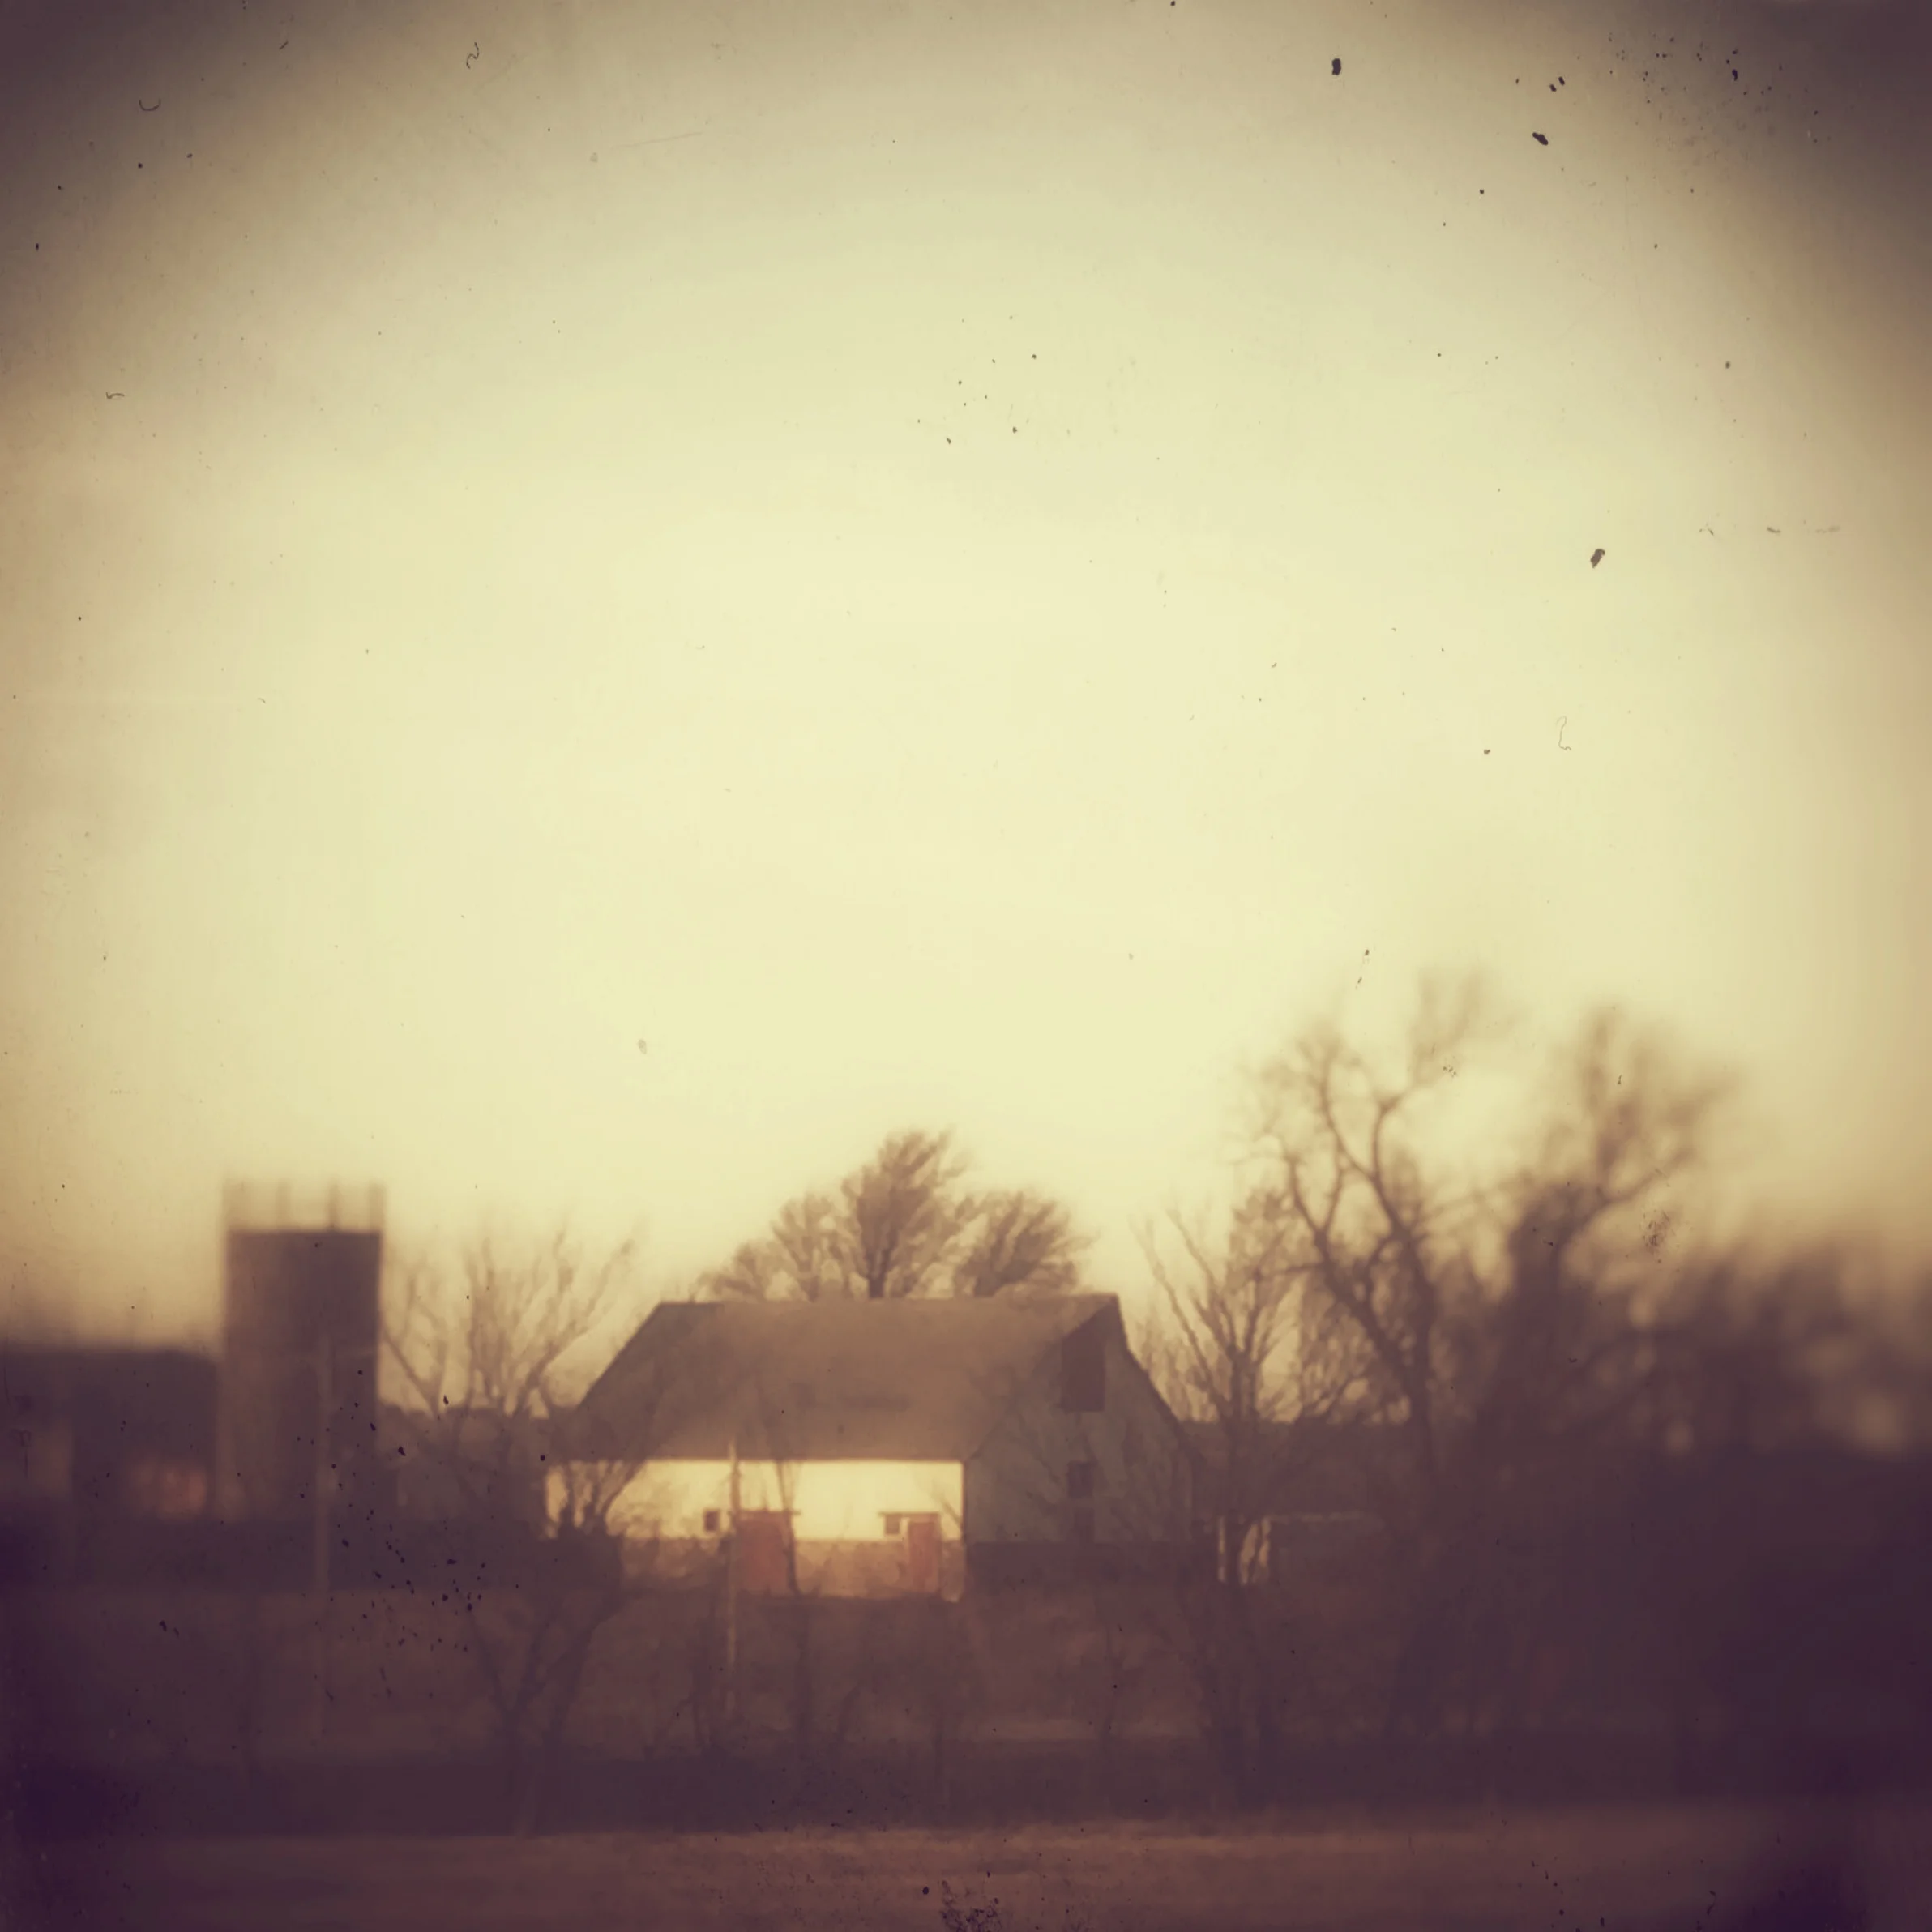
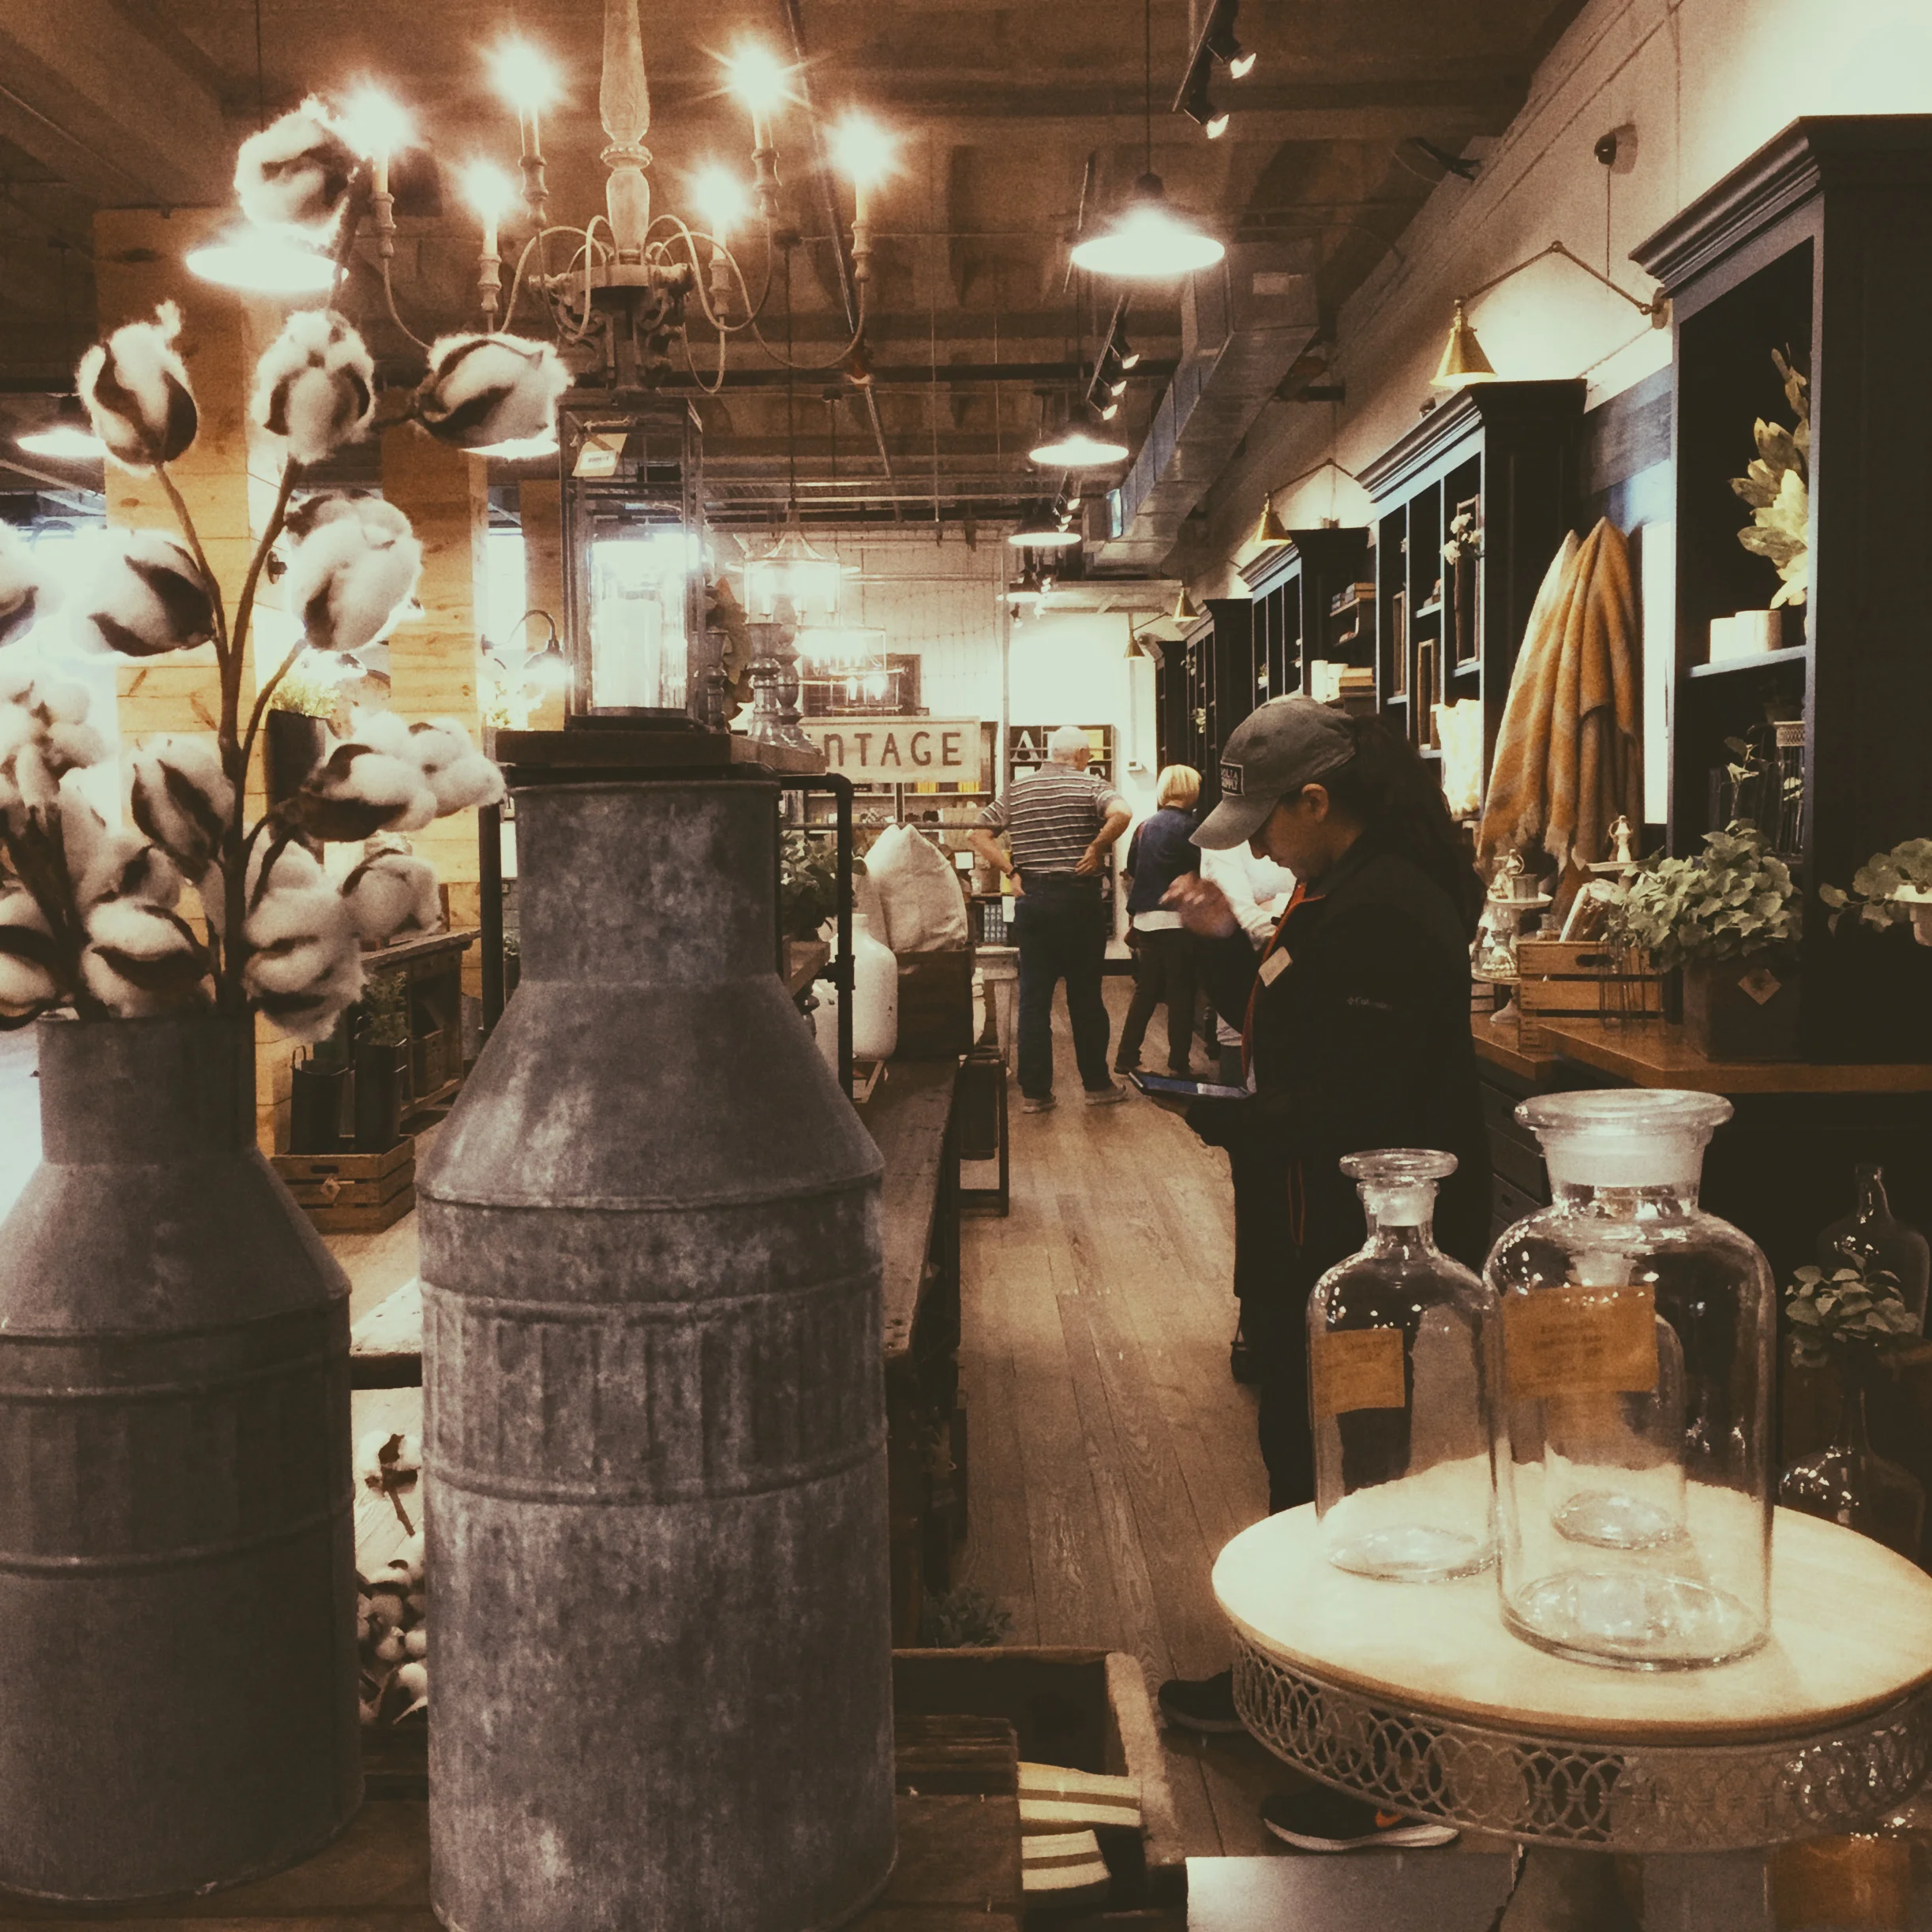
The Backroads in Pixels and Paint
We love driving the backroads with our cameras on nice days, foggy days, even snowy days. Gary likes to shoot anything unusual especially old buildings, vehicles, rusty things, etc. I also gravitate toward this subject matter and I like looking for light and shadow with my camera. These photos are inspiration for when I get back in the studio with my paints.
Gary and I will be doing a joint exhibition at the Carnegie Arts Center in Alliance from May 16-June 25, 2017. You're invited to a reception on Saturday, June 24, from 1:30 - 3:30.
The Backroads in Pixels and Paint
We love driving the backroads with our cameras on nice days, foggy days, even snowy days. Gary likes to shoot anything unusual especially old buildings, vehicles, rusty things, etc. I also gravitate toward this subject matter, and I like looking for light and shadow. These photos are inspiration for when I get back in the studio with my paints.
Please know you are welcome and invited to attend our reception on June 24, and we would be most happy to see you. Gary will have 20-30 pieces and I will have 10-15 of all sizes.
If you have not visited the Carnegie Arts Center in Alliance, this would be a great road trip. The gallery is beautiful and has much to offer art lovers.
Thanks for stopping by and take good care, dear reader.
--Beth

It's a Mystery
I'm trying to solve a mystery. One of my favorite Nebraska painters is Hal Holoun. I absolutely love his work and I have admired it for most of my painting life.
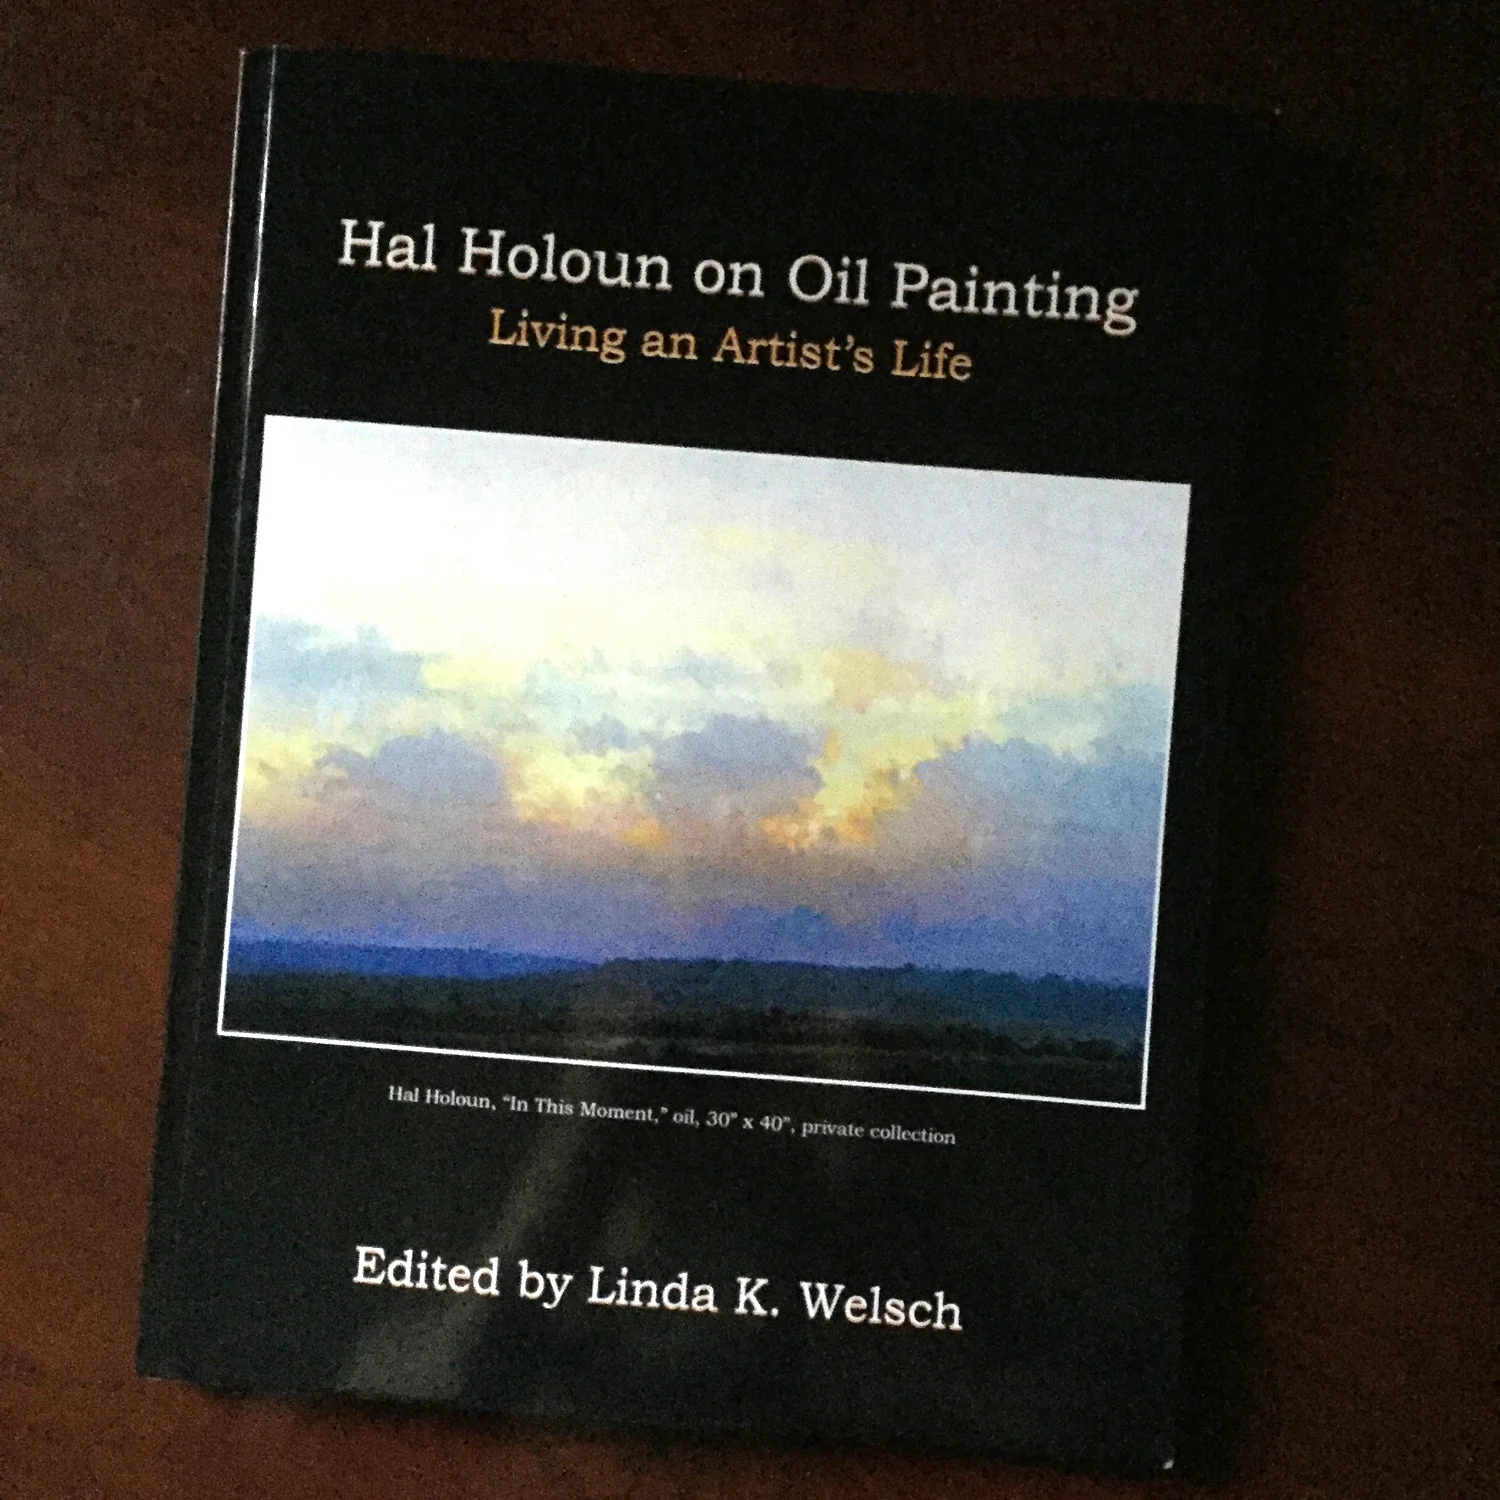
Hal Haloun on Oil Painting, Edited by Linda K. Welsch
I'm trying to solve a mystery. One of my favorite Nebraska painters is Hal Holoun. I absolutely love his work and I have admired it for most of my painting life.
Who Is This Book Angel?
So I received a package from Amazon last week. I didn't remember ordering anything so I was a little surprised. My surprise and delight grew when I opened the package and saw Hal Holoun's beautiful book, edited by Linda Welsch. Wonder of wonders! My favorite!
There was no packing slip in the package. Who could this book angel be? Hmmmmm. I reached out to Amazon Customer Service to see if they could help. They confirmed it was a gift but they couldn't say from whom. Foiled!
So, dear reader, I am still perplexed and feeling so grateful over this beautiful gift. If you are reading this and had a hand in this mystery I would love to know so I can give you a proper hug and millions of thank you's.
Now I'm off to paint. Best day to you, dear reader.

Art After Fifty
This is a new series on the blog for those over fifty who have always wanted to create ART. Is that you? I'm glad you're here. Truly.
Art After Fifty
I was 54 when I picked up a paintbrush. It was something I have always wanted to do, but never made time for because of life – raising kids, business responsibilities, etc. Maybe it’s the same for you. If so, I want to encourage you. It’s not too late! You are in the prime years of your life. You may still be working full or part time but chances are your nest is empty and you have a little more time to explore art.

Sheltered © Beth Cole | Oil on Canvas | 11 x 14
This is a new series on the blog for those over fifty who have always wanted to create ART. Is that you? I'm glad you're here. Truly.
Art After Fifty
I was 54 when I picked up a paintbrush. It was something I have always wanted to do, but never made time for because of life – raising kids, business responsibilities, etc. You, too? If so, I want to encourage you. It’s not too late! You are in the prime years of your life. You may still be working full or part time but chances are your nest is empty and you have a little more time to explore art.
I want to write about the journey I have taken to this landing spot of oil painting in hopes that you will not be afraid to experiment with all kinds of media in order to find your landing spot.
Experimenting With Supplies
I found one of the easiest ways to begin painting was to buy some inexpensive canvases, acrylic paint and brushes. In fact, when I first started, I didn’t know anything about color mixing and that sounded too time consuming for me, so I bought craft paint in the colors I liked and just began painting. This was a great way to start! I remember seeing things I liked on Pinterest and then trying to get a similar result with my tools.
My earliest paintings were something else, whoowee. In fact, I remember throwing my brush down and tossing the canvas in the trash and telling my husband, I can’t do this. I was so frustrated! He didn’t let me quit though and supported me by buying a whole bunch of paint and supplies for my birthday that year. It was such a beautiful expression of love and support.
Regardless of whether you have a supportive family, you can still paint – please give yourself permission and time to give it a try. Painting is such a release and a joy, I think it is can be a beautiful expression of worship and gratefulness to our Creator. If you have curiosity about painting and the urge to try, please follow through on it.
What Shall I Paint?
This is the question every artist asks no matter how long you have been painting! I began creating art with mixed media pieces because I would see things I liked in Hobby Lobby or wherever and just wonder if I could create something like that. So I would give it a try. My pieces never looked like those in Hobby Lobby, eeeeeek, they were….well let’s just stay, quite interesting. I remember painting birds on a telephone wire, some abstract shape pieces, a few figurative pieces like rainy day girls, etc, things like that. I would just follow my heart and paint the things I liked. It was a lot of fun and I felt freedom to just create.

One of My First Pieces -- Rain Girl © Beth Cole | Mixed Media
I didn’t have a dedicated art room when I first started, I just used a corner of my laundry room. In fact, my clothes dryer still has remnants of that craft paint spattered here and there. I remember moving the folded piles of clothes to one side of the counter and spreading out newspaper and my little canvases and a paper plate for a paint palette. I would turn my music on and just go to town. I didn’t use many reference images in the beginning, I experimented with mixed media, found objects, layers of papers and more abstract concepts. It was great fun and I was constantly learning. But I knew I would need to soak up lots more learning so I began looking for classes.
In the next post I will talk about how I found classes to take online and what happened when I became part of an online art community.
That’s it for today. Thanks for reading and please know your comments and questions are always welcome. Take good care now.
--Beth
Soli Deo Gloria
Painting With Oils - Part Four
This is the fourth in a series about painting with oils, sharing what I have learned so far. You can read the first, second, and third posts here.
Applying Paint
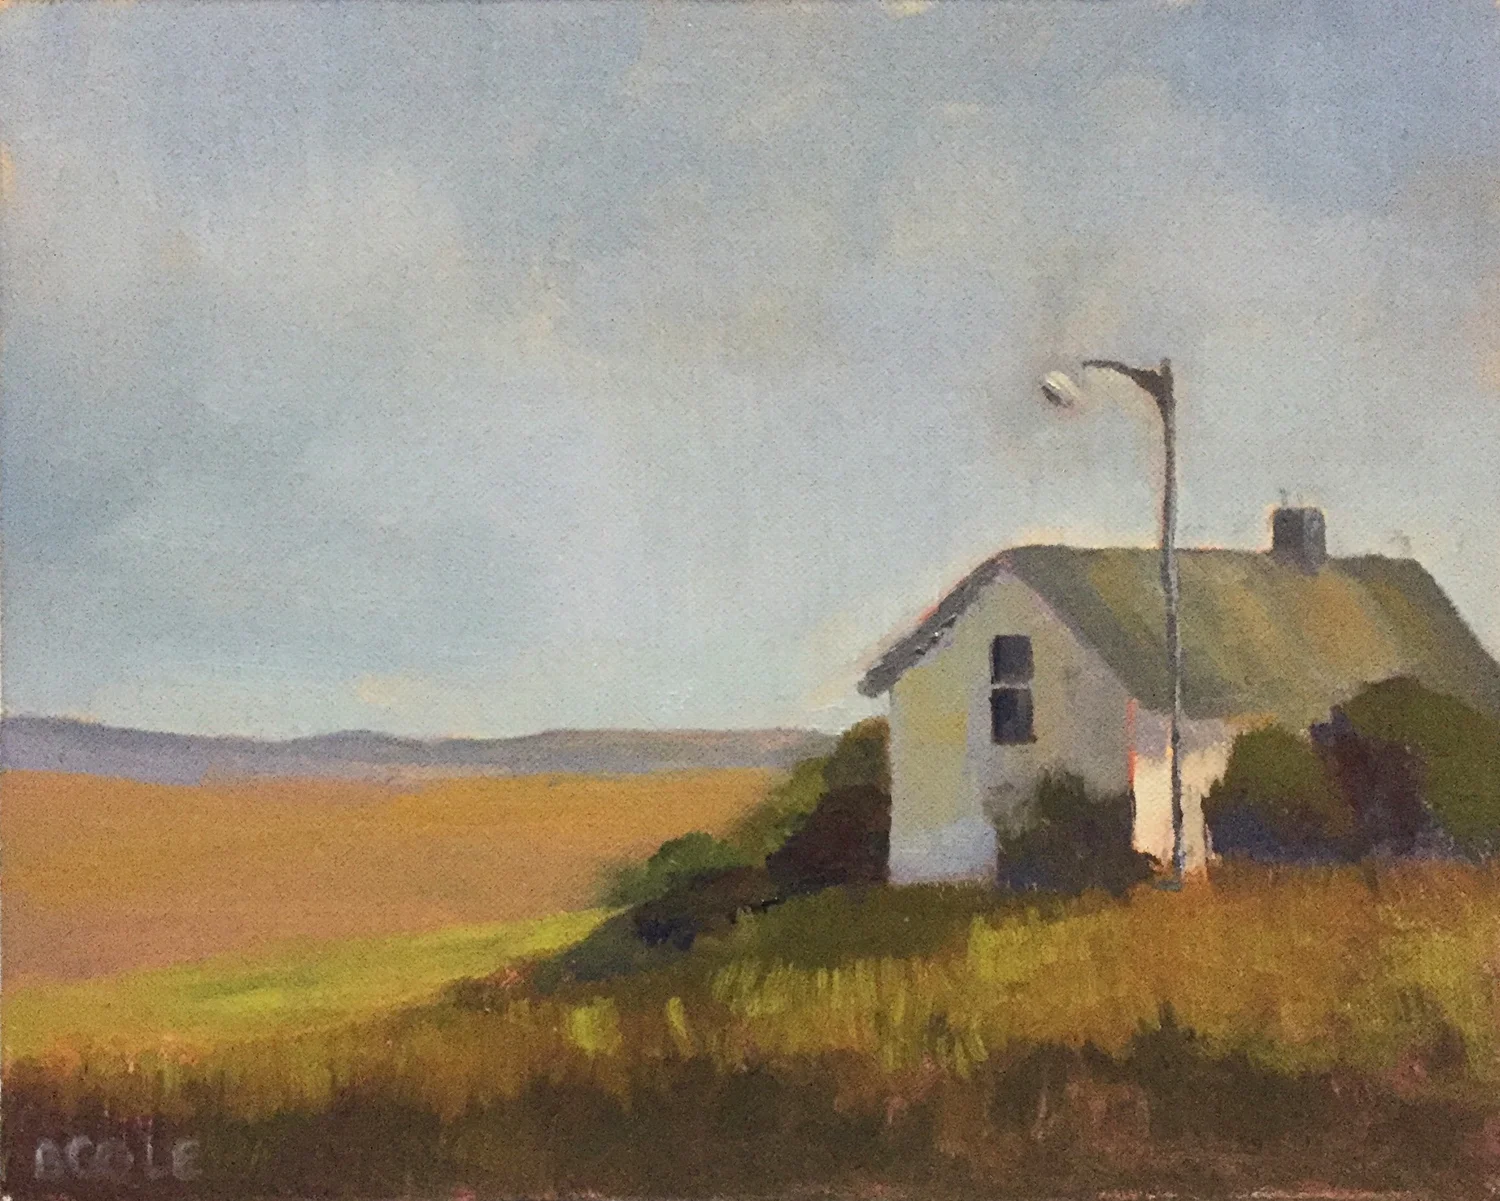
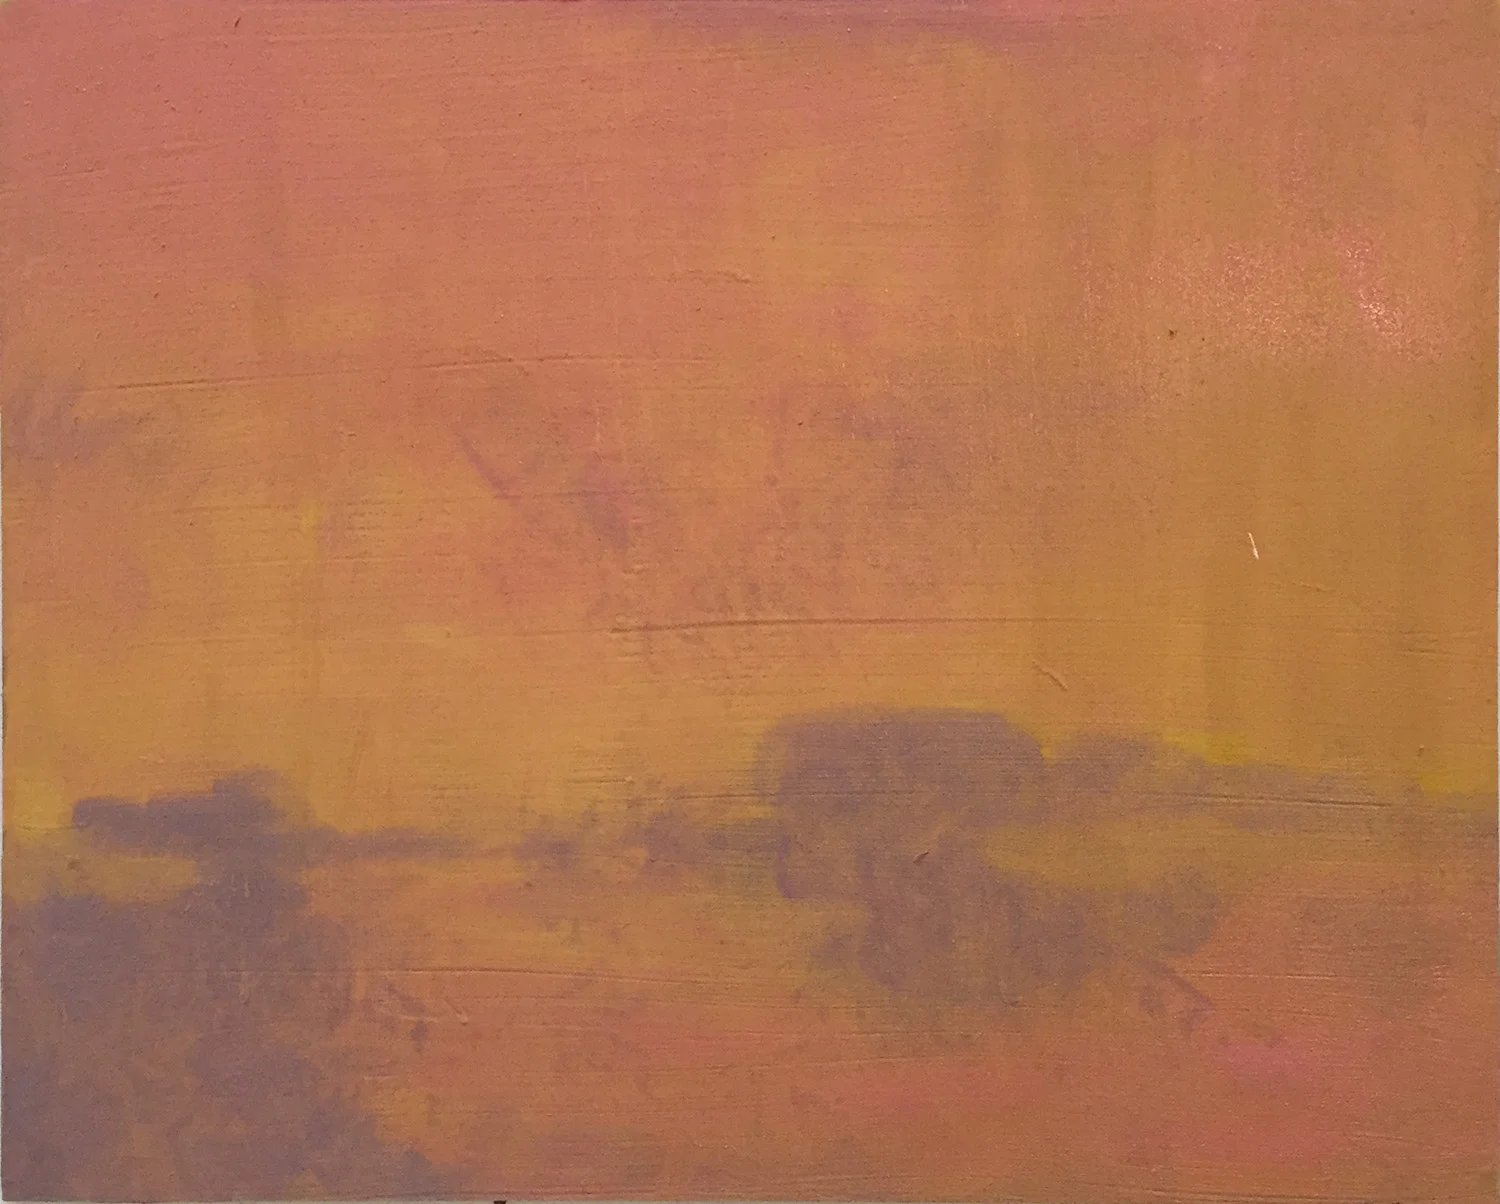
In this post I want to write about the best part of painting – applying the paint! I usually don’t start with a white canvas, instead, I mix a background color (usually in the pinkish family) and dip my brush in mineral spirits to get it nice and thin. Then I brush this all over the canvas. Sometimes I mix a warm and cooler color and apply one for land and one for sky, it just depends. Drips happen sometimes, and I really like that, but I usually take a tissue and wipe everything fairly dry so my actual paint doesn’t mix with the mineral spirity paint.

Yardlight | © Beth Cole | 8 x 10 | Oil on Canvas Panel
This is the fourth in a series about painting with oils, sharing what I have learned so far. You can read the first, second, and third posts here.
Applying Paint
In this post I want to write about the best part of painting – applying the paint! I usually don’t start with a white canvas, instead, I mix a background color (usually in the pinkish family) and dip my brush in mineral spirits to get it nice and thin. Then I brush this all over the canvas. Sometimes I mix a warm and cooler color and apply one for land and one for sky, it just depends. Drips happen sometimes, and I really like that, but I usually take a tissue and wipe everything fairly dry so my actual paint doesn’t mix with the mineral spirity paint.
Next, I mix a darker version of the background wash and sketch in the outline of the composition. Sometimes, I fill in the sketch a little as pictured below.

Thin wash and sketch
After I’m satisfied with the sketch, I wipe the puddle of paint off so the palette is clean for mixing paint.
Mixing and Graying Down Your Paint
Now to mix paint. I look at my reference photo and start mixing the colors I see and want to use.
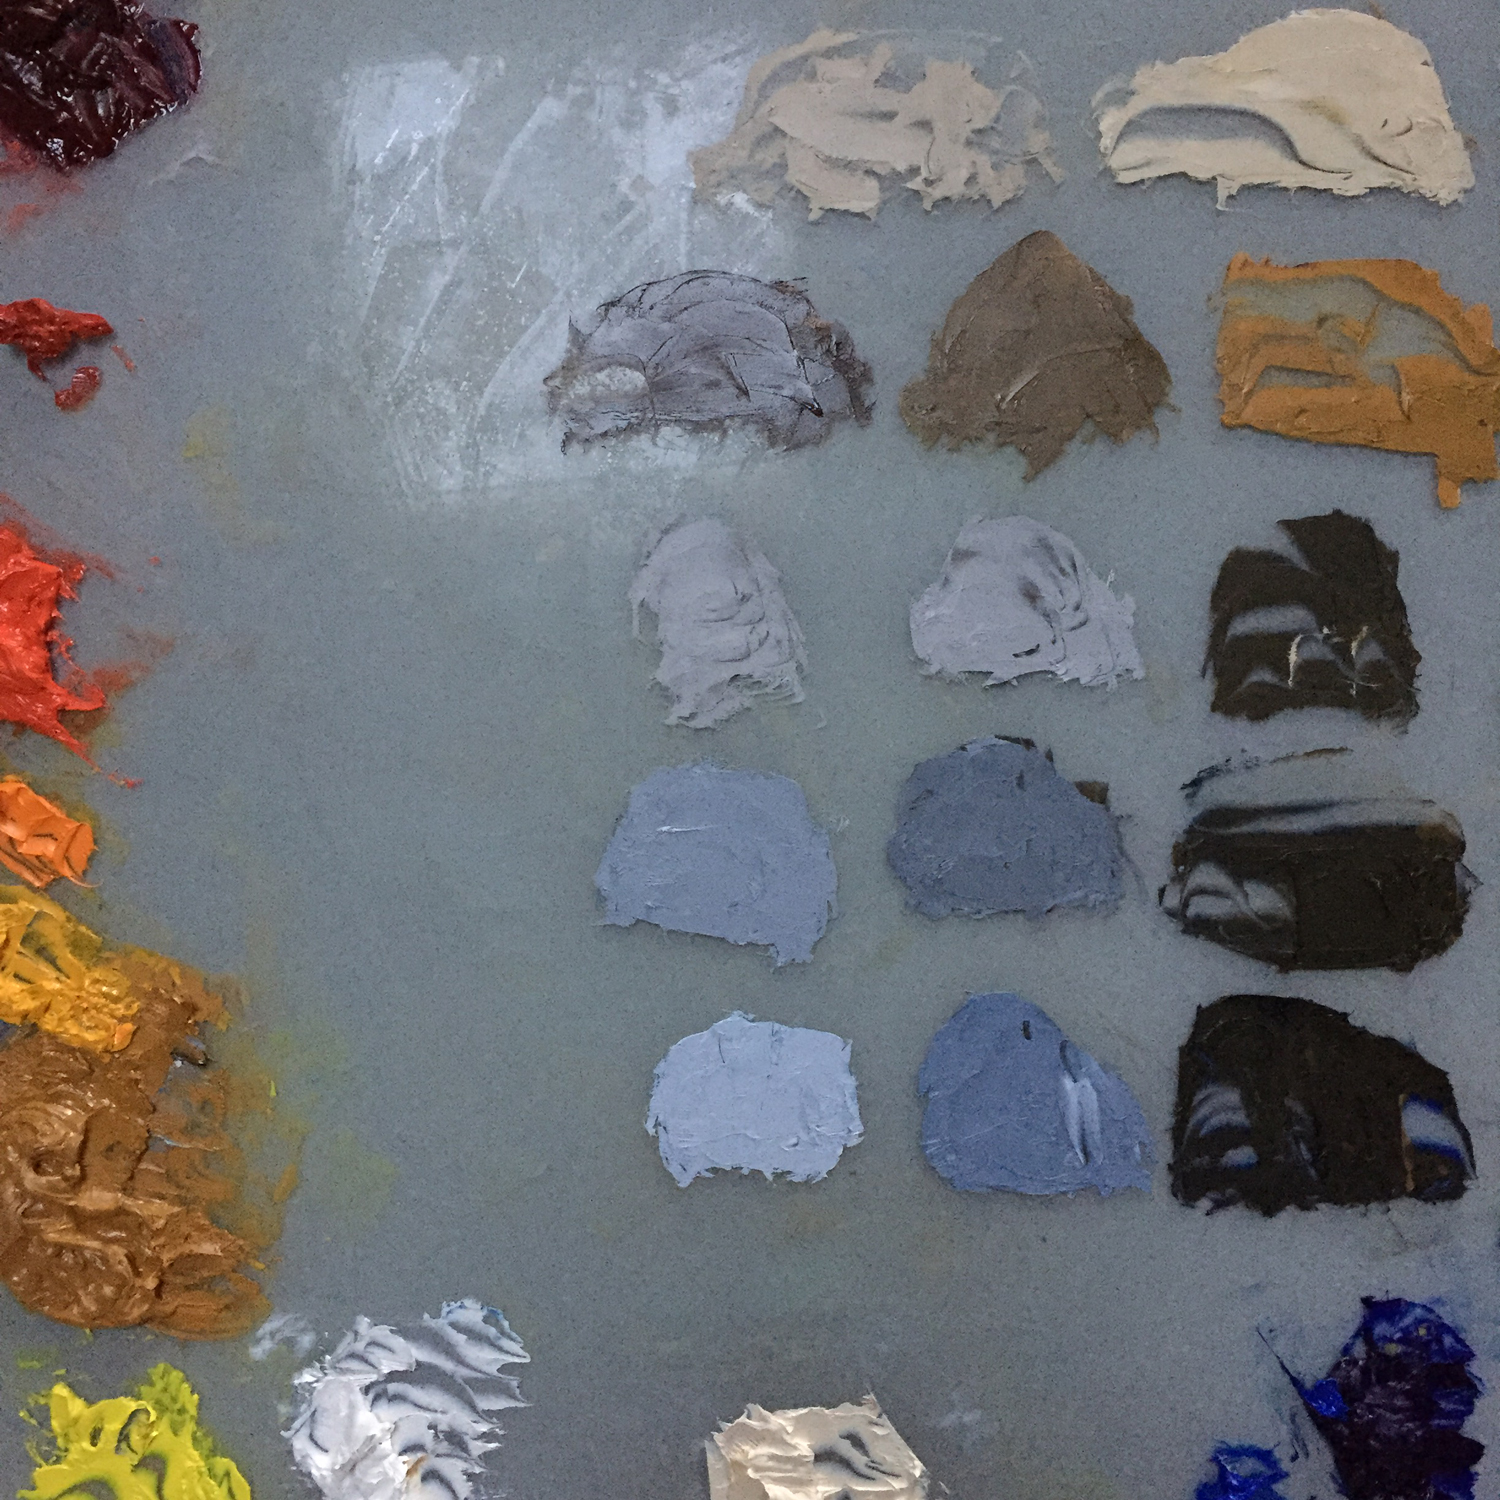
Mixed paint
Most mixtures are too “hot” right out of the tube, so I will usually gray down the color so it appears more natural and realistic. There are a couple of ways to do this.
- You can mix a complement into your color. For example if you are mixing a green and it looks too green, you can mix a little red into it, or if you are mixing a yellow and it’s too bright, mix a little purple in with it. I always keep a color wheel within sight to help me with this. I like the Quiller Color Wheel because it names the paint colors.
--OR--
- The other way I have been graying down colors is a method I learned from Don Finkeldei in his DVD, Painting Large From a Field Study (excellent), and that is to mix three values of a neutral gray that can be added to any paint mixture on your palette. To make the neutral gray, mix ultramarine blue and orange for your dark, then add white to make a middle value gray and a light gray. I have to say, I have been really liking this method and have been using it with most of my recent paintings.
Now, it’s time to paint. The first layers should go on smoothly and easily by dipping the edge of your brush in walnut oil or the medium of your choice and then dipping into the pile of paint. The paint should be thin enough to spread very easily and a little bit will go a long way. Before I learned this, I applied way too much paint because I didn’t understand how to make the paint thin in the first layers. It makes such a difference to use thin paint!
Sometimes I start with the sky and work my way down, remembering that all the values are relative. I usually want the biggest contrast to be at the horizon line, so when I get there with my lightest sky color, I can place my dark next to it and see if it is working and make adjustments from there. Then, I just keep working my way through the painting keeping in mind the colors that are next to each other and testing the values as I go.
The other way I have started many pieces is by painting all the darks first, then working my way to the middle values, then the lightest. This is fine, too. Whatever works for you.
I usually let my first pass of the painting dry a little over night, then I come in the next day with a palette knife and thicker paint on my brush to add texture and more interest. I rarely finish a painting in one day, usually it takes two or three.
Next up, cleaning your brushes and storing paint. Thanks for following along and please let me know if you ever have questions. Happy painting to you!
--Beth

Painting With Oils - Part Three
This is the third in a series on painting with oil, what I have learned so far. You can read the first post here, and the second one here.
Choosing Your Surface
Stretched canvas or canvas panels have been my go to painting surface for most of my painting time with oil. I like this option because both are affordable and easy to find at Hobby Lobby or wherever.
Going Home | ©Beth Cole | Oil on Canvas | 11 x 14
This is the third in a series on painting with oil, what I have learned so far. You can read the first post here, and the second one here.
Choosing Your Surface
Stretched canvas or canvas panels have been my go to painting surface for most of my painting time with oil. I like this option because both are affordable and easy to find at Hobby Lobby or wherever.
Lately, I have experimented with cradled birch panels and gessoed MDF panels and have found both to be wonderful options.
To prepare the MDF board (available at Blick), I apply gesso with a bigger brush using horizontal strokes for one coat, letting that dry, then vertical strokes for the next coat and letting it dry. Sometimes I add a little yellow ochre to the gesso to warm it up, you can do whatever you like
The same process works for a cradled birch panel. What I love about painting on these panels is they are finished as they are, they don’t need to be framed, and they are very sturdy and nice to handle. Sometimes with stretched canvas, the surface has a little give to it and once you have started painting on a solid surface, it’s hard to go back.
Another option for a surface is linen or canvas on gatorboard. I have just ordered my first linen on gatorboard so I don’t have any experience yet, but I will let you know what I think. Many fine artists use this method and I haven’t yet because of the expense. But I’m ready to give it a go.
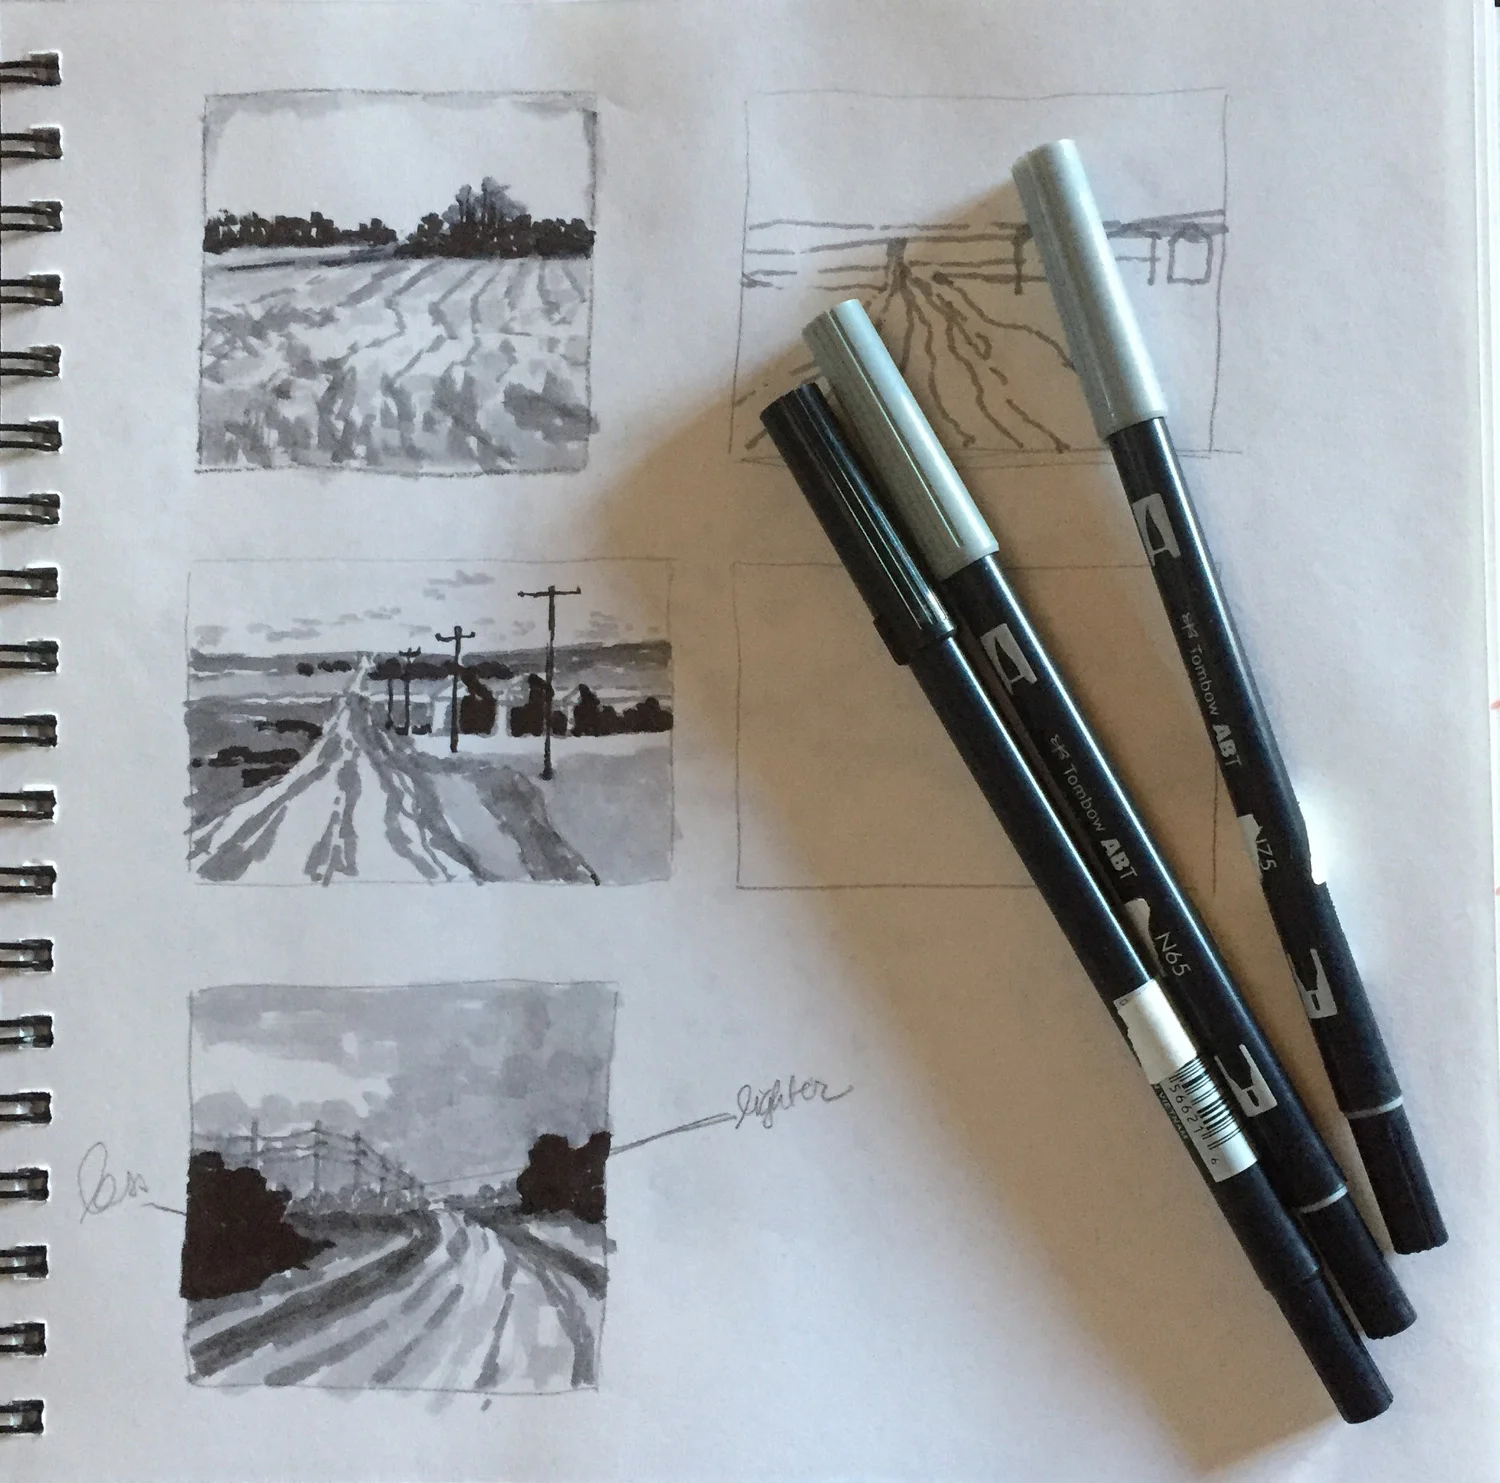
When I am starting a painting, I will usually do a small thumbnail value study using grayscale Tombow markers (black, cool gray N65 and N75). I then use this value study to do a small 8 x 10 color study.
Before I start the painting, I use mineral spirits to create very thin paint and use that to give the whole board a gentle wash as an under painting.
A Gessoed MDF Panel with an Underpainting Wash
Next comes sketching in, I’ll write about this and applying paint, fat over lean, in the next post. Thanks for following along.
-- Beth
Painting With the Masters - Edward Seago
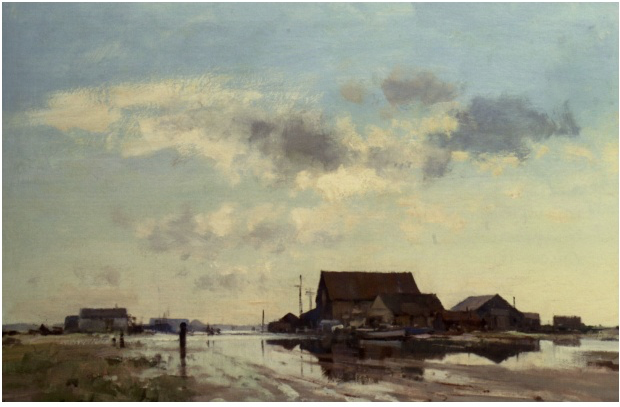
I love this painting by Edward Seago. The grays are so delicate. There is a variety between cool and warm. And the horizon line with the buildings is beautifully painted in such close values. I love the contrast of light and dark - the standing water against the dark buildings. The sky is at once warm and cool and full of lively clouds. I just like the feel of this painting - it takes me there. These are the reasons I chose this painting to study. I have others from Edward Seago that I want to paint in the coming days. There is something about his style that I really like.

The Flooded Roof by Edward Seago
I love this painting by Edward Seago. The grays are so delicate. There is a variety between cool and warm. And the horizon line with the buildings is beautifully painted in such close values. I love the contrast of light and dark - the standing water against the dark buildings. The sky is at once warm and cool and full of lively clouds. I just like the feel of this painting - it takes me there. These are the reasons I chose this painting to study. I have others from Edward Seago that I want to paint in the coming days. There is something about his style that I really like.
I learned so much from this practice. My horizon line ran up hill a little bit so I had to adjust that with my good friend Photoshop. The detail of the painting was tricky. I didn't want to get bogged down in painting the rim of the boat or whatever so I just tried to paint shapes. Seago is truly a master if you look at all the detail in the painting, wowza. I believe his sky was a little warmer and his horizon a little darker.
Here is my version. This was one of my favorite master paintings to study. I look forward to doing more.
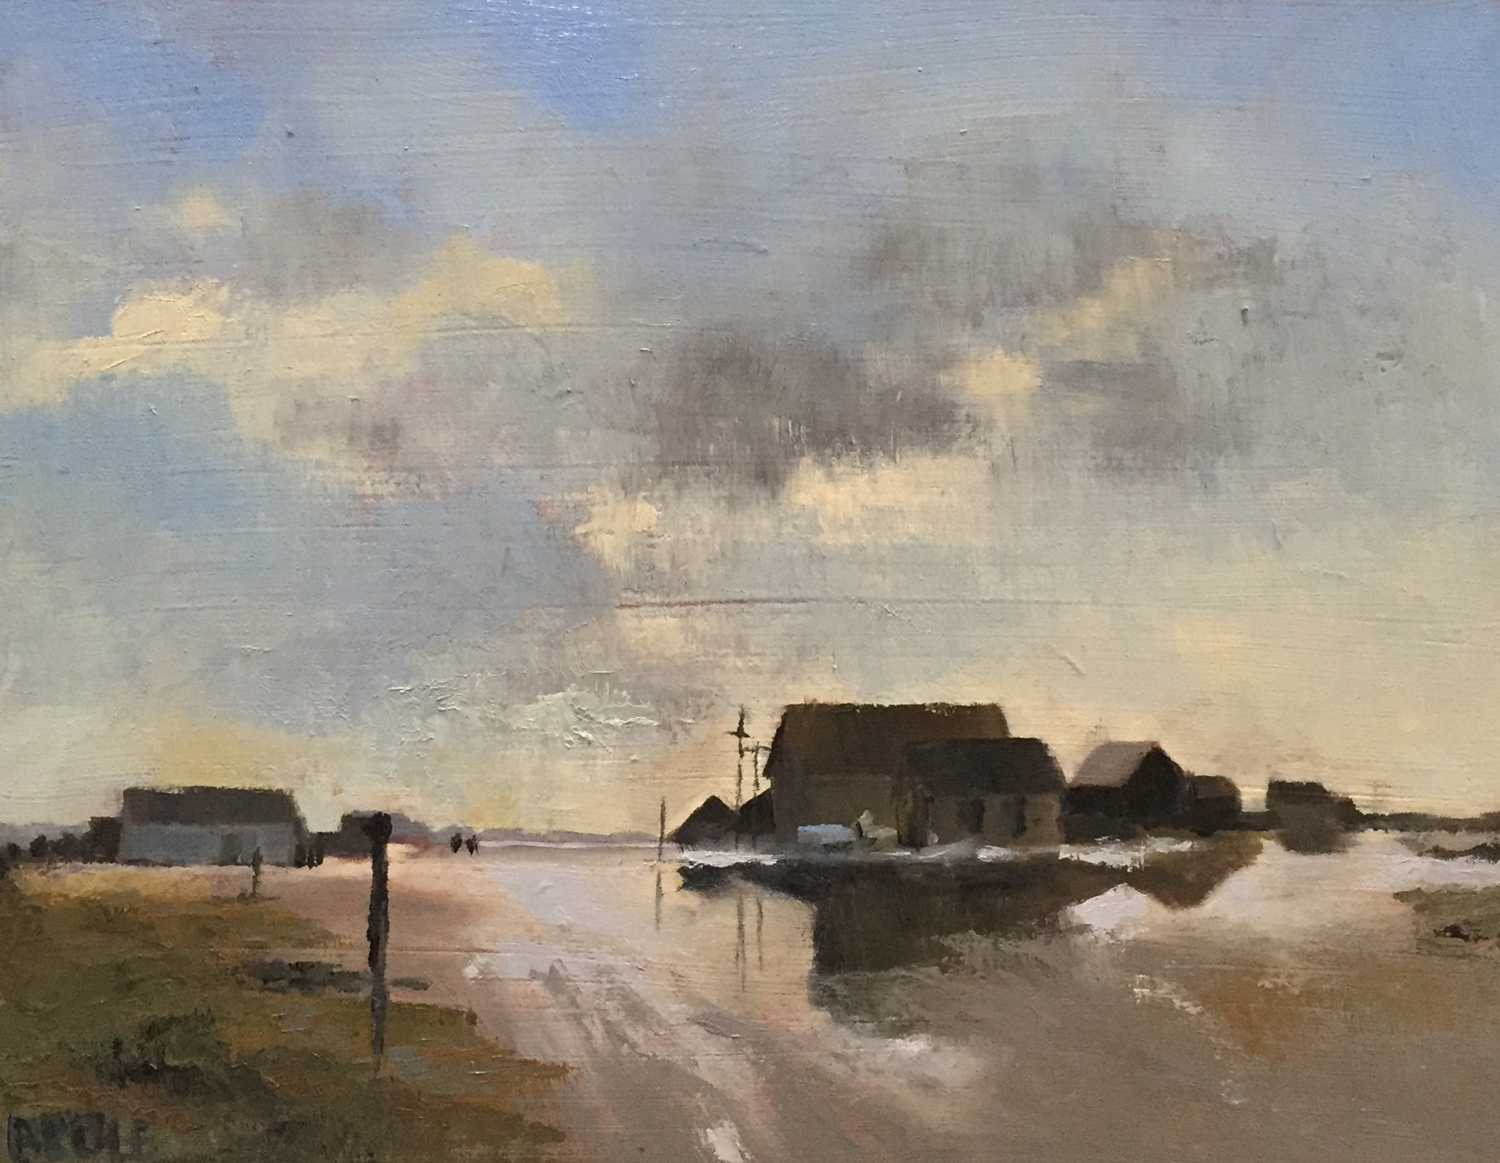
The Flooded Roof, Beth Cole after Edward Seago - 8 x 10, oil on panel
Thanks for following along. Enjoy the day!
--Beth
Soli Deo Gloria
Bonecreek Museum of Agrarian Art Exhibit
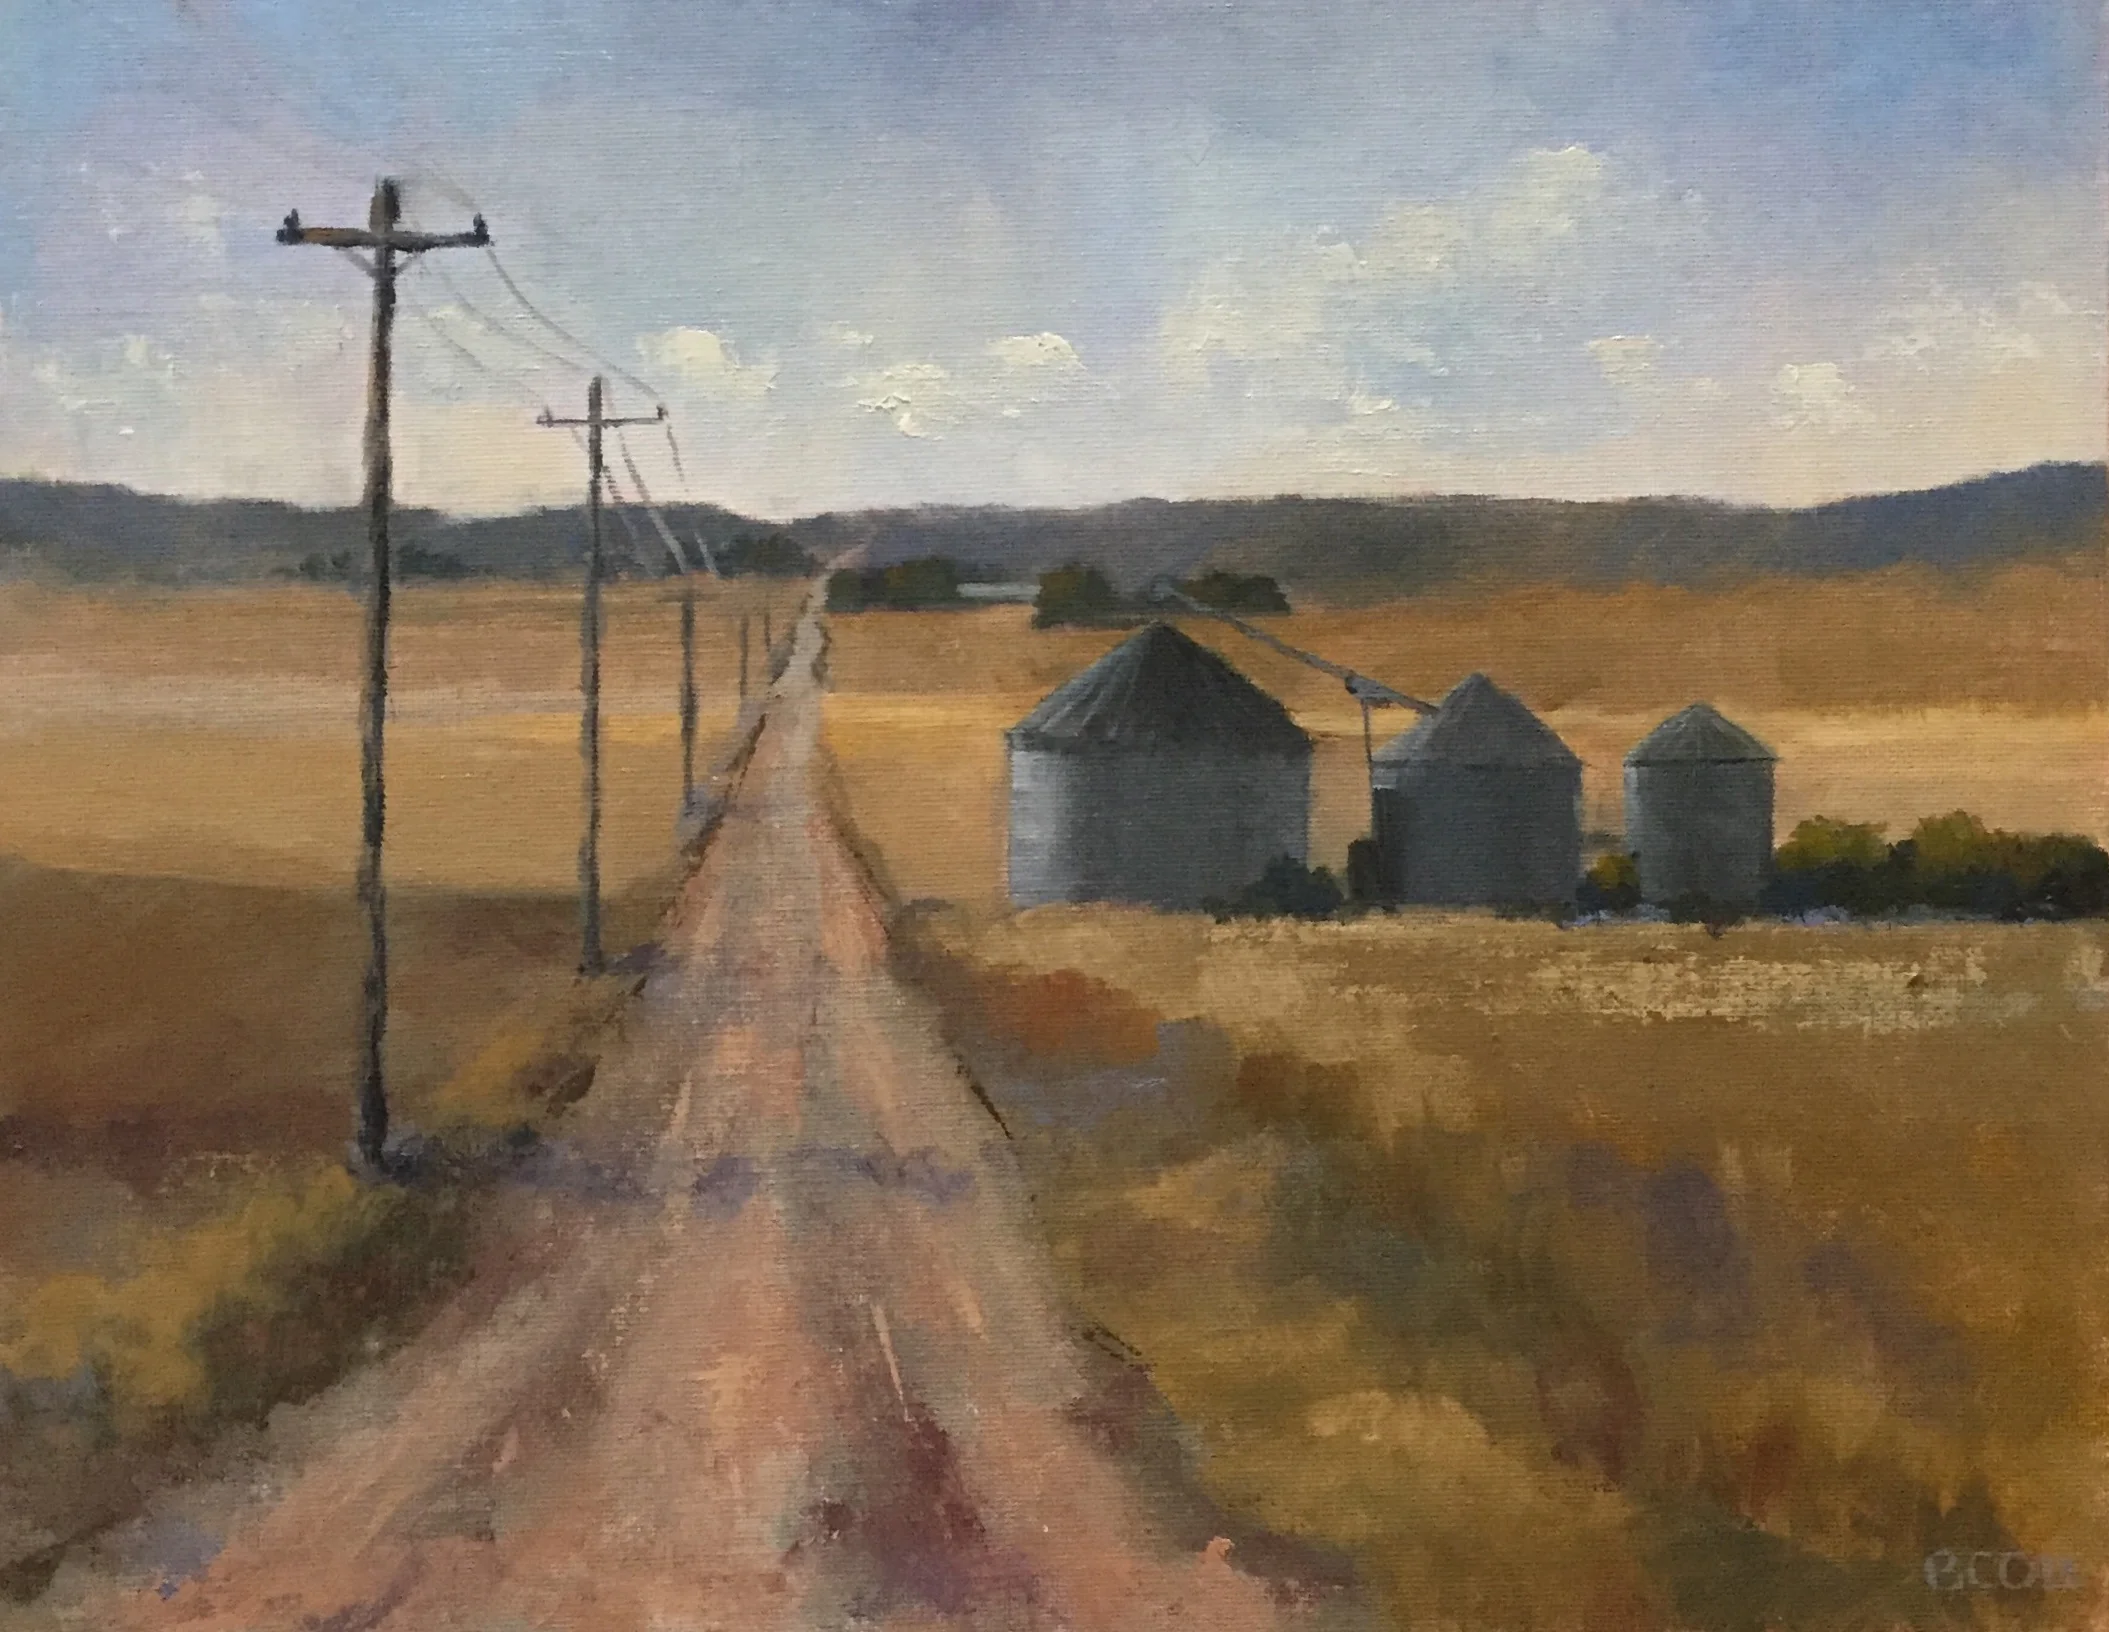
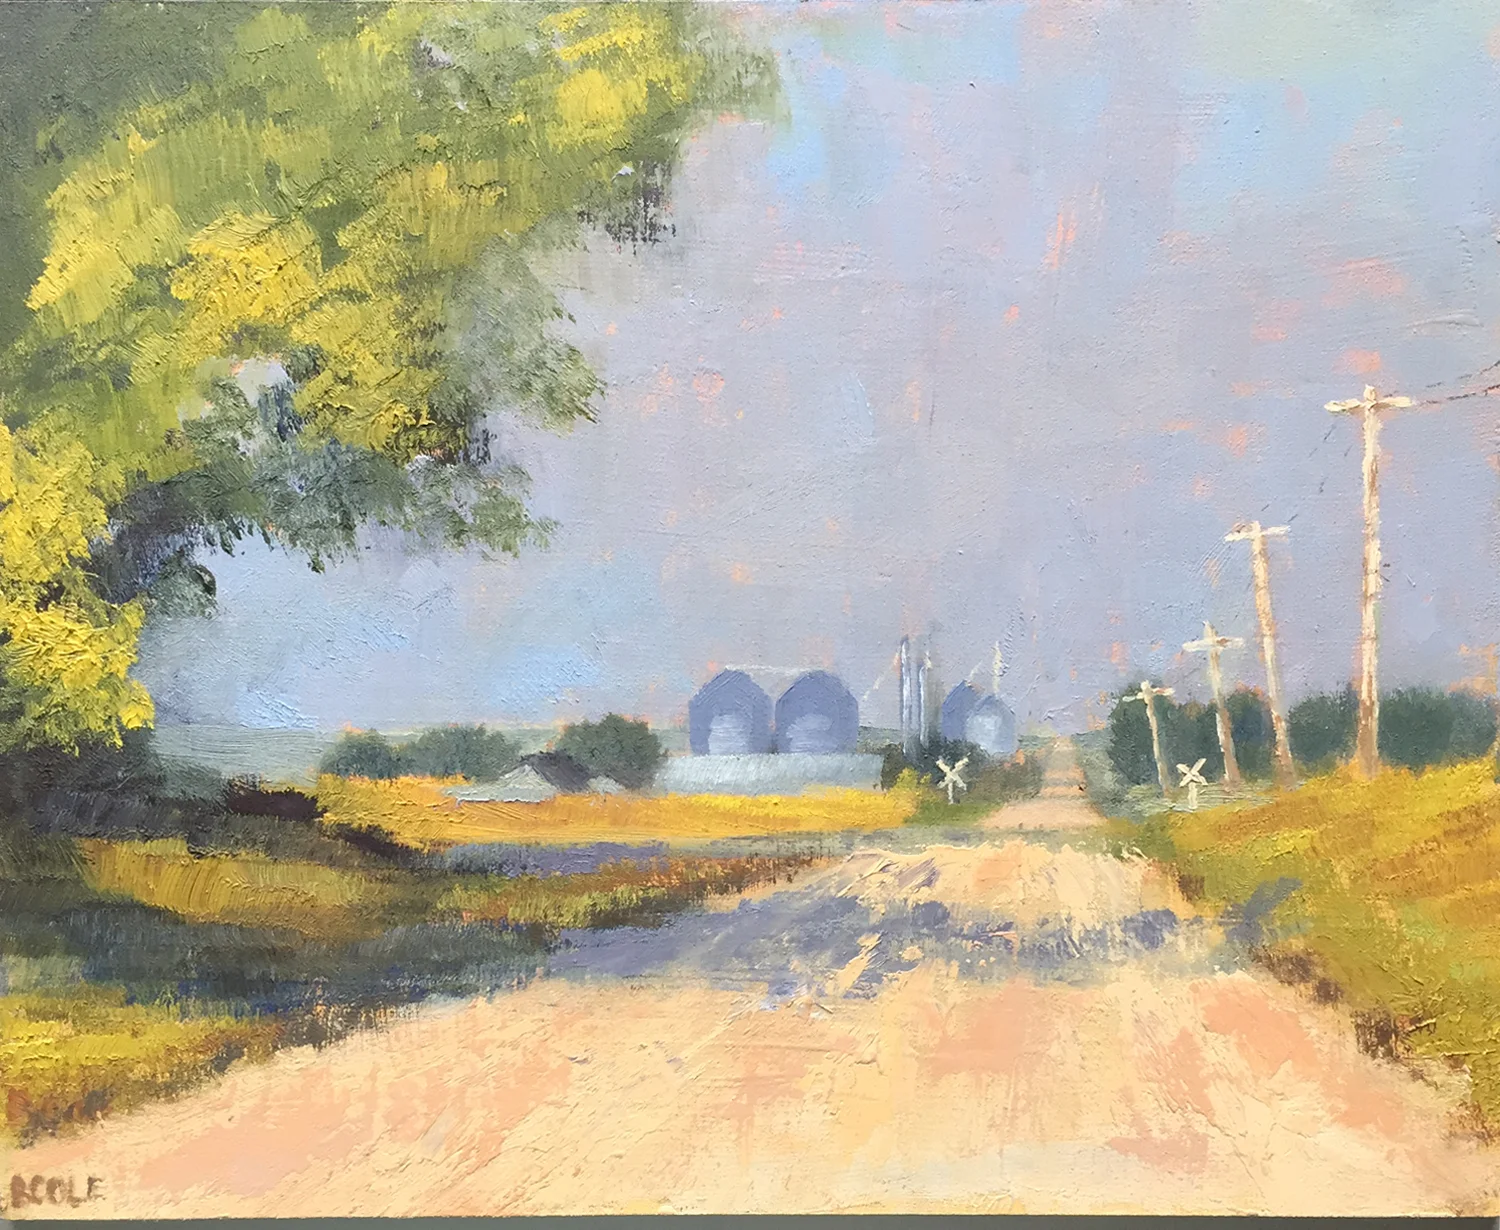
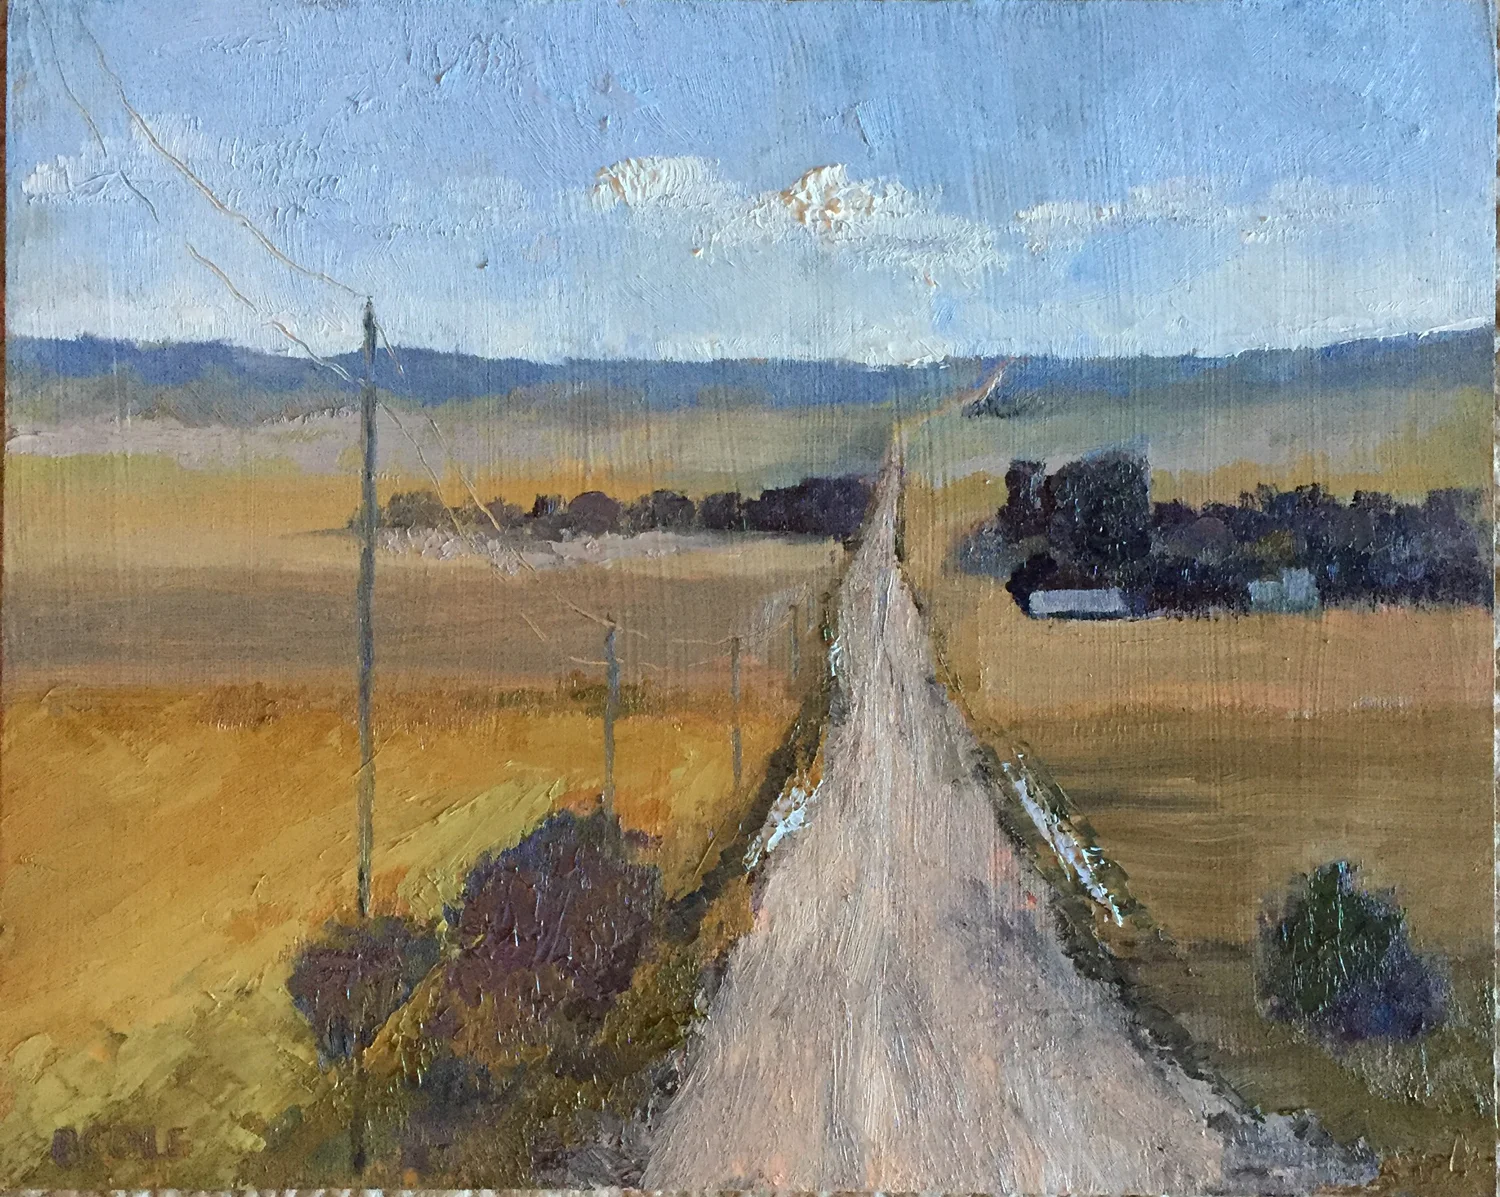
The Bonecreek Museum of Agrarian Art in David City, Nebraska is celebrating Nebraska's 150th birthday with an exhibition titled "150 Artists, 150 Artworks, 150 Years of Nebraska Art in Miniature." My piece, North of Town, was accepted for the exhibition, wahoo, so fun! I am honored and grateful.

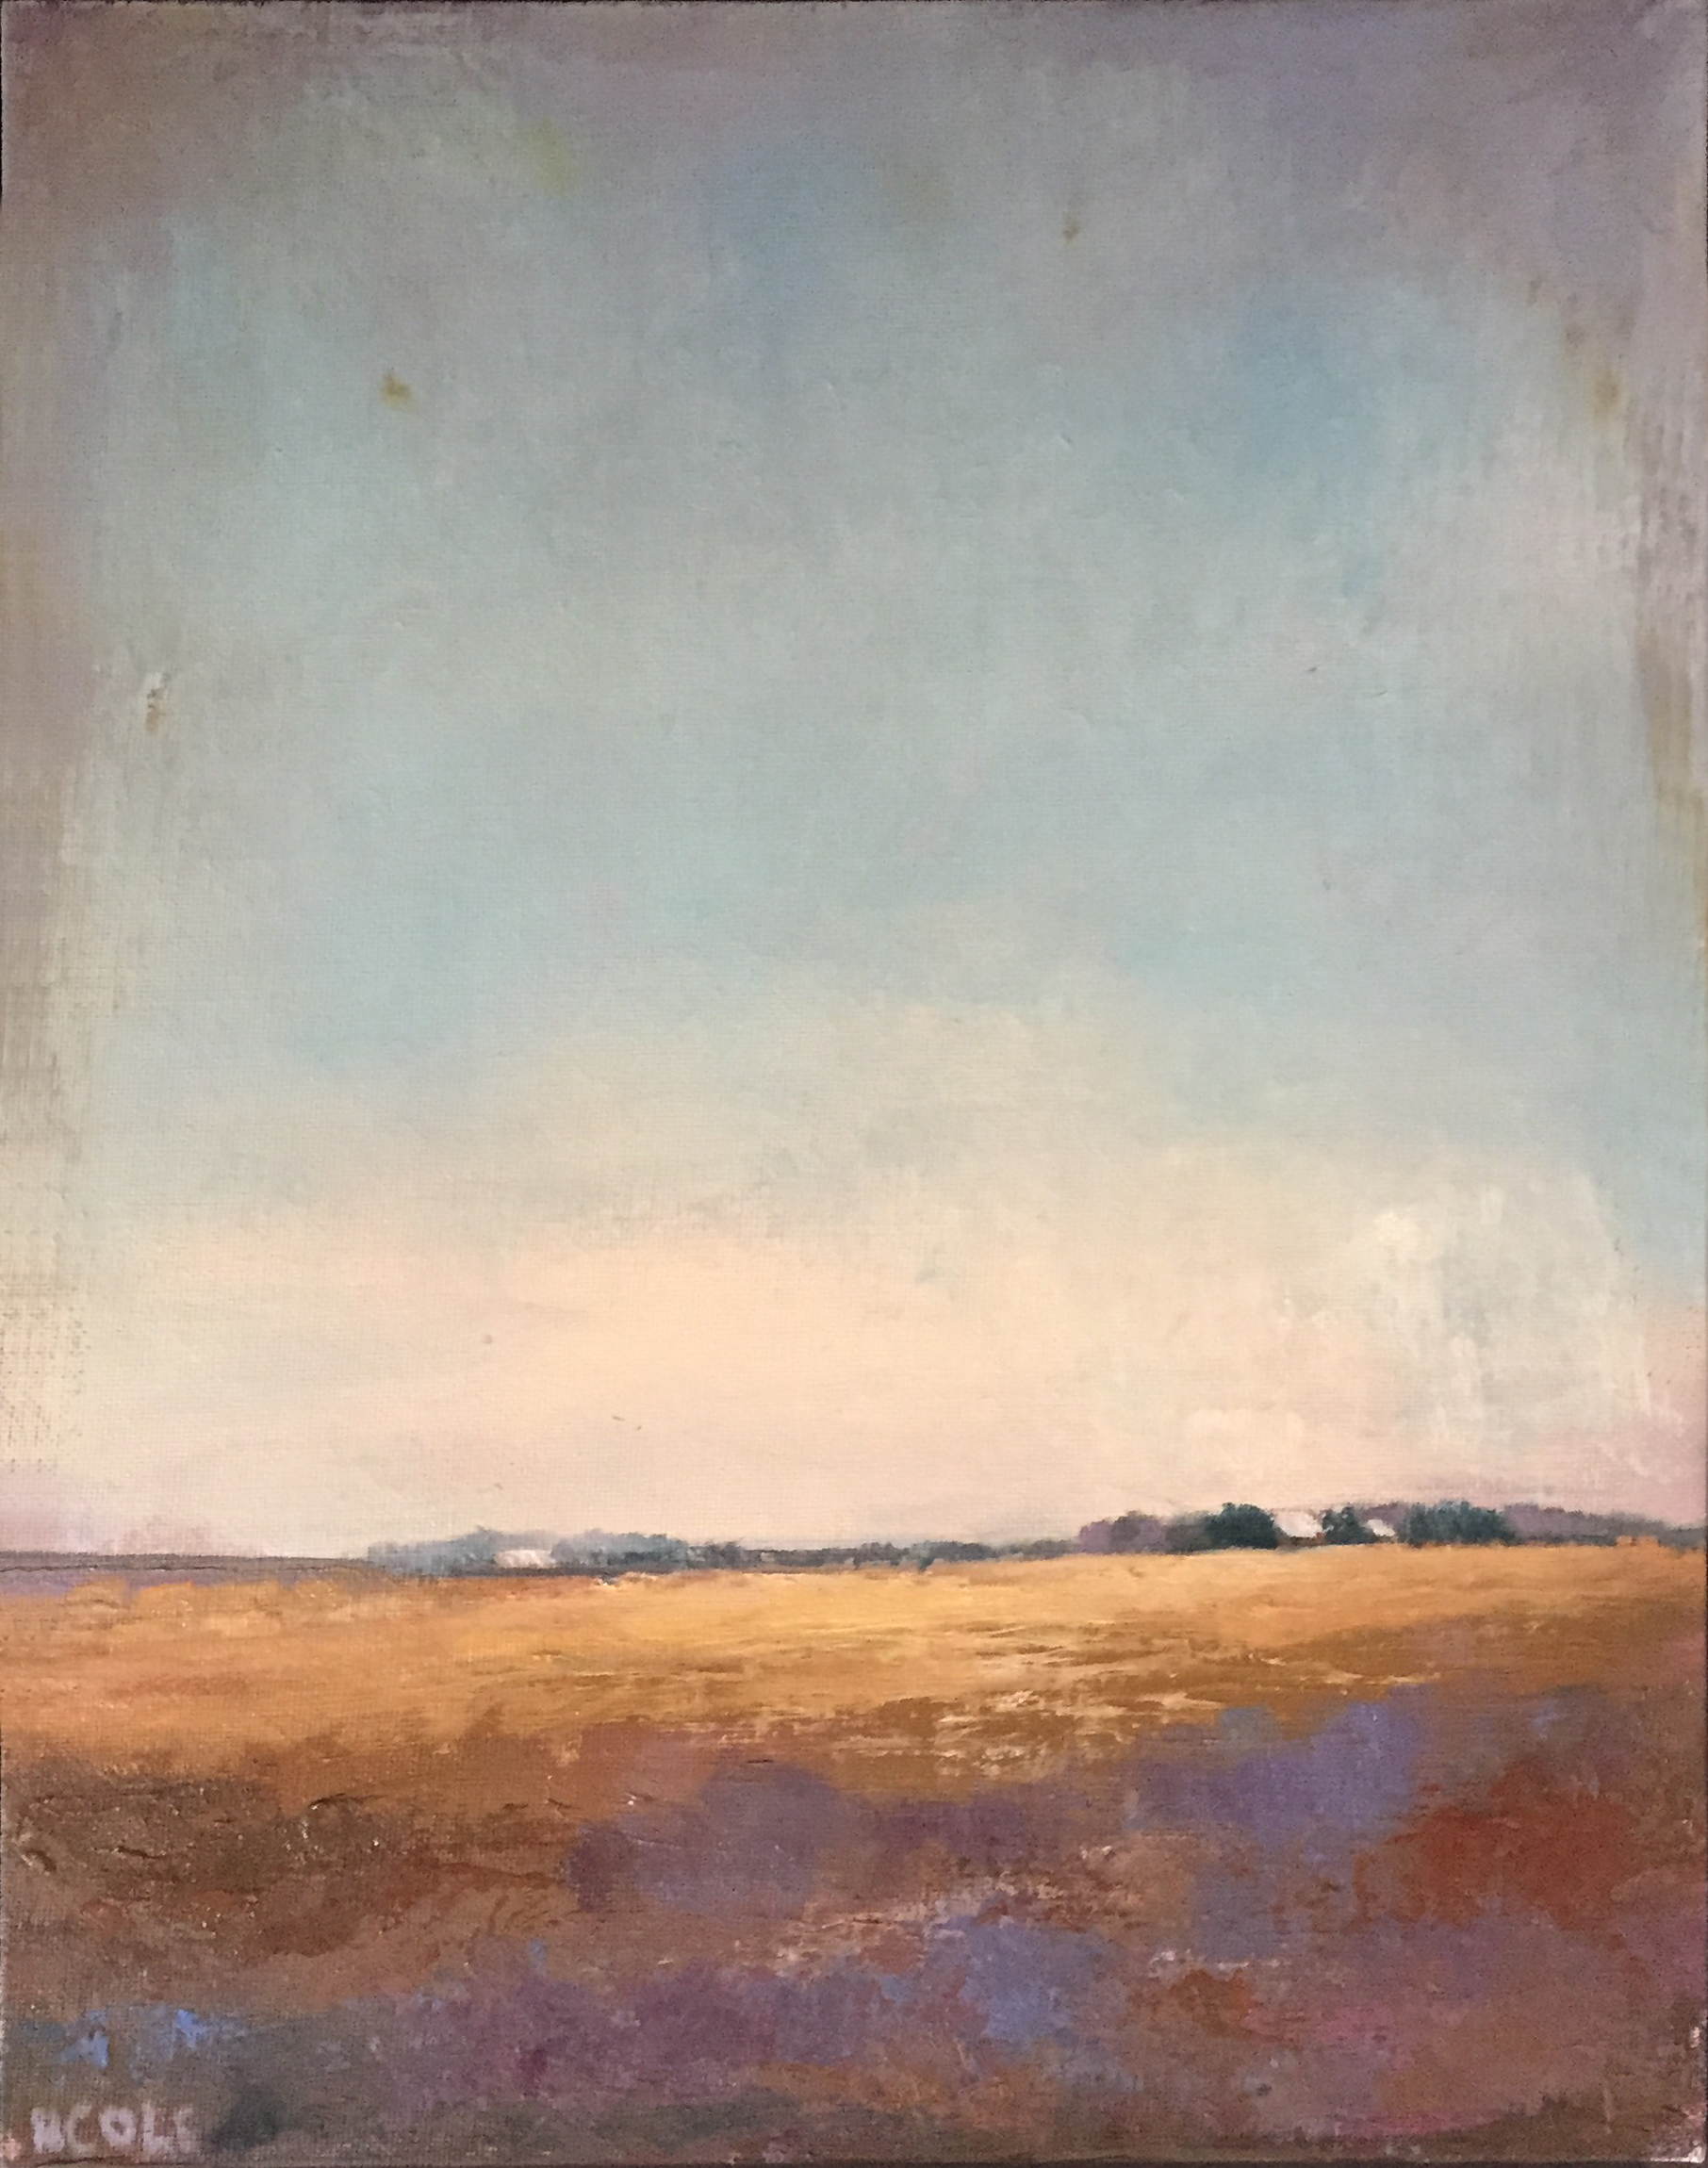
North of Town, Oil on Panel, 8 x 10 © Beth Cole
The Bonecreek Museum of Agrarian Art in David City, Nebraska is celebrating Nebraska's 150th birthday with an exhibition titled "150 Artists, 150 Artworks, 150 Years of Nebraska Art in Miniature." My piece, North of Town, was accepted for the exhibition, wahoo, so fun! I am honored and grateful.
This painting is a scene very close to where we live. It was a foggy morning and I was out and about with my camera. As the fog started to dissipate, the sun came out behind me and lit up the road and the fields with beautiful warm light. The fog was still hanging in the distance making for a dramatic contrast. I'm not sure my painting does it justice. I really enjoyed painting it.
The exhibition with 150 pieces of art will be on display at the museum from May 3 through July 30, 2017, with an artist reception scheduled for July 29, 2017. I'm looking forward to seeing all those artworks. I have visited this museum and it is lovely and would be worth your while to go for a visit. I'll be posting more about that as the time approaches.

Painting With Oils - Part Two
This is the second post in a series I am working on about oil painting. Here is the link to the first post.
Mixing Colors and Using Medium
This post is about mixing colors and using medium in your oil paint.
Nebraska artist Patty Scarborough had some great advice about mixing paint on her blog, she said (and I agree) the best way to learn how to mix colors is hands on experimentation – in other words - trial and error. There really is no substitute.

Untitled, Oil on Canvas, 12 x 12 © Beth Cole
This is the second post in a series I am working on about oil painting. Here is the link to the first post.
Mixing Colors and Using Medium
This post is about mixing colors and using medium in your oil paint.
Nebraska artist Patty Scarborough had some great advice about mixing paint on her blog, she said (and I agree) the best way to learn how to mix colors is hands on experimentation – in other words - trial and error. There really is no substitute.
It is fun to mix colors, it can be addicting. It is especially fun to practice mixing warm and cool colors. This is something I have been learning and doing for the past few months and I believe it has made a big difference in my paintings.
When I first started painting with oil, I did not grasp the concept of temperature in painting, but I am starting to understand it, and it has made a big difference.
These are the basic warm and cool colors I use most often:
- Prussian Blue – Cool
- Ultramarine Blue – Warm
- Cad Yellow Light – Cool
- Yellow Ochre – Warm
- Alizarin Crimson – Cool
- Cad Red Light – Warm
- Titanium White
- Warm White
You might try mixing a warm and cool version of each color you want to use in your painting. It can add interest and sophistication to your work.
Now, what about using medium with oil paint?
When I first started my art journey I painted with acrylic and so I learned about using matte medium with the paint to extend it and make it more transparent. When I started transitioning to oil, I loved how buttery the paint was without any medium and I loved how long it would stay open so I could go back and make changes. I didn’t understand the concept of painting fat over lean, in other words using really thin paint to begin with, then building up the layers as you go. So, in order to paint lean you need to use some type of oil medium to thin the paint down.
There are plenty of choices when it comes to medium, I have tried walnut oil and solvent free gel by Gamblin. Walnut oil is nice because it is a natural oil, does not have an odor (unless it sits out too long and goes rancid, I have not experienced this but I read it is something to watch out for). To keep walnut oil longer, other artists recommend keeping it in the refrigerator.
Clove oil is another oil that I have tried and I really like it, but it is hard to find so I have only used it once in a workshop (Todd Williams – excellent). It is on my list to try again this year.
If I’m using walnut oil, before I begin a piece, I make sure I squeeze out new paint and add a few drops of walnut oil to each pile. Then I mix the oil in so it’s nice and fluffy, like frosting. I’m not sure if this is the best way to use walnut oil, but it has worked okay for me.
To use the solvent-free gel, I squeeze it onto the palette and mix as I begin painting. I try to mix all my colors before I ever start painting. This helps me keep a unified palette and make sure the colors go together. One instructor I had said, look at your palette and ask yourself if you would wear those colors together? If so, you are on the right track. I always think about this when I am mixing colors.
That’s about it, if you have any color mixing or oil medium tips to share, I would love to hear them, please do comment.
Next up, I will write about oil painting surfaces.
Thanks for reading along, I am grateful for you.
--Beth
Painting With Oils - Part One
This is the first in a series of articles I want to write about painting with oils. Before I started painting with oils I was pretty intimidated. Tales of trash cans bursting into flame and toxic materials with strict handling rules kept me tiptoeing around them for sure.
But as I have continued to study master artists and great paintings that I really like, most of them are done in oil. So, a few years ago, I started learning more about the process of oil painting and while I certainly don’t know it all, I am happy to share what I have learned.
What I Have Learned So Far About Painting With Oils

(Work in Progress) - Oil on Panel - 8 x 10 - © Beth Cole
This is the first in a series of articles I want to write about painting with oils. Before I started painting with oils I was pretty intimidated. Tales of trash cans bursting into flame and toxic materials with strict handling rules kept me tiptoeing around them for sure.
But as I have continued to study master artists and great paintings that I really like, most of them are done in oil. So, a few years ago, I started learning more about the process of oil painting and while I certainly don’t know it all, I am happy to share what I have learned.
What Paint to Buy
There is a difference in paint quality. If you are just experimenting and on a budget, the student grade or tinted varieties might get you by (i.e. Winton), but for serious and intentional painting, I think it is best to purchase the best quality you can afford.
I have tried Rembrandt, Winsor & Newton, and Gamblin – they are all quite nice.
Gamblin, I think, is a bit stiffer than the two other brands, but I like the consistency of the product line, most of my paint is Gamblin. I really love the Rembrandt paints, and may start working them in more and more to my palette.
As far as setting up the palette, I use a 16 x 20 piece of glass that my husband bought from the local glass store. I like it because it is easy to clean with a razor blade tool.

I try to keep color families together and I separate the cooler colors from the warmer with the whites. So in the lower left corner are blues and greens, then warm white and cool white, then on the top side of the palette, yellows, orange and red. If I use earthy colors like raw umber, burnt sienna or asphaltum, they go together on far top right. I don't always use those, just once in awhile. My palette is not so tidy like other people's I have seen.
My go-to colors are Ultramarine Blue, Cobalt Blue, Warm White, Titanium White, Cadmium Yellow Light (sometimes Cad Yellow Deep), Yellow Ochre, Transparent Orange (mostly for mixing), Cadmium Red Light, Alizarin Crimson, Transparent Red Oxide. I will use a touch of Prussian Blue or Veridian from time to time as well. I have found by limiting my palette to warm and cool of each of the primary colors, I am able to mix a wide variety of shades including grays.
If I will be out of the studio for more than a day, I pick up the whole palette and place it in my deep freeze. This is a great way to keep your paint fresh and usable for the next session. Works like a charm.
Next up, mixing colors and using medium.
Thanks for following along, I am grateful for you!
--Beth

Painting With the Masters - Frits Thaulow
Frits Thaulow was a Norwegian impressionist painter. I learned of him through the book Landscape Painting by Asher Durand and Birge Harrison. He was praised by Harrison for the way he painted water, and I agree, what a master he is!

Nordfransk Elveparti by Frits Thaulow
Frits Thaulow was a Norwegian impressionist painter. I learned of him through the book Landscape Painting by Asher Durand and Birge Harrison. He was praised by Harrison for the way he painted water, and I agree, what a master he is!
I have never tried to paint something as complicated and detailed as this, so it was an excellent exercise for me. I especially loved how he created such texture on the buildings, when I look at this painting, I feel like I am transported to that place and time. I also love the depth of the water and the reflections, so perfect.
I learned PATIENCE above all with this painting. It took me quite awhile. And it's far from the original, mine is a little brighter in tone and I left out the tree at the end because I didn't really care for it.

Nordfransk Elveparti, Beth Cole after Frits Thaulow, Oil on Panel, 8 x 10
Thanks for taking a look. If you are interested in the others in this series, here are the links in order.
- Sanford Gifford
- George Inness
- Alexei Savrasov
- John Frederick Kensett
- Robert Henri
- Alexei Savrasov
- John Frederick Kensett
- Birge Harrison
Enjoy the day, my friend.
-Beth
Soli Deo Gloria

A Travelogue of Sorts
We have been wandering the backroads between Nebraska and Texas via Highway 183. Our destination was a photography expo in San Antonio (my husband is a photographer).

We have been wandering the backroads between Nebraska and Texas via Highway 183. Our destination was a photography expo in San Antonio (my husband is a photographer).
Man. It was a long drive. But it was all good.
I wanted to share some bits and pieces of our experience.
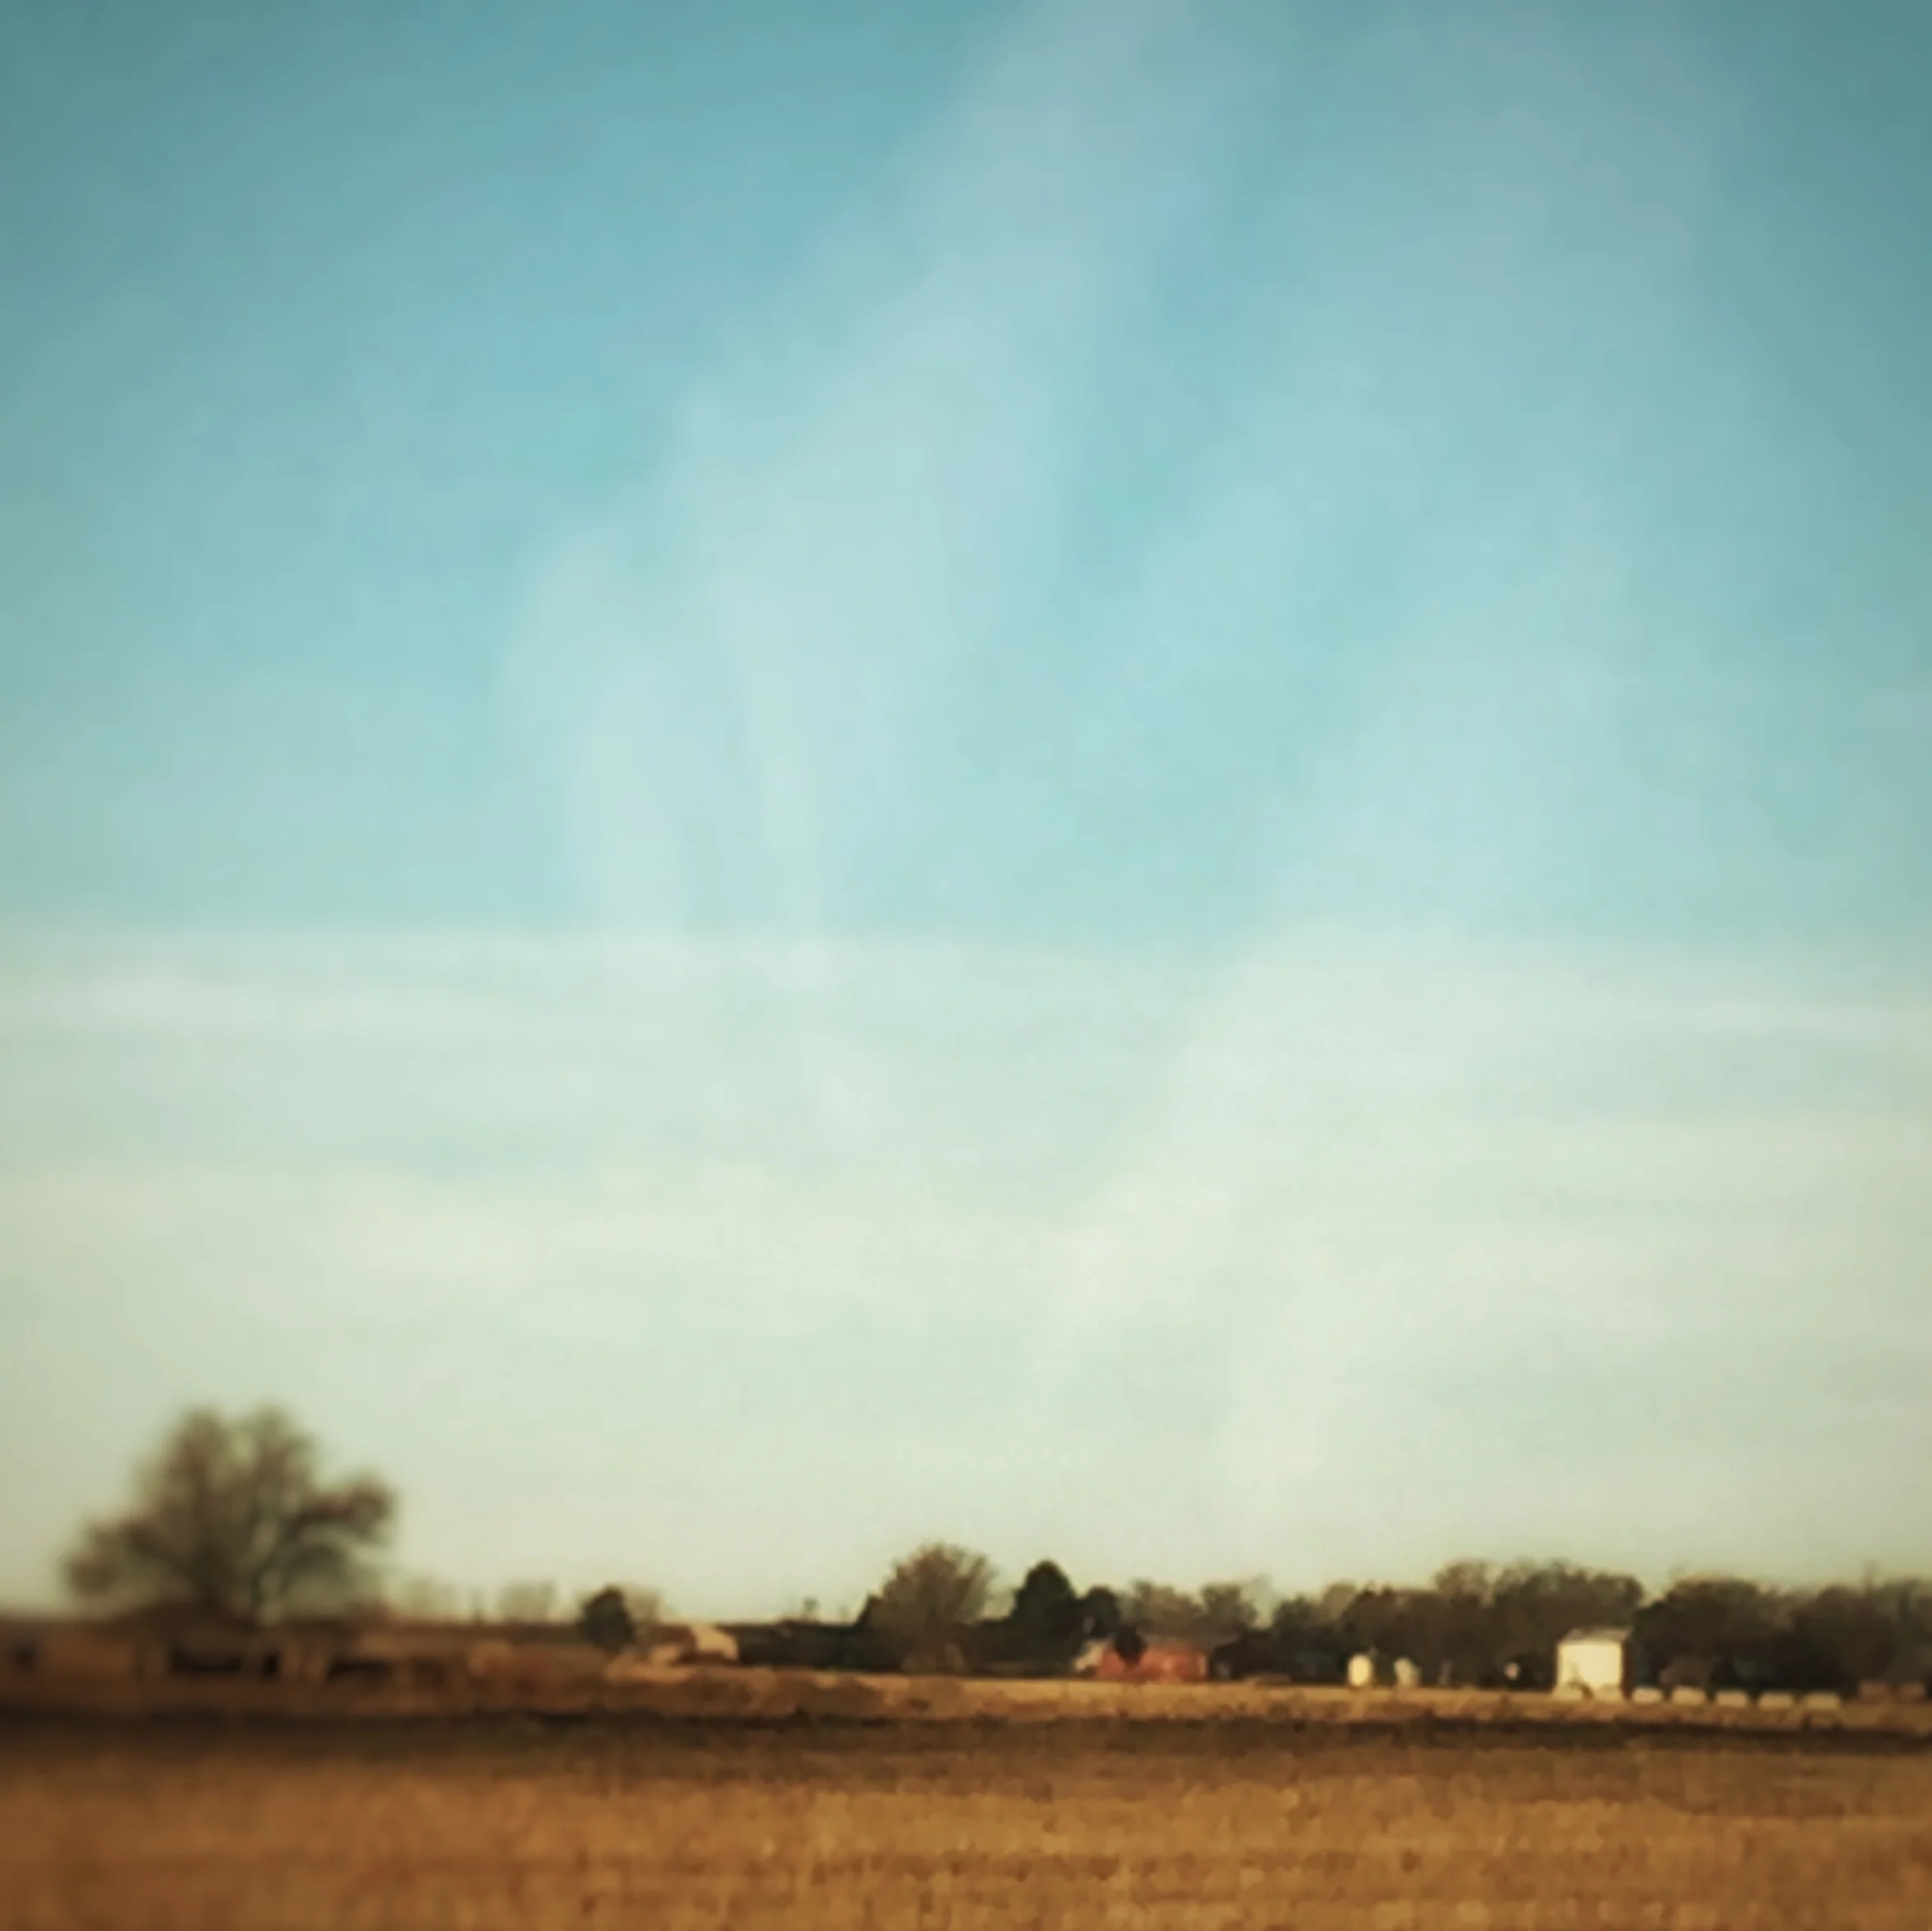
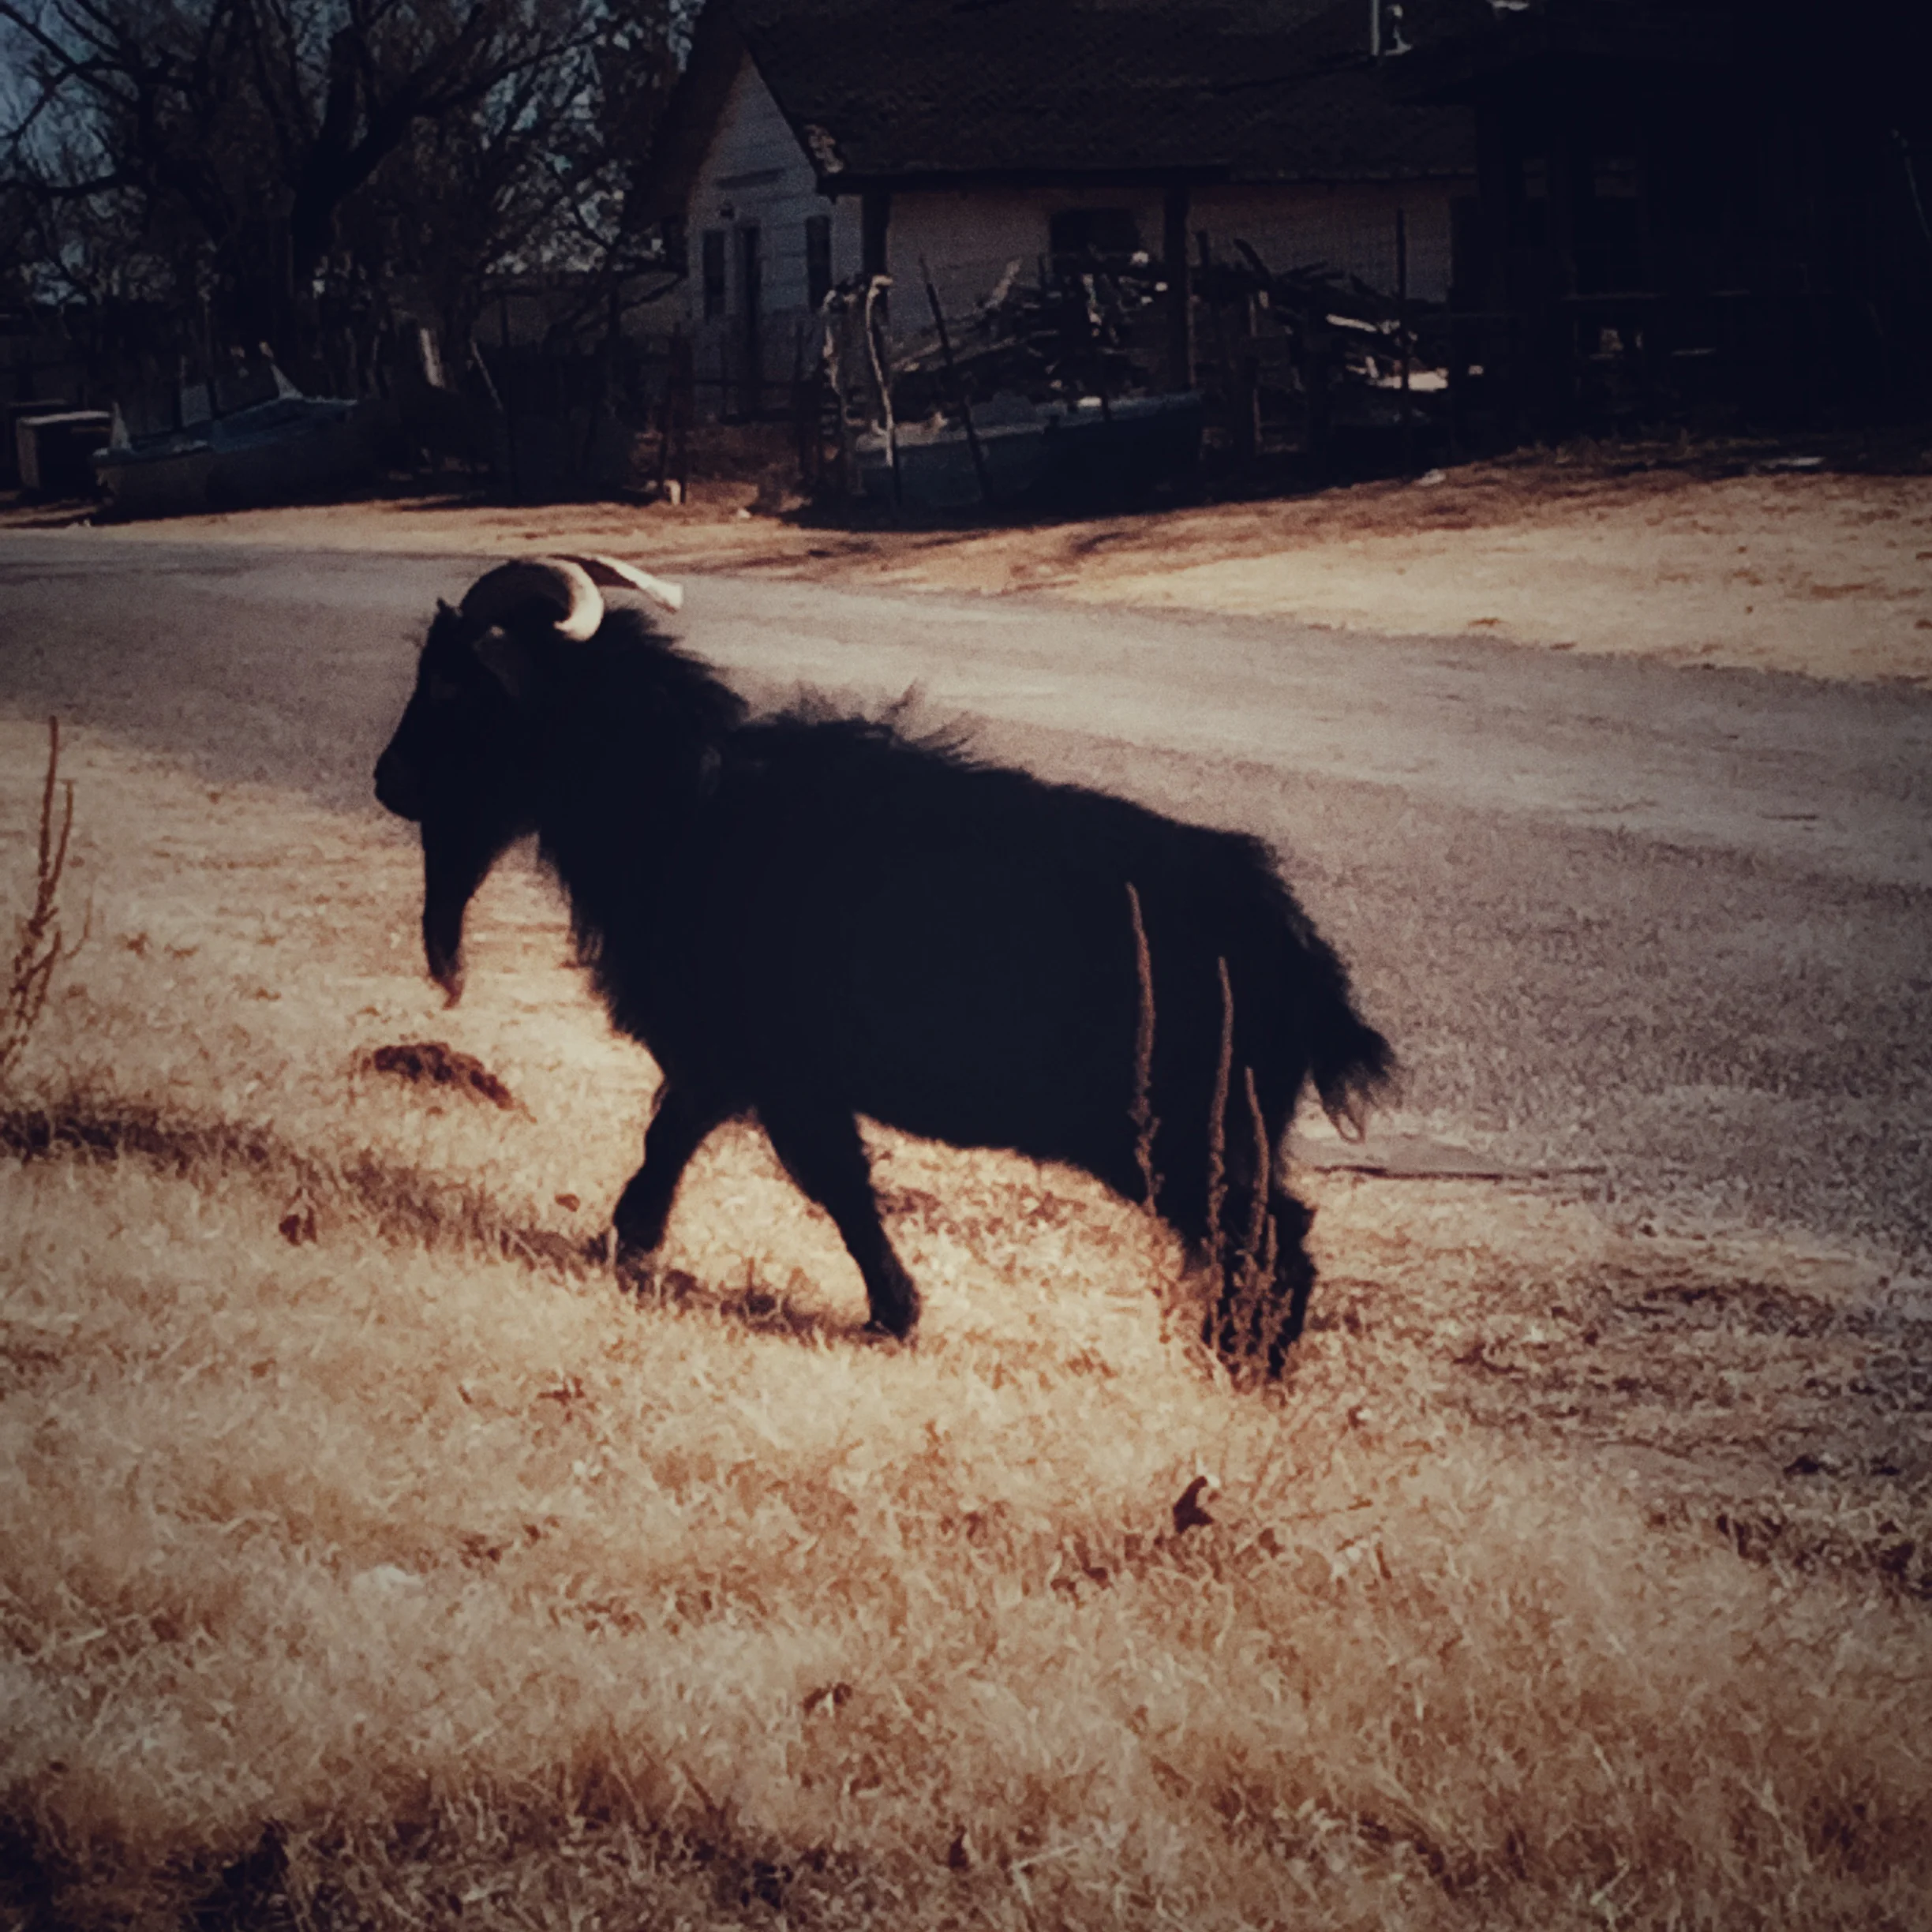
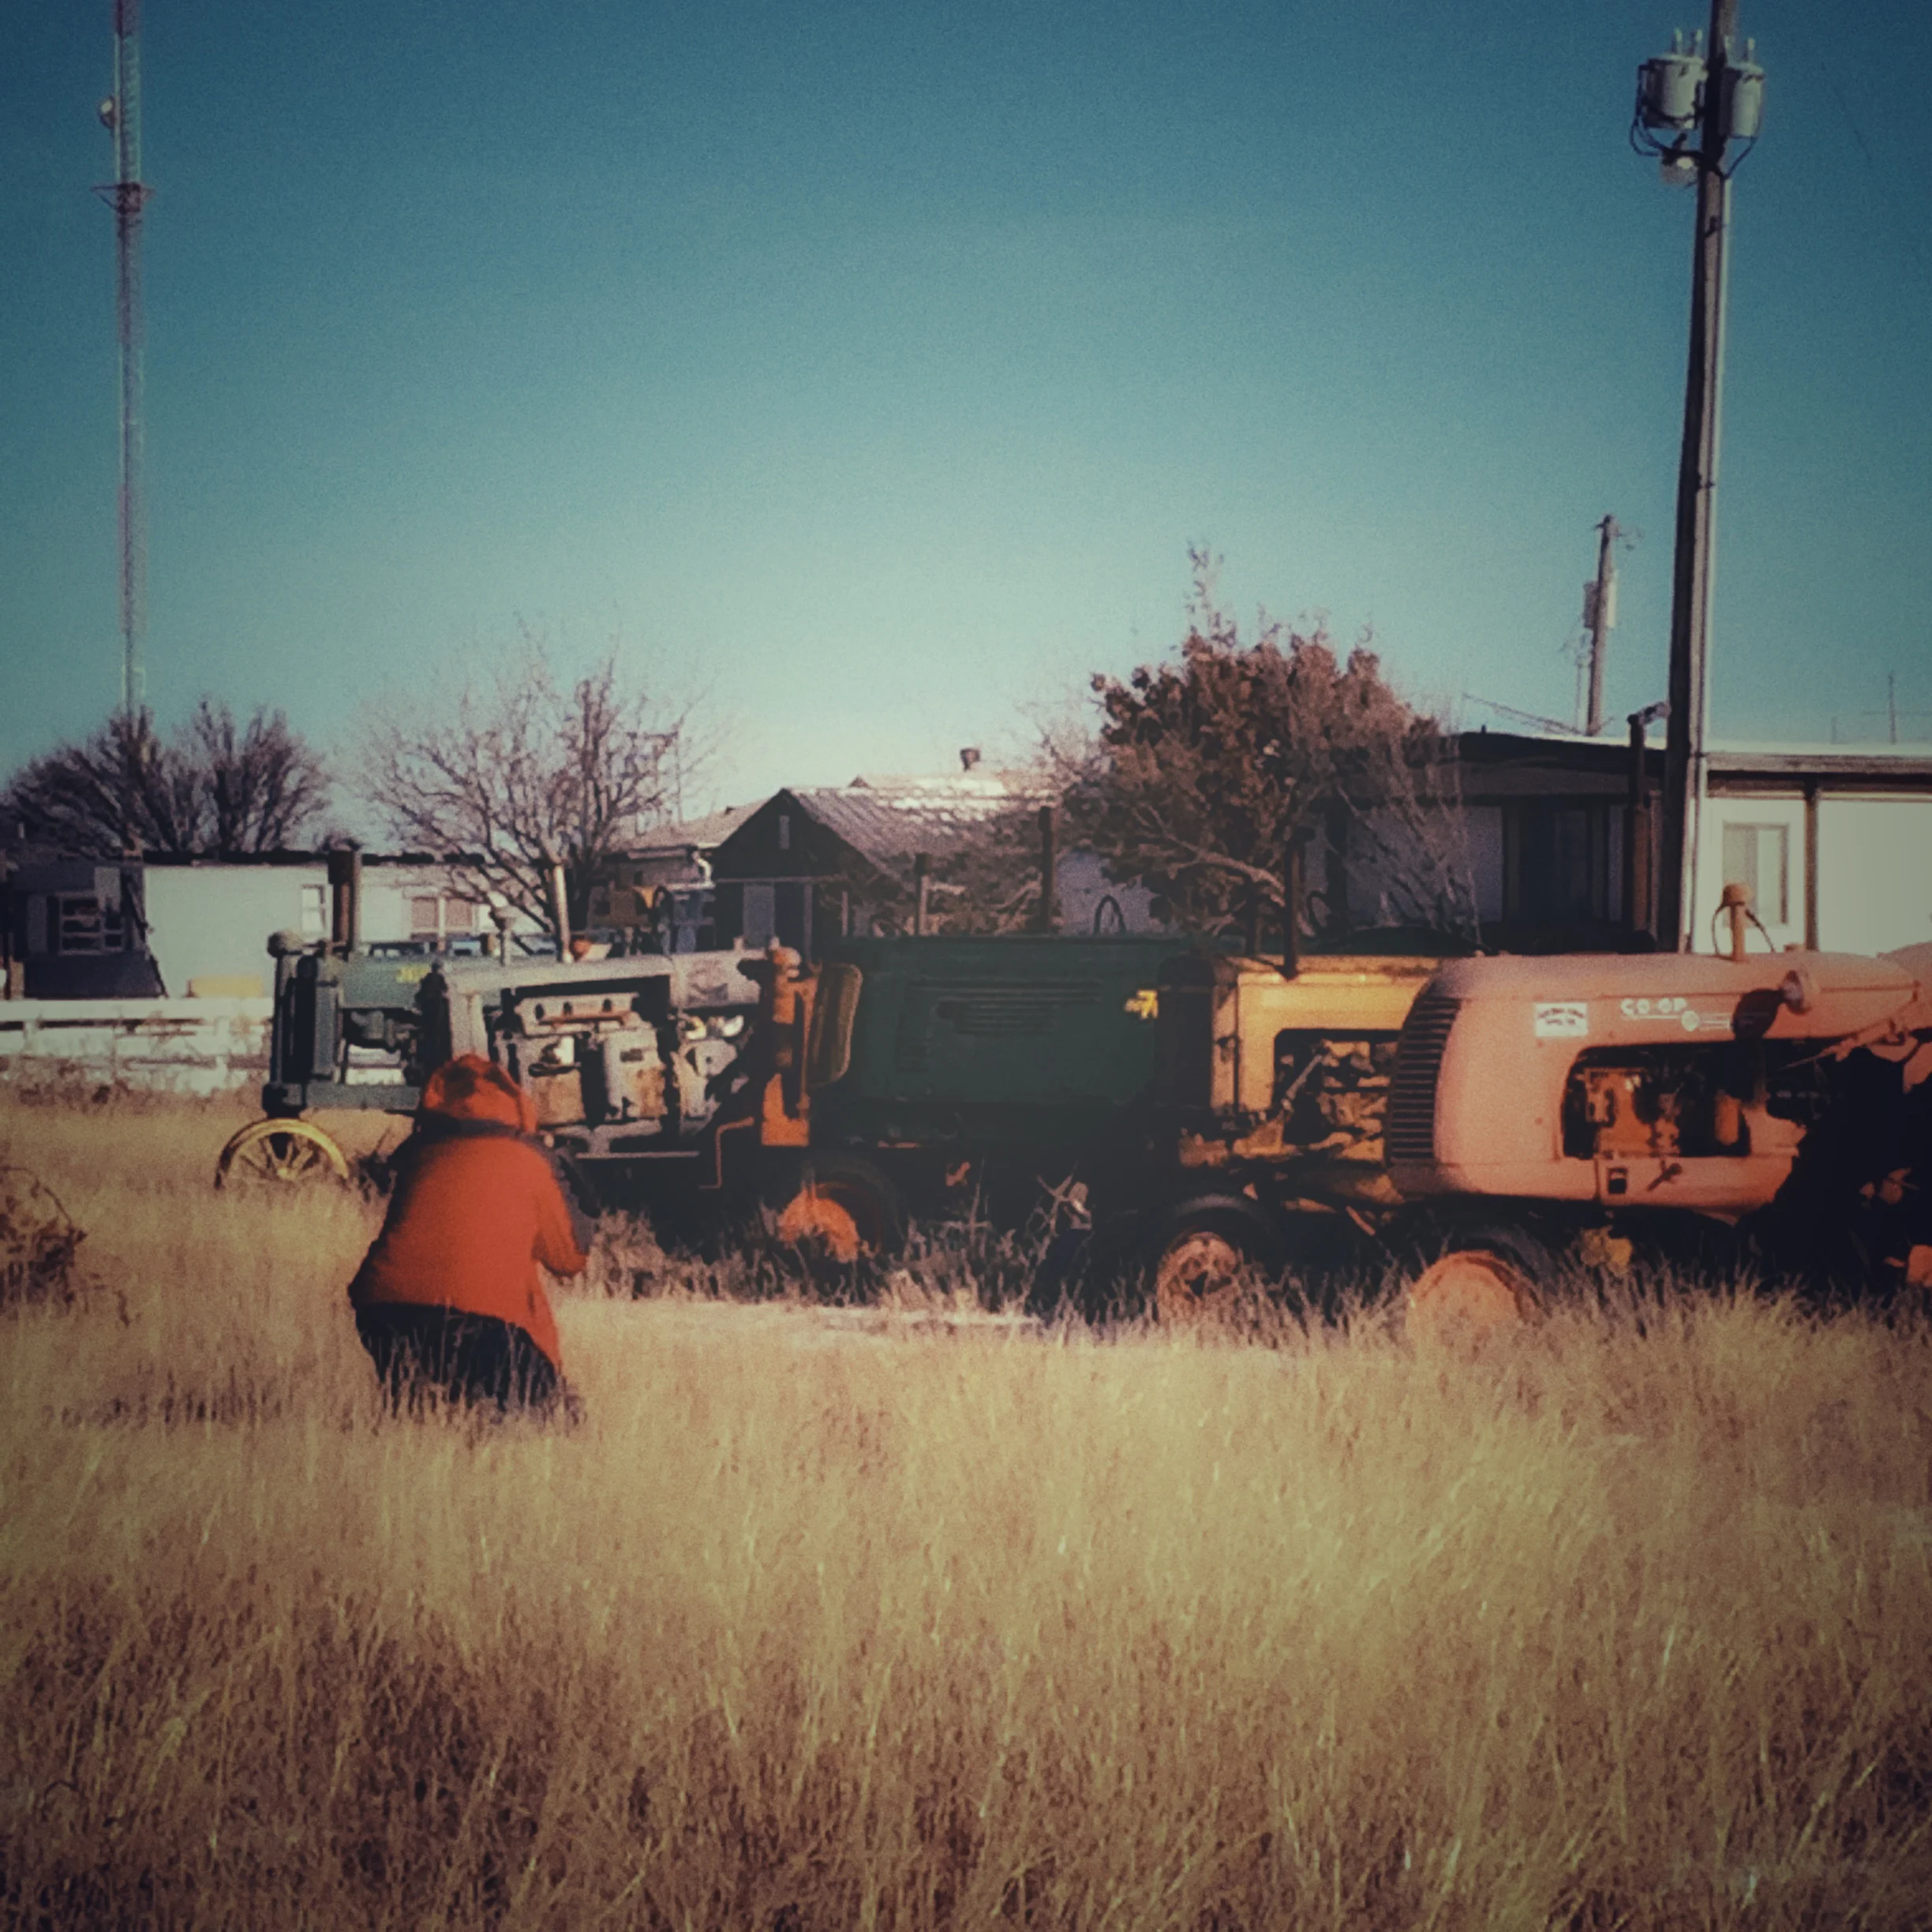
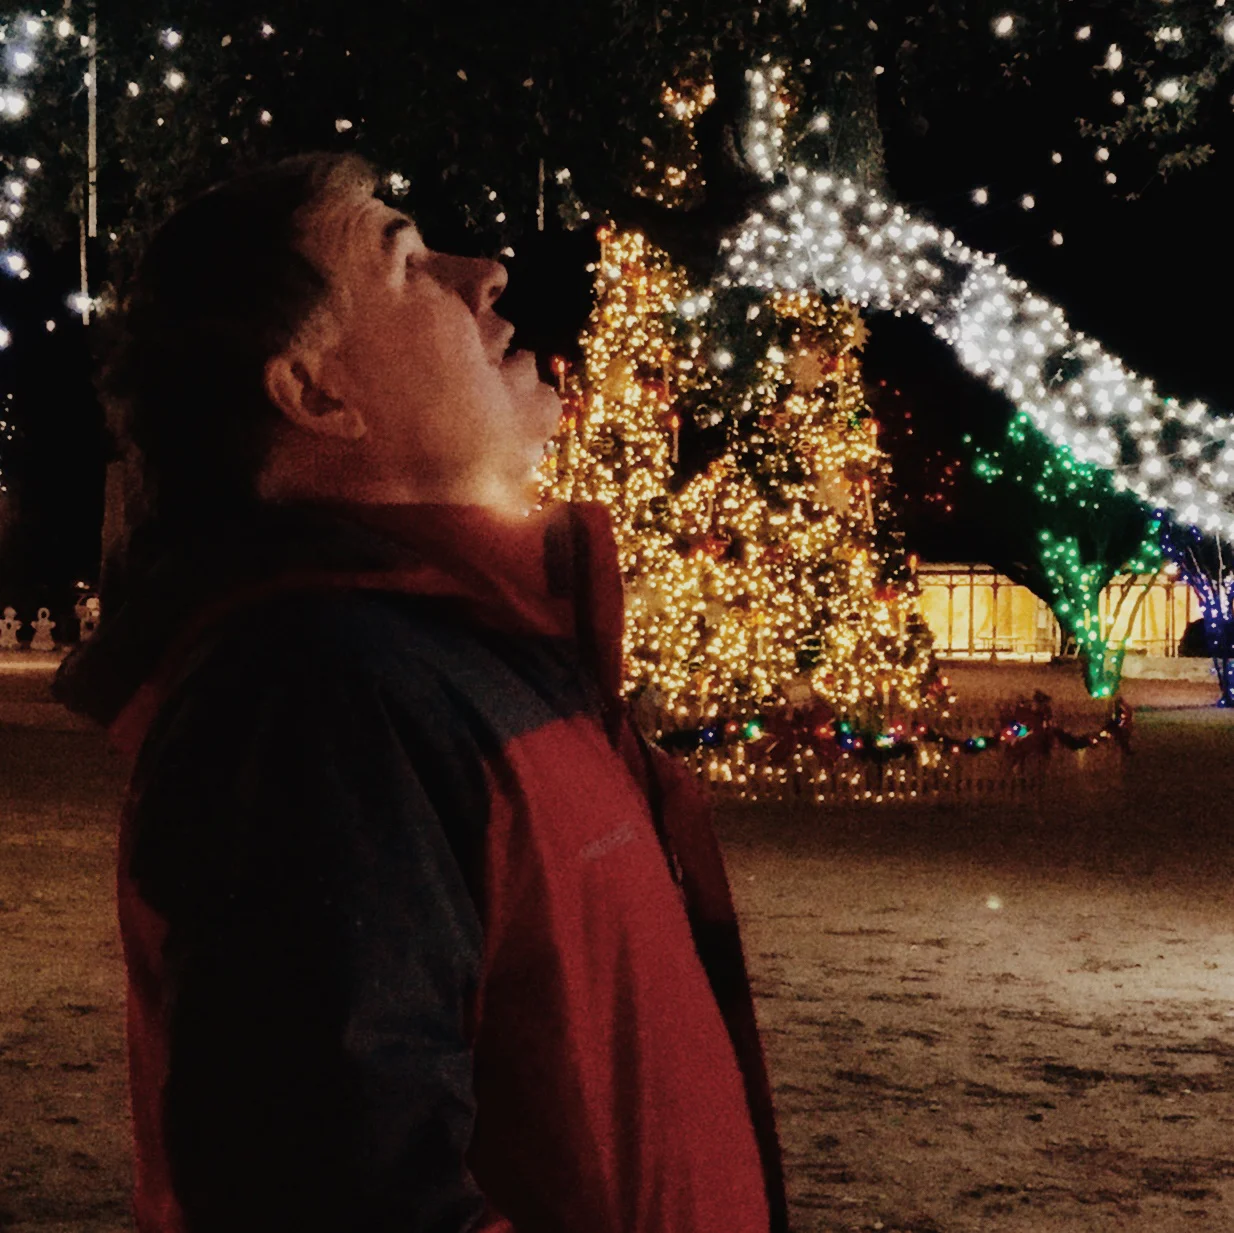
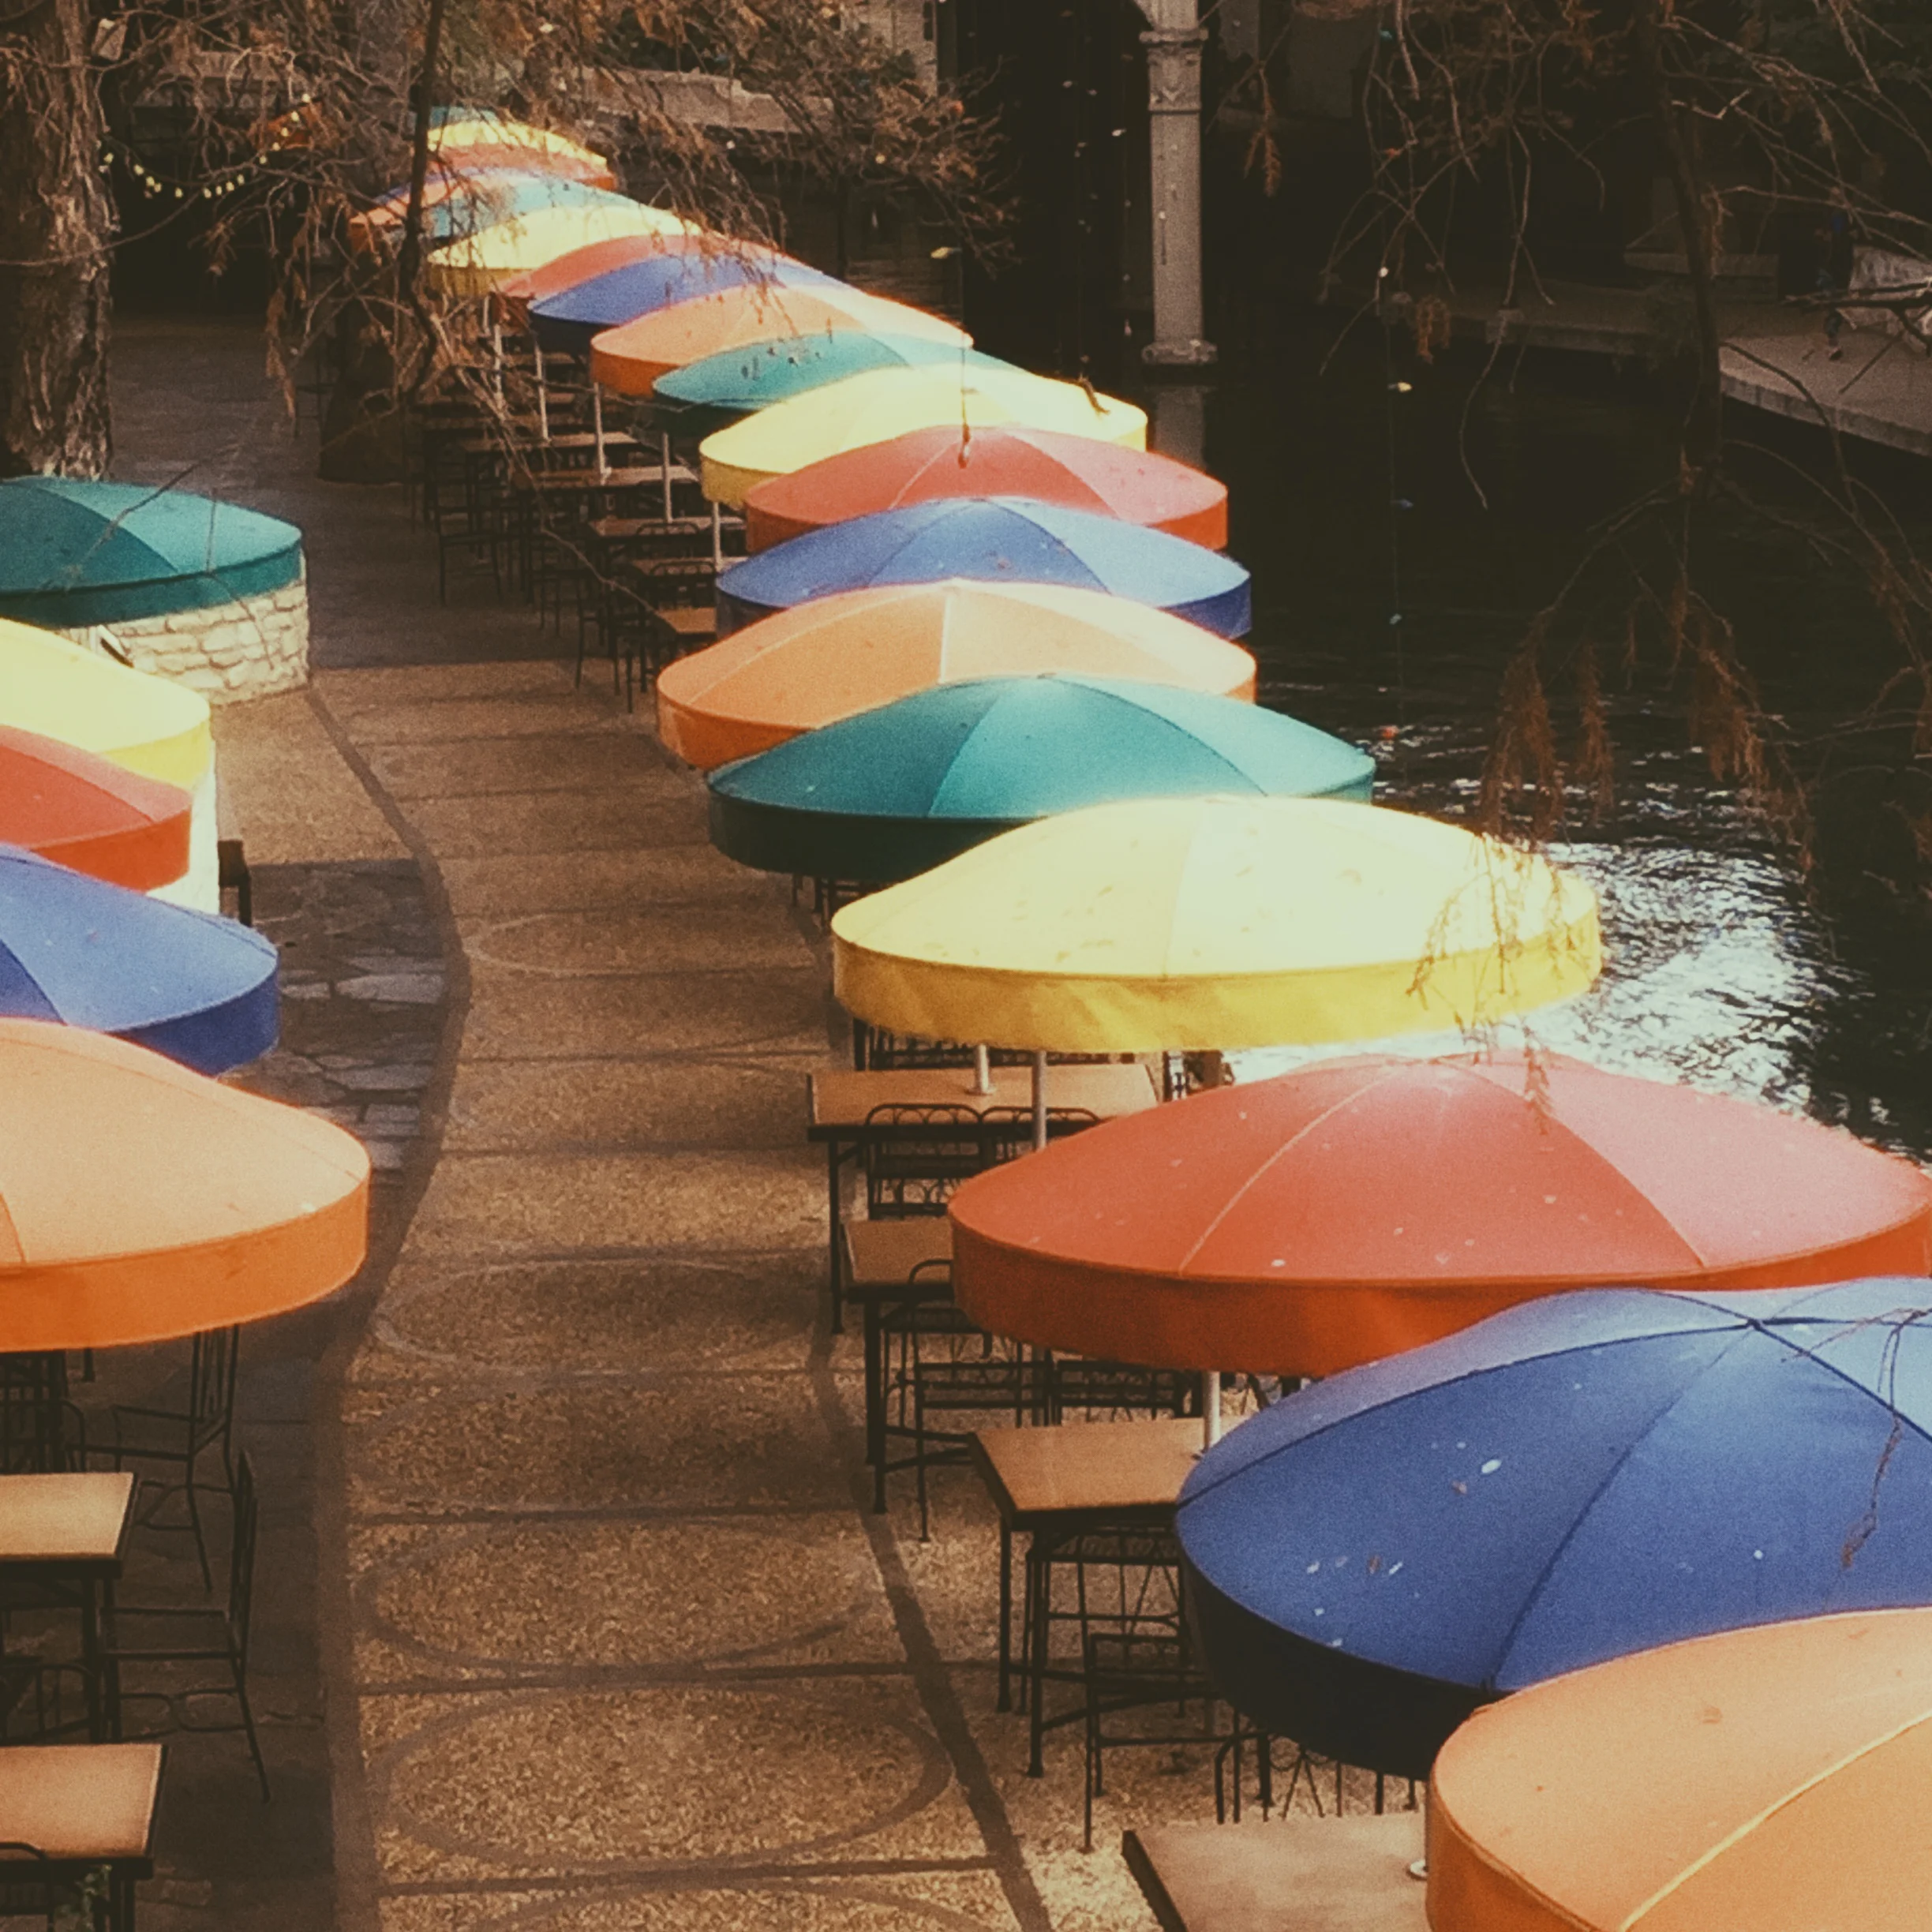

Adventuring is such a gift. I am grateful.
Thanks for traveling with me.
--Beth
Soli Deo Gloria

Painting With the Masters - Birge Harrison
I just finished reading Landscape Painting by Asher B. Durand and Birge Harrison. Great read. It is a combination of letters written by both artists to their students, Durand's originally published in 1855, and Harrison's originally published in 1909.

Moonlight Meadow by Birge Harrison
I just finished reading Landscape Painting by Asher B. Durand and Birge Harrison. Great read. It is a combination of letters written by both artists to their students, Durand's originally published in 1855, and Harrison's originally published in 1909.
The combined reprint edition was published in 2013 and I really enjoyed it. All this to tell you it led me down the rabbit hole of exploring Durand and Harrison's work, and I really loved this sketch by Harrison. It is so simple. I couldn't find a painted version so I don't know if he followed through with it or not, but I wanted to give it a try. For sure.
Here is my effort.

Moonlight Meadow, Beth Cole after Birge Harrison, Oil, 8 x 10
This study taught me a boatload. I started with a warm red underpainting to see how it would work, I like the bits of red showing through.
Values just win every time, don't they? Harrison's sketch wouldn't work unless the values were right. I really tried to create distance and depth and interest with color and values. It was a really fun one to paint and I think one of my favorites so far because it is so simple.
I have more favorites to paint and share in the coming months. I'm trying to balance painting these masters along with drawing every day and painting my own pieces as well. All good. I am grateful.
Thanks for taking a look!
--Beth
Soli Deo Gloria
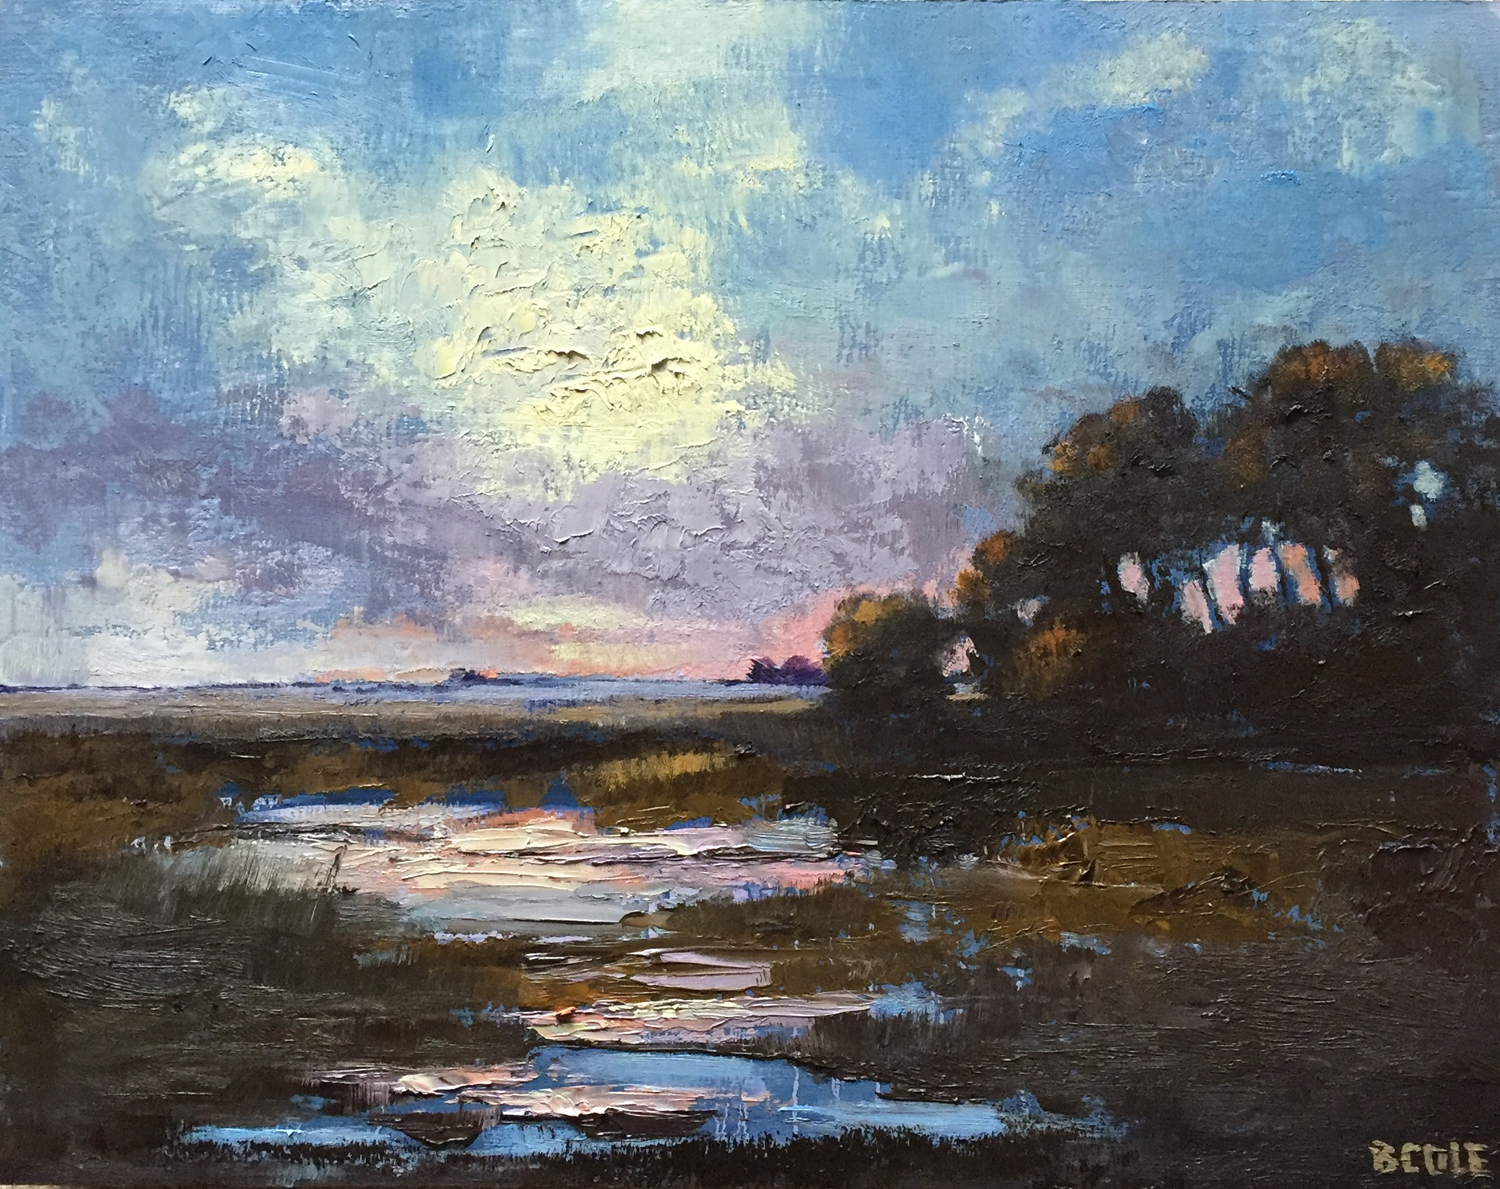
On The Easel - Prairie Marsh - 11 x 14 Oil
Happiest new year to you dear reader!
This piece, Prairie Marsh, started a few days ago in the wee hours of the morning when I couldn't sleep, you know how that is. I think it was 4:00 in the morning. Those morning hours are good to me.

Prairie Marsh, 11 x 14, Oil on Wood Panel © Beth Cole
Happiest new year to you dear reader!
This piece, Prairie Marsh, started a few days ago in the wee hours of the morning when I couldn't sleep, you know how that is. I think it was 4:00 in the morning (those morning hours are good to me).
I had an idea from a photo I took on one of my drives home from Omaha on highway 92. It had just rained and there were marshy lagoons and puddles here and there. I stopped several times to consider the glitters and skitters of light on the water.
So the composition follows my photo fairly closely, and the colors are inspired by one of the recent master painting studies I painted. This one almost painted itself. Almost. It doesn't happen very often, but when it does I am always so grateful.
My tools were a palette knife, oil paint, and brushes to soften edges and add texture. I started with a drippy blue underpainting which was a fun way to get things going.
I have a few other paintings in progress, including some more master paintings that are teaching me a lot. I will share more soon.
Take good care and thanks for taking a look.
--Beth
Soli Deo Gloria